Dual Part Cooling Fan Mount for BunnyScience BNBSX Short Ears MK3S Extruder
thingiverse
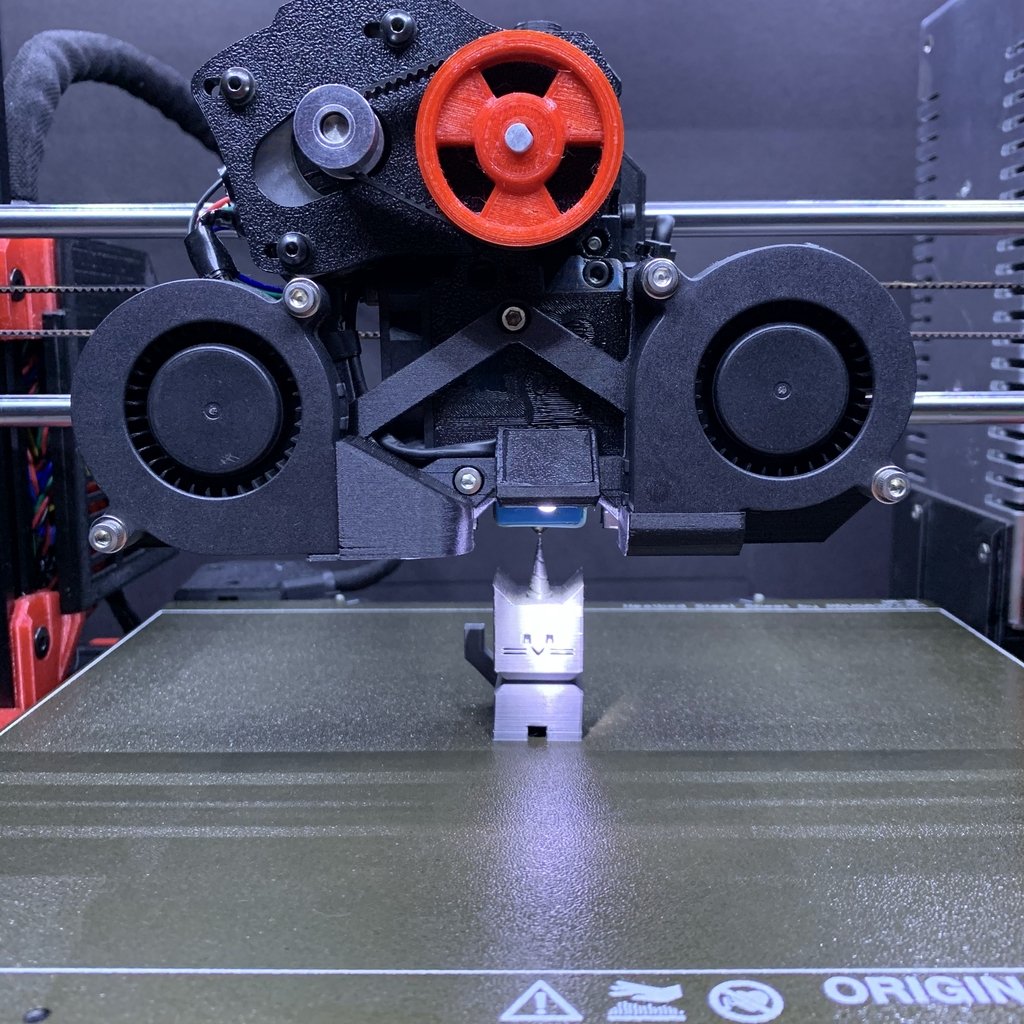
This is a remix of jonathanrswift's clever dual fan mount, but modified to mount on BunnyScience's BNBSX Short Ears MK3S Extruder. All credit goes to jonathanrswift for this highly effective shroud. I appreciate the simulation work that went into this shroud and to be able to see the nozzle is what I always wanted. APRIL 18, 2020 Long-term use and findings I'm pleased to say that this shroud has been great for my printing. Overhang performance is pretty good. You can print fast, and now, there's a little light to help with first-layer quality assessment. I do have a couple notes you should consider in using a dual fan setup. Big tip: Try to use the stock fan, and make it a pair. I've used nice quality LDO fans, 5V/3A although their RPM is 5,000. To print with a slower fan speed is a problem, because Prusa's system is setup, in the firmware to run its stock fan, which is 5V/3A, BUT with an RPM of 4,500. Why does this matter? Well, we have to understand that the fan has feedback, a yellow signal wire as a tachometer sensing how fast the fan is. If the Einsy/firmware expects to keep a fan at 30% but the reading from a faster fan is off, it is bound to error. I've printed alot with the LDO fans, but mostly PLA and fast prints. If you wish to go slower with .1-.15 prints, this setup may not be compatible. If possible, make your two fans Prusa fans from the start. 02.23.20 - Version 2 (non-lighted) and 3 (Lighted) [*If you can't download the file(s), go to the 'Thing Files' tab and download from there] For these versions, I wanted to tweak the outlet nozzle on the right a little. Didn't seem like enough air was coming out as it should and I thought the aim was a skosh off. I did several tests, as evidenced by the multitude of shrouds I'd printed out and tested. This newer version should work better. It turns out, the version I used to modify to a BNBSX extruder was not directly from the original designer, as it was modified to fit a Bunny gear setup on an MK3S extruder with BLTouch (JojoStein), therefore it had previously been modified. I essentially modified the shroud to be closer to the original. Additionally, I restored the 'delta' style bracket as I liked the balanced appearance. I also extended the flange under the left fan to grasp/cup/support the fan's outlet a little more. On the right I raised the flange for the same effect. (I actually broke this off in my final image with the lighted shroud, ironic). Supports are modeled in. I had a hard time trying to get the right supports, so I modeled the supports in. These break off quite easily. If they don't, as had happened to me, use an Xacto11 hobby knife to score a few times on the break off lines, then work supports free. LIGHTED VERSION (3) After these adjustments, I also realized I was a bit tired of using my torch flashlight to illuminate under the extruder to check the first layer. So, I added a light. The LED is a 5mm led I pirated out of a key chain fob light. I soldered on a 1000 ohm resistor to the positive side, and attached the leads to the mains on the power supply. The light is on when the printer is on, but you can get fancier than me and add a switch. I believe I'd seen a Prusa control screen bezel with a rocker light switch hole. On the inside of the bucket, I added aluminum foil dryer hose tape, to reflect the light a little more. I actually did the same for the inside to insulate the wires a bit more from the plastic. To be clear, the light DOES NOT aim right at the nozzle, rather about a cm ahead of it. I might make another pass and aim the LED at the nozzle, but the heat and other factors are a concern. As it is, I don't have to use my torch to check, and it lights up satisfactorily, at least for me, the first layer and whatever area I check as lighted to catch issues for quality control. There is a cover that you simply Krazy glue (cyanoacrilate) on to cover the wires. It is the square lid on the build plate once you load the .stl. NOTE: I'm not sure whats going on with my .stl export, but the support for the light bucket is separated and moved off once imported. Just break the model into parts in Slic3r and translate the box support under the bucket. Under the light bucket, and other areas will be indicated as a bridge, blue, and that's fine. It will still support and slightly fuse, but should separate fairly easily. 11.19.19 - Version 1 The only modification, besides moving upper mounting points, closing/cleaning open geometry, is that I added a loop to which you can insert a zip tie, and secure the fan wires so that the wires clear the exhaust side of the heat sink, see pictures. I didn't like the 2nd fan wires drooping down, flubbing around in the hot air pushed out from the Sunon extruder fan, and possibly adding turbulence to the exhaust, so I thought it'd be nice to legit secure the wires to the bracket.
With this file you will be able to print Dual Part Cooling Fan Mount for BunnyScience BNBSX Short Ears MK3S Extruder with your 3D printer. Click on the button and save the file on your computer to work, edit or customize your design. You can also find more 3D designs for printers on Dual Part Cooling Fan Mount for BunnyScience BNBSX Short Ears MK3S Extruder.