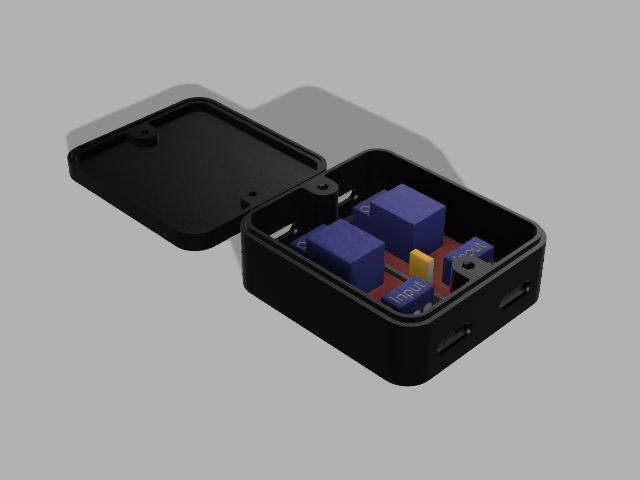
Dual Relay Enclosure
thingiverse
I have a bunch of relay boards around, and needed to add one to my cnc. I figured why not make room for a second relay, just in case... that later turned out to be a wise move. BOM: 2@ relay breakout boards ( https://www.amazon.com/Youngneer-Raspberry-Arduino-Channel-Opto-Isolated/dp/B07M88JRFY/ref=sxts_sxwds-bia-wc-nc-drs2_0?cv_ct_cx=relay&dchild=1&keywords=relay&pd_rd_i=B07M88JRFY&pd_rd_r=878b67da-bd1f-432a-a7d4-a6b795f63fc1&pd_rd_w=2MKa7&pd_rd_wg=7Dphp&pf_rd_p=a64002b9-9c26-4361-b8a1-b0f5a4835670&pf_rd_r=K8JKTJJ69ZTRYTVK6J0P&psc=1&qid=1609538673&sr=1-2-38d0a374-3318-4625-ad92-b6761a63ecf6) 1@ printed Base 1@ printed Lid 10@ M3x6mm bolts 4@ #8 self tapping screws The parts can be printed without supports in whatever filament you like; I used ABS. There are 4@ 4mm diameter holes on the bottom for mounting the enclosure to a flat surface (#8x1/2" wood screws work). The relays and lid are secured to the base with M3 bolts. There are 2 slots for wires on either side. The photo shows this thing with the lid off and only one relay installed (12V mist servo), on the side of my mpcnc. It also shows only 2 screws on the relay... it is enough for me but there are 4 holes if you feel different about that. Sure enough within a month of adding the first relay, I had to another for some feature I wanted (12V spindle enable for lasers). Fortunately the added relay, more 16awg, signal wires, and another barrel splice connector still fit well under the lid. ;)
With this file you will be able to print Dual Relay Enclosure with your 3D printer. Click on the button and save the file on your computer to work, edit or customize your design. You can also find more 3D designs for printers on Dual Relay Enclosure.
