Dual Z Adjustable Bracket for Geeetech A10 / A10M / A20 / A20M + Short Firmware Instructions
prusaprinters
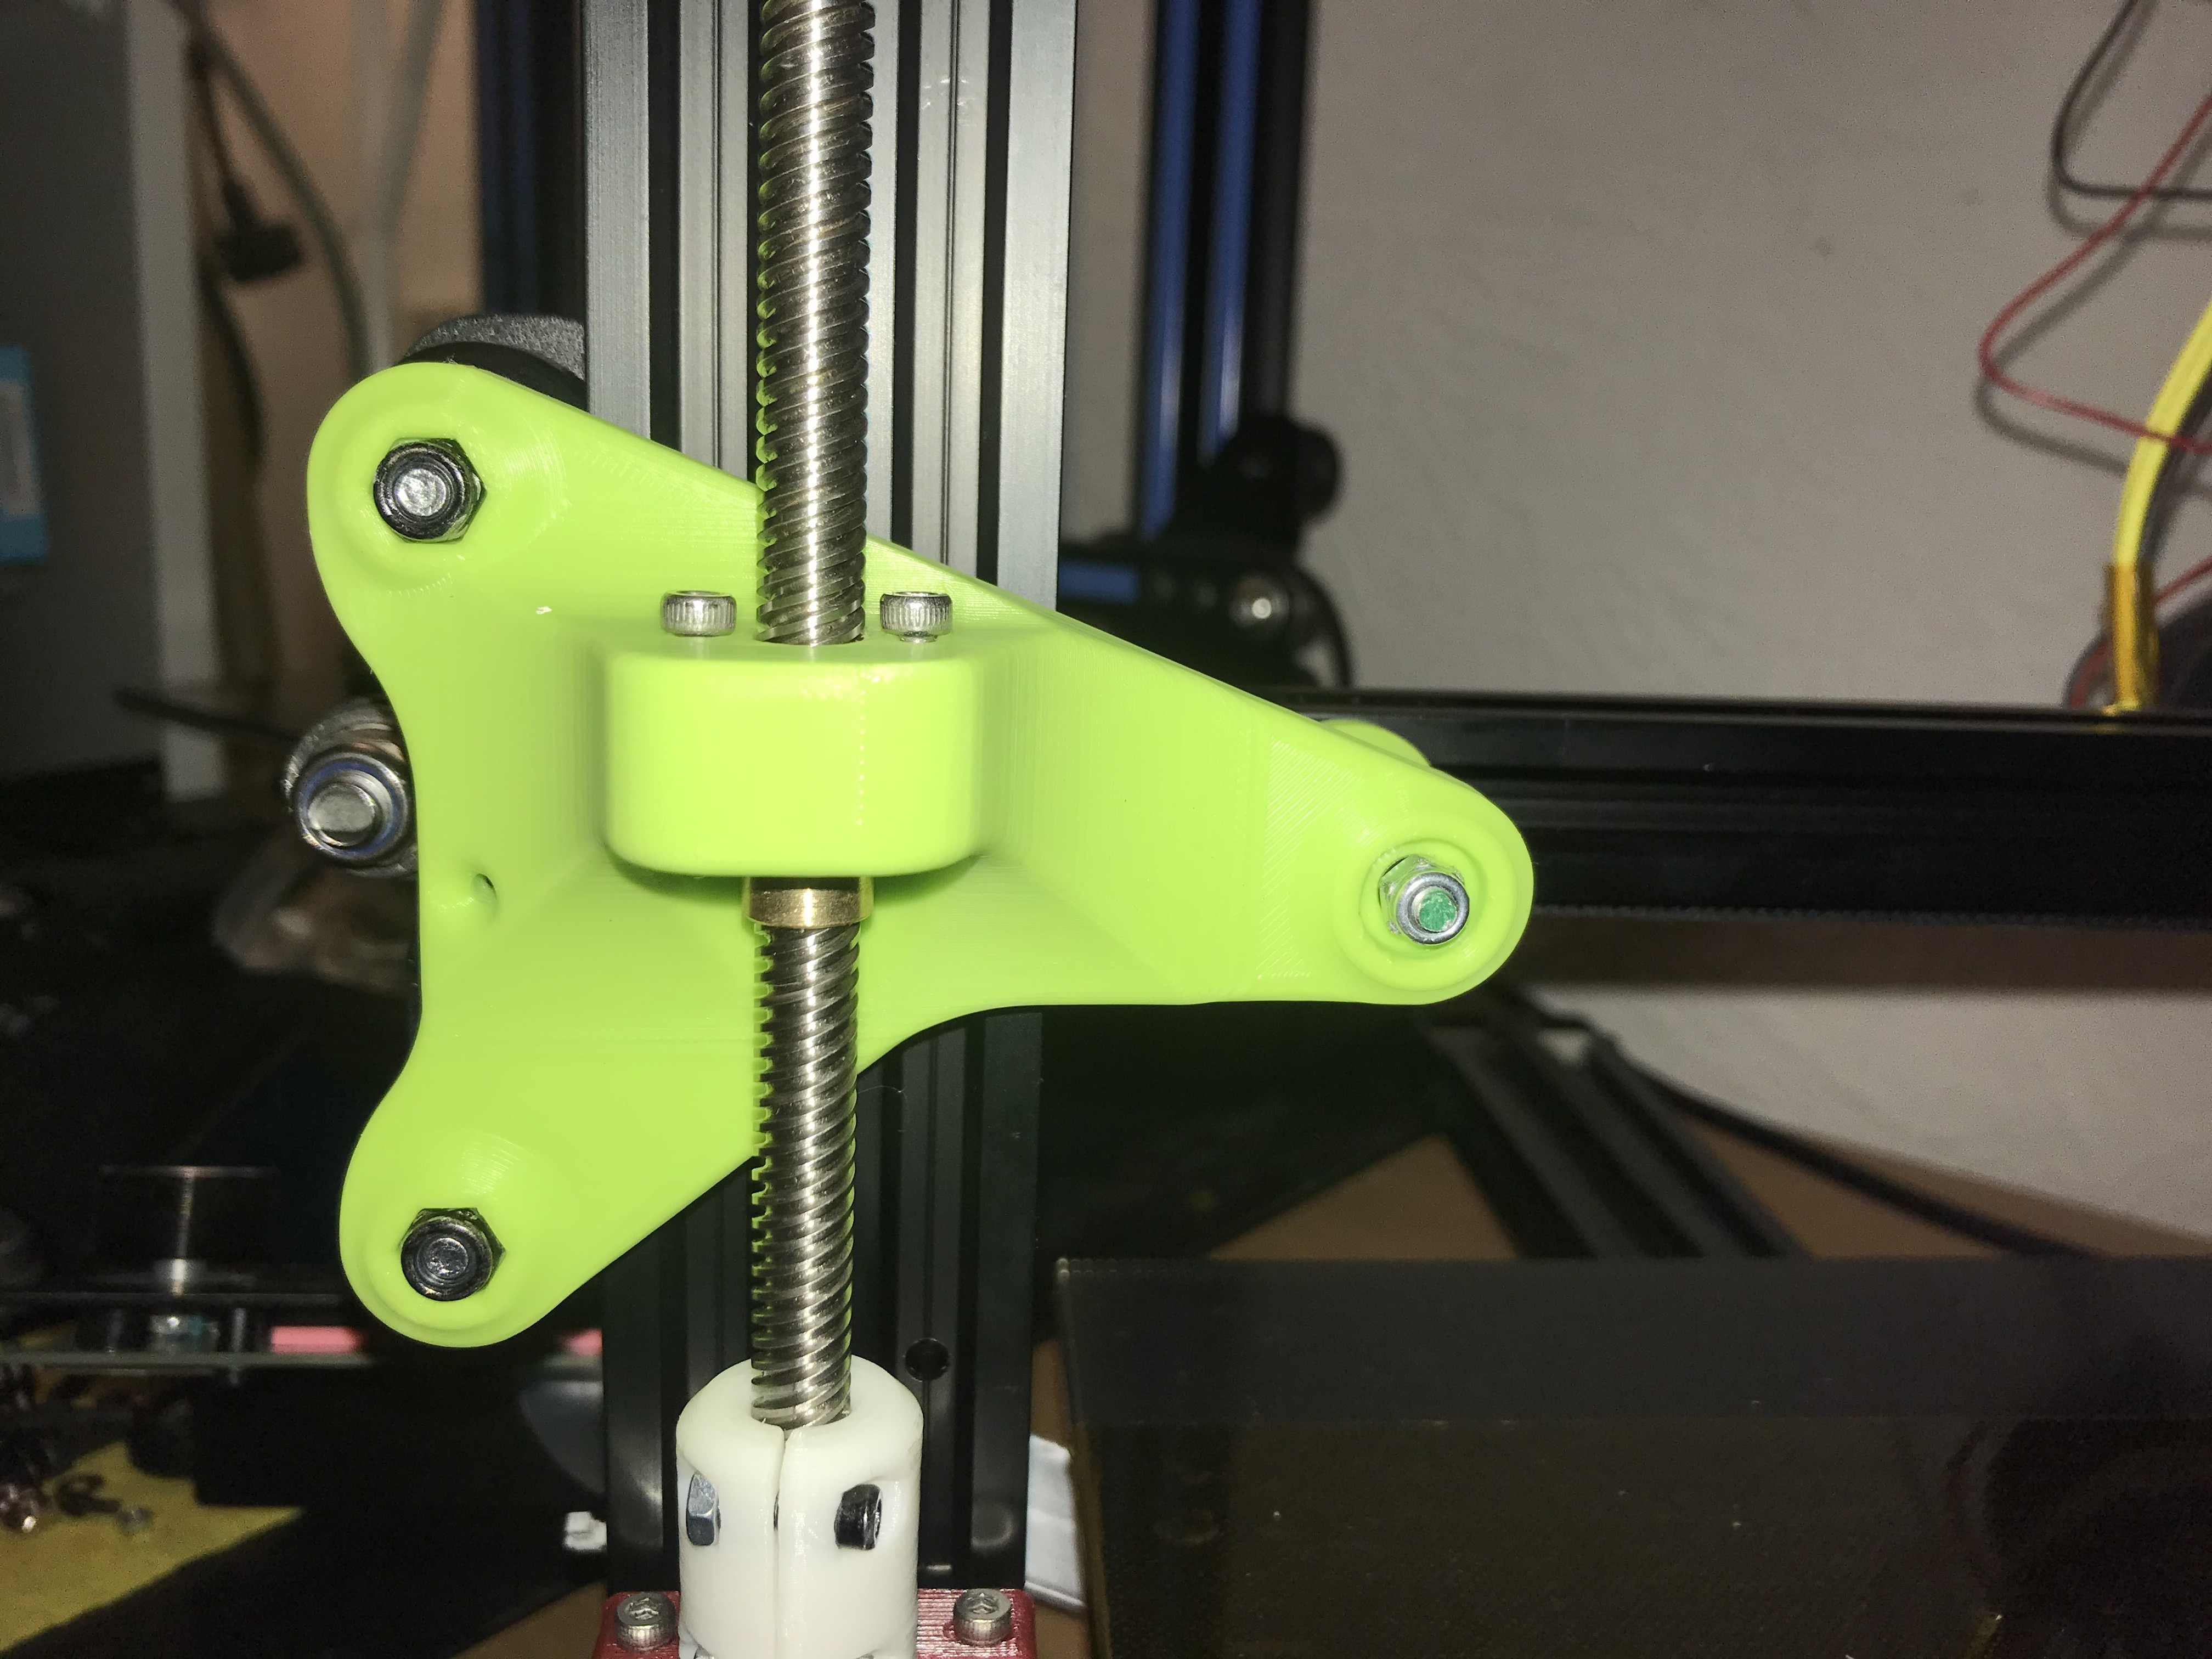
<p>Update 09.01.2020: I updated the lead screw nut hole to accept a wider range of lead-screw nuts, before the diameter was 22.0mm and now in V2 its 22.6mm. I also added some minor tweaks overall. (check out the gif on the bottom of the page)</p> <p>If you like it, don't forget to leave a TIP for a cold or warm beverage: <a href="https://www.paypal.me/akoswonerth">https://www.paypal.me/akoswonerth</a></p> <p>This is one of my upgrades after I installed the E3D Hemera Extruder/Hotend.<br/> The slightly heavier Hotend needed a little more support on the right side so i thought about upgrading to a second Z Axis.</p> <p>Inspired by CR83D's Dual Z: <a href="https://www.thingiverse.com/thing:3742027">https://www.thingiverse.com/thing:3742027</a></p> <p>I made my own version from scratch for the Geeetech printers:</p> <p>What you'll need:</p> <p>1x Stepper Motor<br/> 1x Stepper Driver<br/> 1x Motor Cable<br/> 1x T8 Lead Screw and nut (Pitch 2mm, 4 start, 8mm lead) (400 steps/mm)<br/> 1x 8x5 Coupler (I use this one on all my printers: <a href="https://www.thingiverse.com/thing:1264447">https://www.thingiverse.com/thing:1264447</a> )</p> <p>For the second Z-screw mount:</p> <p>1x M4x50mm - alternative: 1x M4x55mm threaded rod + M4 Lock Nut<br/> 2x M5x40mm</p> <p>For mounting the stepper Motor</p> <p>4x M3x16 screws<br/> 2x M3 T Nuts</p> <p>Printed Parts:</p> <p>1x Dual Z Back Plate - Lead Screw Mount<br/> 2x Small Spacer<br/> 1x Big Spacer<br/> 1x Stepper Motor Mount ( <a href="https://www.thingiverse.com/thing:2752080">https://www.thingiverse.com/thing:2752080</a> )</p> <p>I wired the second Z-Motor to the free drivers on my GT2560_V3 board, but if you don't have any free driver (A10T or A20T) you can still wire the second motor in Serial or Parallel to the first Z-Motor</p> <h3>Print instructions</h3><h3>Category: 3D Printer Parts Print Settings</h3> <p><strong>Printer:</strong> Geeetech A10</p> <p><strong>Rafts:</strong> No</p> <p><strong>Supports:</strong> No</p> <p><strong>Resolution:</strong> 0.2</p> <p><strong>Infill:</strong> 25% - 35%</p> <p><strong>Filament:</strong> Geeetech PLA Applegreen</p> <h3>Post-Printing</h3> <p><strong>In "configuration_adv.h" delete "//" from the front of "//#define Z_DUAL_STEPPER_DRIVERS" like in the pic above</strong></p> <p><strong>In "pins_GT2560_V3.h" add the "Z2_Step_PIN" , "Z2_DIR_PIN" , "Z2_ENABLE_PIN" with the pin numbers from where you attached the driver and mototr cable. I use the E1</strong></p> <p><strong>V2 - Upgrade 01.09.2020</strong></p>
With this file you will be able to print Dual Z Adjustable Bracket for Geeetech A10 / A10M / A20 / A20M + Short Firmware Instructions with your 3D printer. Click on the button and save the file on your computer to work, edit or customize your design. You can also find more 3D designs for printers on Dual Z Adjustable Bracket for Geeetech A10 / A10M / A20 / A20M + Short Firmware Instructions.