Dual Z-axis kit
thingiverse
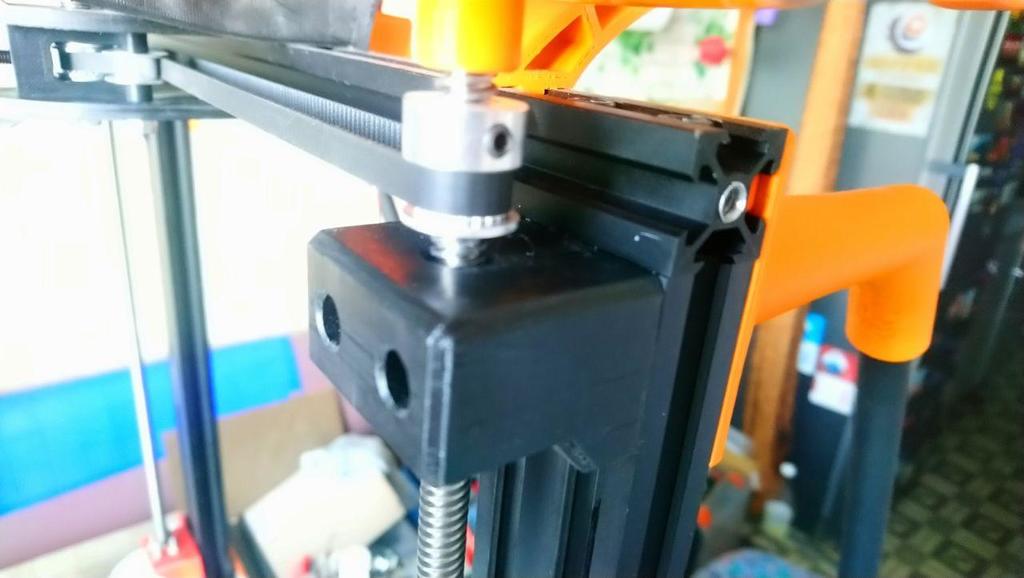
This kit contains two types of lead screw attachment points, a counterpart for the right X-axis carriage and a timing belt tensioner. All parts were designed for use on the Tevo Nereus printer, but most of them can be used on other printers based on extruded aluminum profiles. Further description and list of screws used for assembly and installation is based on installation on Tevo Nereus. Lead screws and mounting points: To install a double Z-axis on your printer, the first thing you need is a second lead screw, of course =) You can order one screw identical to the one you already have installed, but I did not take such a risk and ordered two screws of the same length (identical to original), but with a doubled thread pitch, which in theory should increase the positioning accuracy and make the motor work easier when moving, since the load on it will increase. It should be borne in mind that when using such screws, it is necessary to double the number of steps of the motor and it is very desirable to reduce the speed of movement, which will not affect the printing duration in any way, but will simplify the life of your Z-axis motor during homing and other long movements. The set includes two types of lead screw attachment points: 1. for installation on a vertical 20x40 profile - can be used both above and below (part No. 1) 2. for installation on the horizontal profile of the printer base at the lower point of the lead screw attachment (part No. 2) Bearing type - 608Z. Please note that the bearing may fit very tightly and the plastic part may need a little sanding. To install these parts use M4x20 screws with hexagonal sockets and t-nuts. The upper mounting points must be installed with the bearing down and on the vertical profile strictly UNDER the horizontal upper beam, as this is consistent with the plane of the synchronizing belt and its tensioner. To fix the second lead screw in the vertical axis (if you are using one motor with belt and tensioner), use 8mm shaft collars or lead screw clampin collars, which will be the best solution. The right X-axis carriage counterpart (part No. 3): !!!Warning!!! This part is designed for Tevo Nereus and is not guaranteed to be compatible with other printers. There won't be many words here. I made two small holes in the plate - for easy access to the screws for adjusting the position of the X-axis beam. The bore for the lead screw nut is increased to compensate for the curvature of the screw and to avoid the wobbling effect, so do not tighten the set screws too much... ...also use longer M5 screws, place washers under their nuts, wash your hands, wear masks and stay at home with your printers... Belt tensioner (part No. 4): To install it you need the following parts: GT2 pulley - 20 teeth, 8mm bore - x2 GT2 idler pulley - 20 teeth, 5mm bore - x1 GT2 idler pulley - toothless, 5mm bore - x2 M3x16 screws with nuts - x8 M4x10 screws with t-nuts - x6 M5x35 screws with counter nuts - x3 M5x40 screw, that will need to be modified with a file so that its head fits the part that moves the tension roller. You can get one from the printer, as it still needs to be replaced with longer ones... and a nut - x1 GT2 closed loop belt (810mm for Tevo Nereus) - x1 During the slicing process of this part, you may find that there are no holes on the first layer. This is made to improve printing results. You can cut them easily after printing. Detailed assembly and setup manual: I believe that since you have coped with reading this text, you can also cope with the installation and configuration of all the details without much effort. If not, then you don't need this :D If you want to thank me for the work done with some tips, don't bother, PayPal does not work in Ukraine =)
With this file you will be able to print Dual Z-axis kit with your 3D printer. Click on the button and save the file on your computer to work, edit or customize your design. You can also find more 3D designs for printers on Dual Z-axis kit .