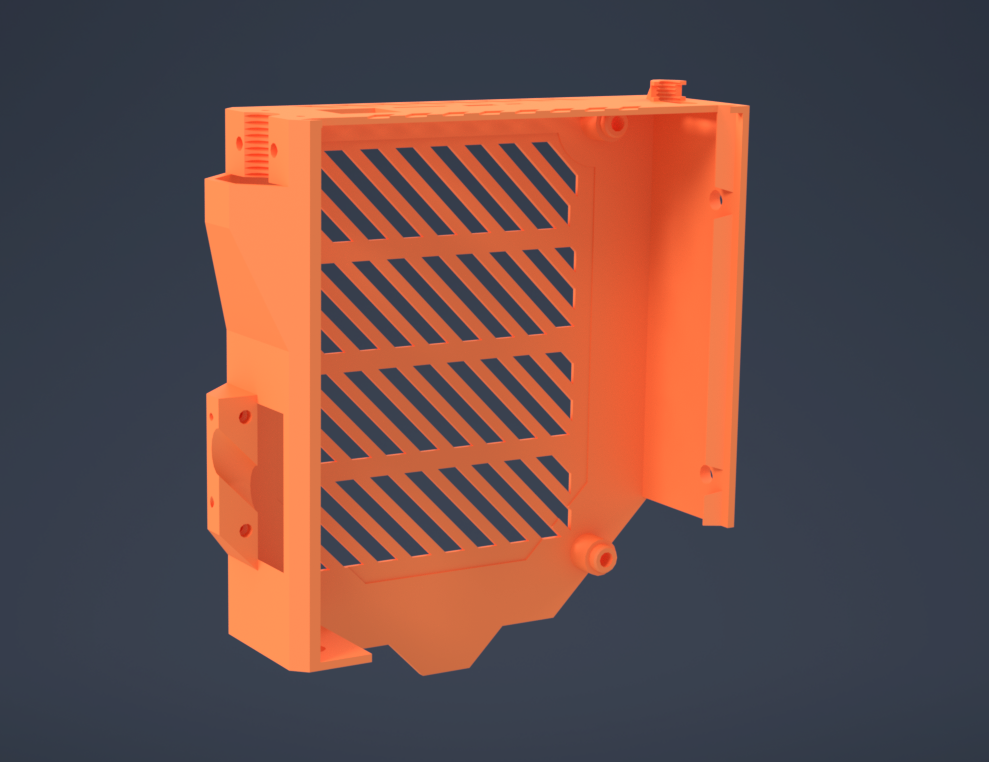
Duet 2 Maestro case for Prusa Bear v2.0 and up
prusaprinters
<p>This is a complete redesign of my Prusa Duet enclosure (<a href="https://www.prusaprinters.org/prints/24757-duet-2-maestro-case-for-prusa-mk2-mk25-or-mk3">https://www.prusaprinters.org/prints/24757-duet-2-maestro-case-for-prusa-mk2-mk25-or-mk3</a>) made to fit a Bear frame.</p> <p>Features, improvements and other changes:<br/> 1 ) The cable management features were removed to make the encloure not stick out the back of the printer, decreasing it's overall footprint and thus making it easier to enclose.</p> <p>2 ) The door slides in from the top and does not need screws to be held in place, which makes it even easier to access the electronics inside.</p> <p>3 ) The door is again on the outside of the printer, which makes working on electronics much easier than the stock Prusa enclosure</p> <p>4 ) The enclosure is mounted to both the vertical and the horizontal parts of the Bear frame, which makes it quite a lot stiffer.</p> <p>5 ) The ammount of material used and the print time were reduced by about 40% compared to my old enclosure</p> <p>STLs, STEP files and original Solidworks files are all provided. main.SLDPRT has a bunch of build errors, but should work anyway. If anyone wants to correct these errors they are free to try, I have failed in that respect.</p> <h3>Print instructions</h3><p>0.4mm nozzle<br/> 0.2mm layer height<br/> 3 perimeters<br/> 5 solid layers on both top and bottom<br/> supports off<br/> The 3MF file should have the correct settings already.</p> <p>Material should not matter too much, I used PETG. Try to avoid using PLA for the main box, it will be mounted right next to the bed which can be very hot (up to 110C).</p> <p>Non-printed parts needed:</p> <p>To mount the case:<br/> 3 M5x8 screws (my Bear frame came with a few extras so I used those)<br/> 3 M5 tee-nuts - the srew holes were carefully placed to allow inserting the nuts without disassembling the frame.</p> <p>For the cable holders:<br/> 4 M3 square nuts<br/> 4 M3x12 srews (mine were extras from the Bear again, M3x10 should work too)</p> <p>To mount the Duet:<br/> 4 M4x10 screws<br/> 4 M4 nuts<br/> 4 plastic washers (they come with the Duet) to isolate the srews from the PCB</p> <p>NOTE:<br/> MOUNT THE CASE TO THE FRAME BEFORE YOU PUT THE DUET ISIDE.</p> <p>Remove the end plates as shown on one of the photos, insert two tee-nuts from the top of the z axis and one from the side of the printer. Locations should be obvious from the printed part.</p> <p>This has to come first, you might not have enough room for tighenting the screws once you mount your Duet.</p>
With this file you will be able to print Duet 2 Maestro case for Prusa Bear v2.0 and up with your 3D printer. Click on the button and save the file on your computer to work, edit or customize your design. You can also find more 3D designs for printers on Duet 2 Maestro case for Prusa Bear v2.0 and up.