Duplo wind-up motor
prusaprinters
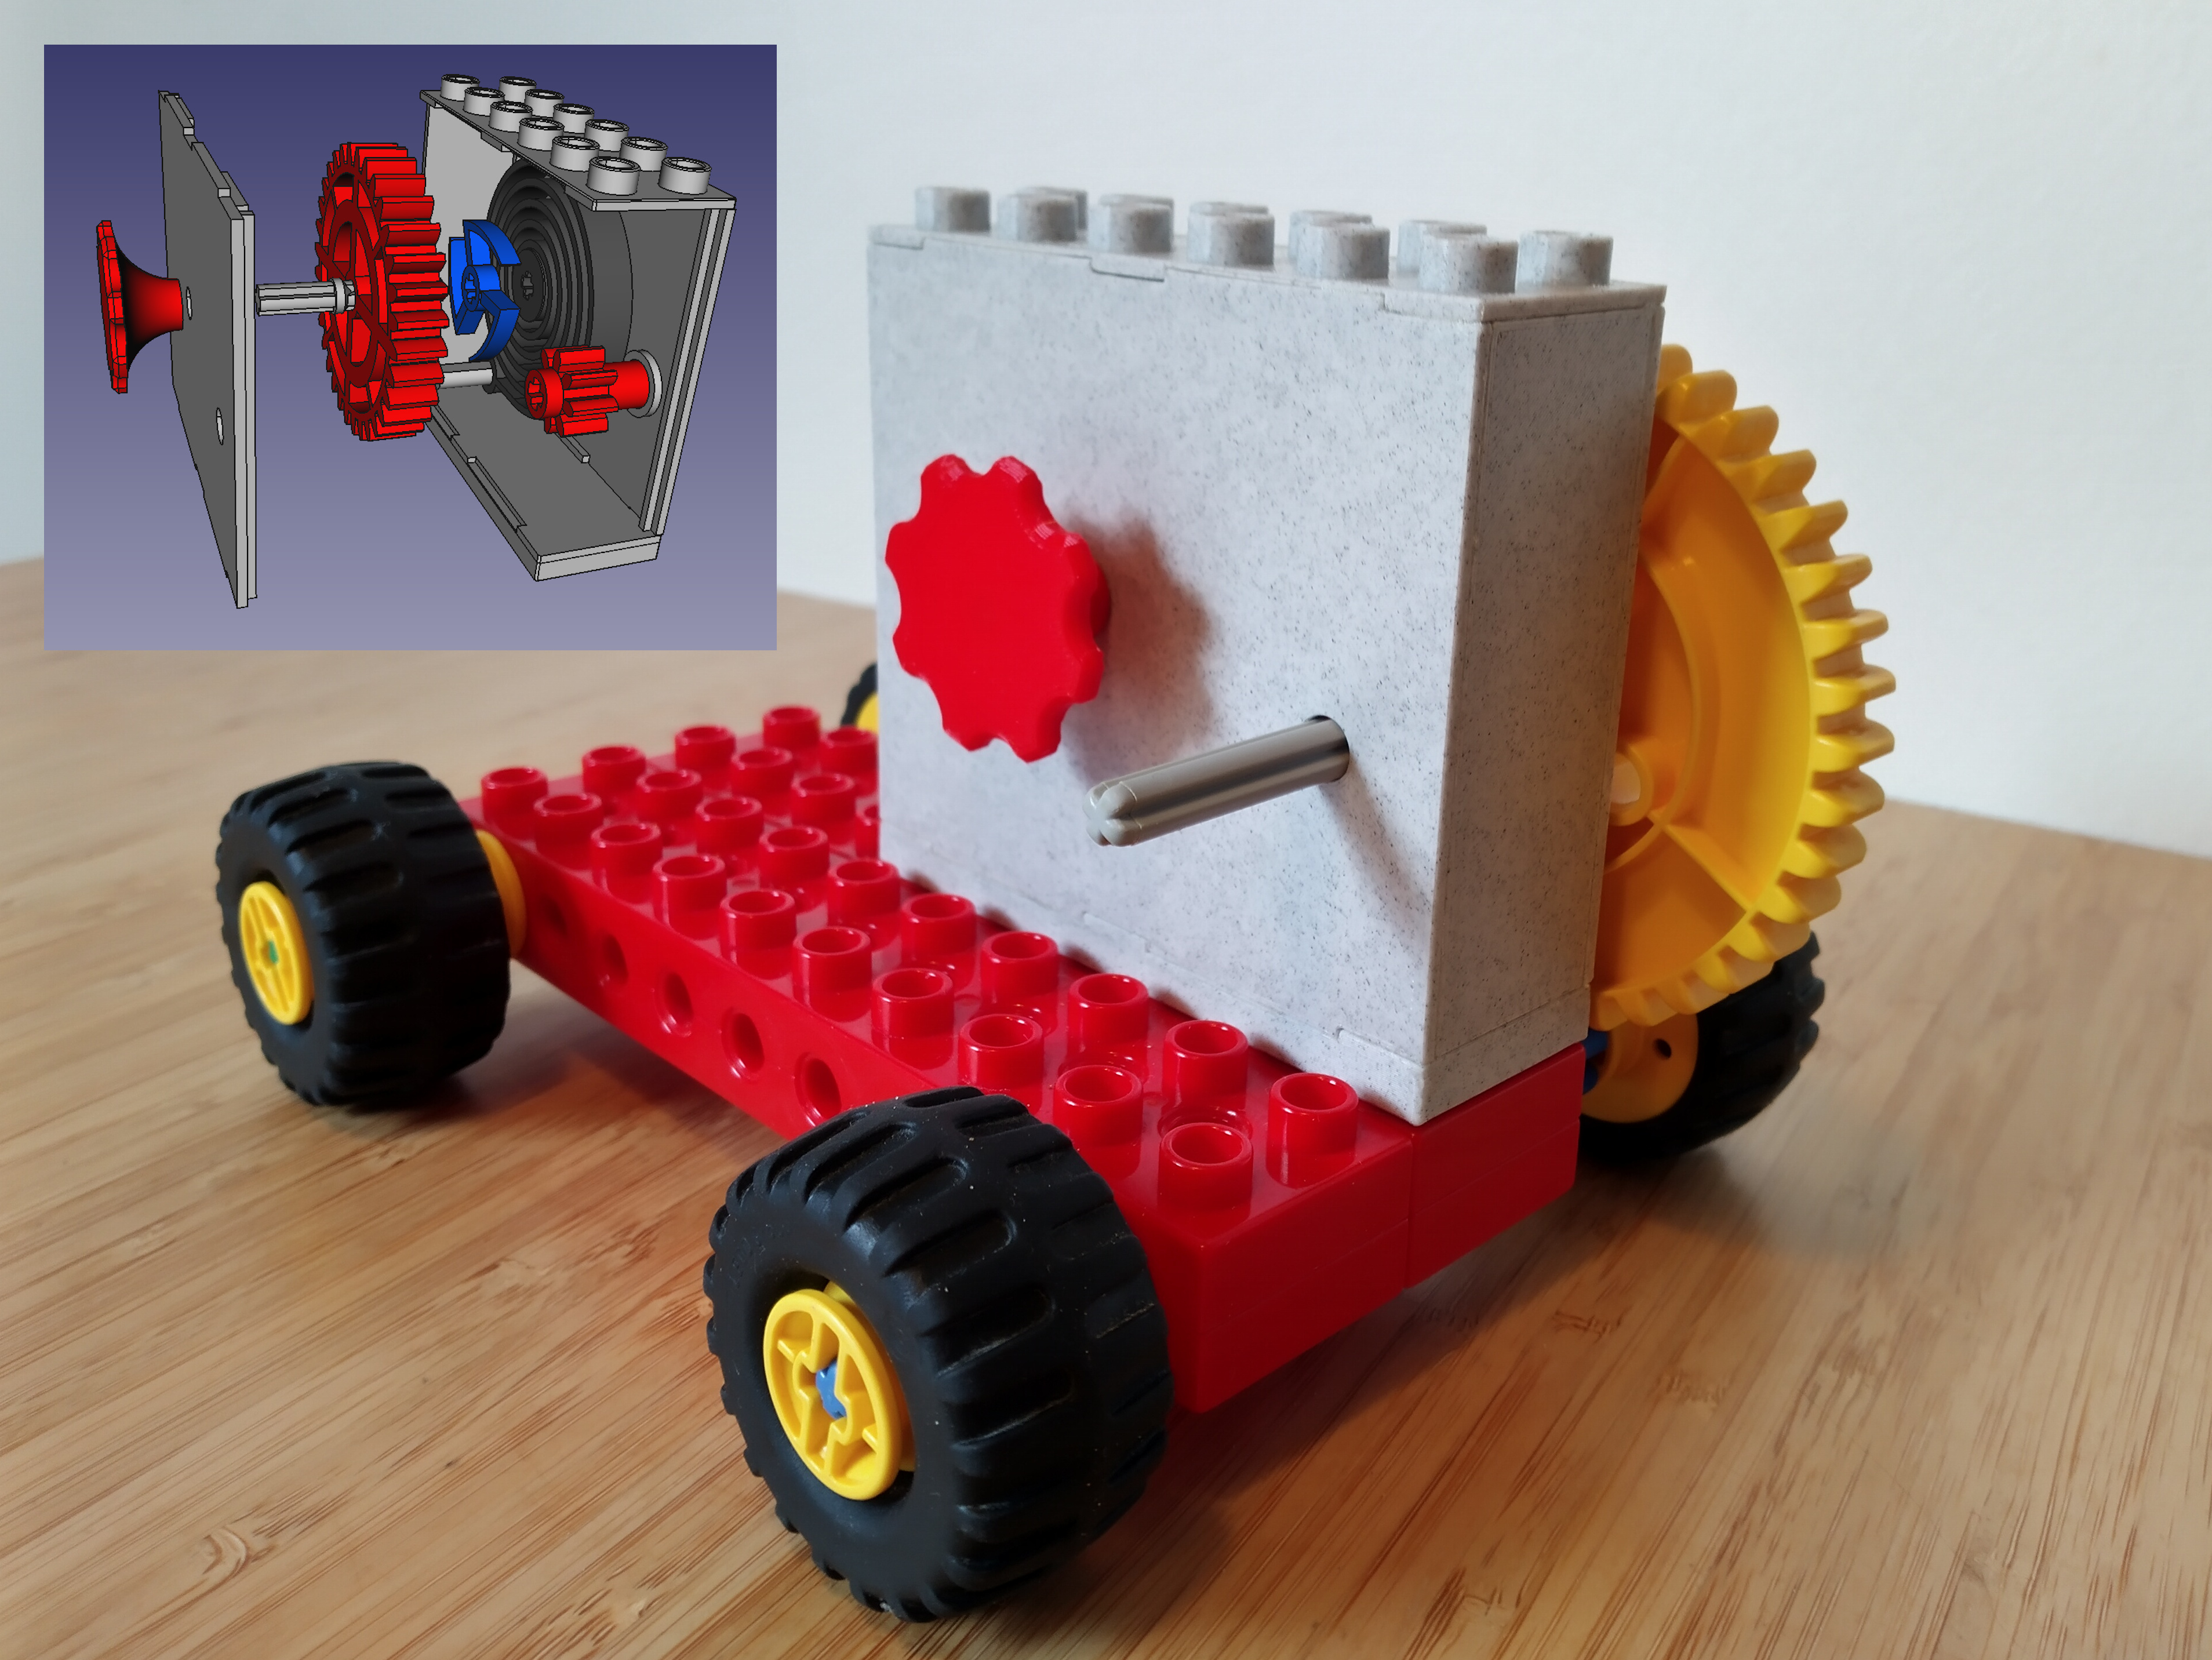
<figure class="media"><oembed url="https://vimeo.com/758501759"></oembed></figure><p>This wind-up spring motor is compatible with the Duplo “Early Simple Machines” set. The spring provides so much torque that Duplo bricks come loose. To remedy this, this model has a built in 4:1 gear reduction.</p><p>The motor has the same width and length as a 2x6 duplo brick, and the height of 4 bricks and a plate.</p><p>The FreeCAD 0.20 file is included - please excuse the mess.</p><h5>Printing</h5><p>I printed everything in PLA on a Prusa Mini+ with 0.25mm layer height, making sure first layer height is also set to 0.25. No supports. Mostly default settings, except I increased the number of perimeters to 3 for the spring, gears, and axles. The spring shaft was printed with a 3mm brim. I used sequential printing for the “small gear and axle” to reduce stringing.</p><h5>Assembly</h5><ol><li>Glue the parts for the “small gear and axle” together.</li><li>Glue the top, bottom, and sides onto the “front” (piece with one hole). I used painters' tape to keep everything in place. Slow-drying glue gives you time to complete the next steps and square everything up nicely at the end.</li><li>Skewer the drive gear, pawl, and spring onto the shaft. They should be on the tapered side of the protrusion. The pawl and spring have a slight “bump” on the side that should face toward the previously skewered part.</li><li>Place the shaft into the ring in the middle of the “front” piece. Rotate until the hole at the end of the spring lines up with the ring in the bottom left. Insert the spring rod through the hole and into the ring.</li><li>Place the “small gear and axle” into the ring on the right, such that it meshes with the drive gear.</li><li>Put the “back” plate and knob in place and do a quick test to make sure everything was installed correctly. Insert a Duplo axle through the hole and hold it with one hand, then rotate the knob counter-clockwise. You should hear a ratcheting sound, and the axle will want to rotate.</li><li>Glue the “back” plate in place. Make sure everything is square and tight, apply some pressure using clamps, weights, elastic bands, or whatever. I let it dry overnight at this point.</li><li>Glue the knob onto the spring shaft. Be careful not to let glue drip into the compartment.</li></ol>
With this file you will be able to print Duplo wind-up motor with your 3D printer. Click on the button and save the file on your computer to work, edit or customize your design. You can also find more 3D designs for printers on Duplo wind-up motor.