MeanWell RS 150-48 Case One
prusaprinters
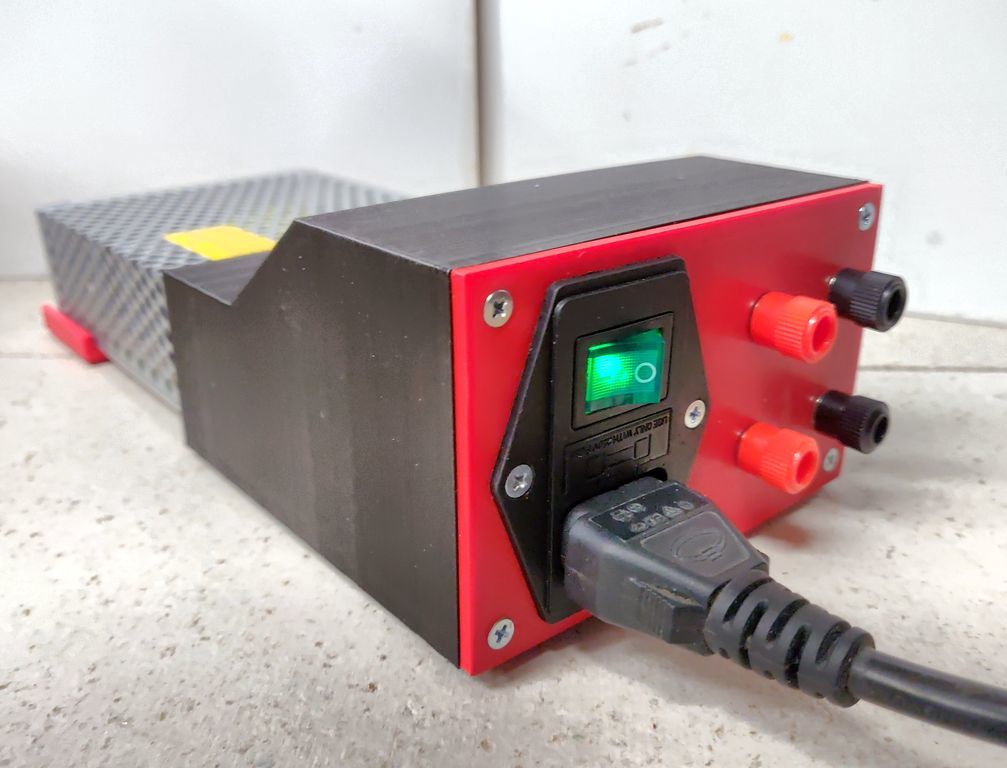
<p>Just another quick'n'dirty "designed" simple Cover for the Meanwell RS 150-48 PSU, which works for me together with a DPS 5015 Module.</p> <p>I use Silicon / Rubberfeet 10mm Diameter to avoid the Case from slipping around the Table. Recesses on the undersides are prepared.</p> <p>The Terminal Binding posts are some cheap ones, for internal wiring I've used AWG 18 Cables.</p> <p>You also need some Screws:</p> <ul> <li>4pcs. M3x20mm Countersunk Screws to attach the front Plate with the Case. (Threads in are prepared in the Case.)</li> <li>2pcs. M3x16mm Countersunk Screws to attach the Switch to the Front Plate (Brackets for the nuts are prepared)</li> <li><p>5pcs. M3x10mm Cylinder Head Screws to attach all Parts with the Power Supply.<br/> I recommend following sets of screws, so you have enough of them for the rest of the Week ;-) : 460 Countersunk Screws and 1080 Cylinder Head Screws.</p> <p>Printed with my AnyCubic i3 MEGA, with Filament from Goedis: <a href="https://shop.goedis.de/PLA-Schwarz-175mm">Black PLA</a> and 3dJake <a href="https://www.3djake.at/3djake/niceabs-rot">nice ABS red</a>.</p> </li> <li><p>PLA: 25% Infill, 0.2 mm Height of Layer, 93% Flow, 215° Nozzle, 60° Heatbed and 60% Cooling.</p> </li> </ul> <ul> <li>niceABS: 15%Infill, 0.2 Height of Layer, 93% Flow, 215° Nozzle, 90° Heatbed and 10% Cooling.<br/> Some of the links are Affiliate. If you buy something, I get a small commission. The price you pay is the same. Thank you.</li> </ul> <h3>Print instructions</h3><h3>Category: Electronics Summary</h3> <p>Just another quick'n'dirty "designed" simple Cover for the Meanwell RS 150-48 PSU, which works for me together with a DPS 5015 Module.</p> <p>I use Silicon / Rubberfeet 10mm Diameter to avoid the Case from slipping around the Table. Recesses on the undersides are prepared.</p> <p>The Terminal Binding posts are some cheap ones, for internal wiring I've used AWG 18 Cables.</p> <p>You also need some Screws:</p> <ul> <li>4pcs. M3x20mm Countersunk Screws to attach the front Plate with the Case. (Threads in are prepared in the Case.)</li> <li>2pcs. M3x16mm Countersunk Screws to attach the Switch to the Front Plate (Brackets for the nuts are prepared)</li> <li><p>5pcs. M3x10mm Cylinder Head Screws to attach all Parts with the Power Supply.<br/> I recommend following sets of screws, so you have enough of them for the rest of the Week ;-) : 460 Countersunk Screws and 1080 Cylinder Head Screws.</p> <p>Printed with my AnyCubic i3 MEGA, with Filament from Goedis: <a href="https://shop.goedis.de/PLA-Schwarz-175mm">Black PLA</a> and 3dJake <a href="https://www.3djake.at/3djake/niceabs-rot">nice ABS red</a>.</p> </li> <li><p>PLA: 25% Infill, 0.2 mm Height of Layer, 93% Flow, 215° Nozzle, 60° Heatbed and 60% Cooling.</p> </li> </ul> <ul> <li><p>niceABS: 15%Infill, 0.2 Height of Layer, 93% Flow, 215° Nozzle, 90° Heatbed and 10% Cooling.<br/> Some of the links are Affiliate. If you buy something, I get a small commission. The price you pay is the same. Thank you.</p> <h3>Print Settings</h3> </li> </ul> <p><strong>Printer Brand:</strong> Anycubic</p> <p><strong>Printer:</strong> All-metal Mega</p> <p><strong>Rafts:</strong> No</p> <p><strong>Supports:</strong> No</p> <p><strong>Resolution:</strong> 0.2mm</p> <p><strong>Infill:</strong> 10%</p> <p><strong>Filament:</strong> Goedis / 3dJake PLA / ABS Black / Red<br/> <strong>Notes:</strong></p> <p>I recommend printing the parts as shown in the screenshot of the Slicer.</p>
With this file you will be able to print MeanWell RS 150-48 Case One with your 3D printer. Click on the button and save the file on your computer to work, edit or customize your design. You can also find more 3D designs for printers on MeanWell RS 150-48 Case One.