Dusty the dust separator
thingiverse
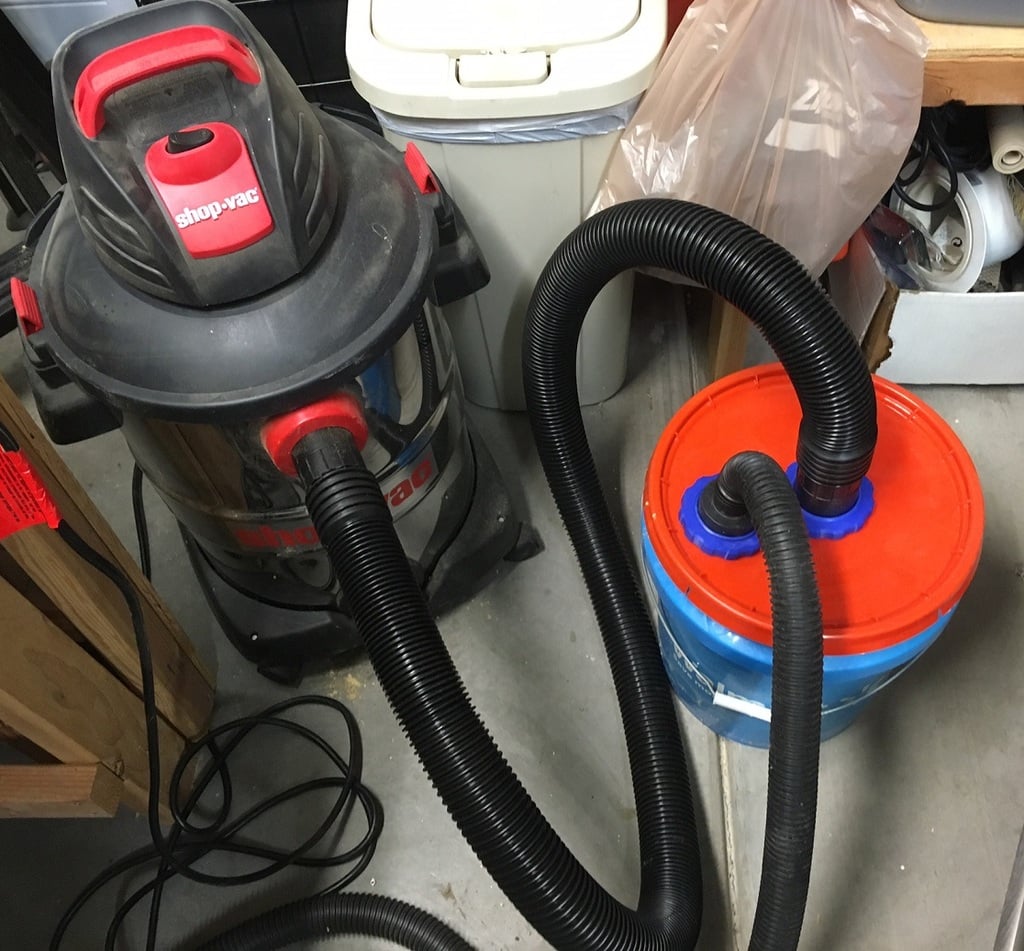
This is my take on a dust separator for a shop vac. I built it around a 5 gallon bucket and lid, although you could use any container you want. I sized the couplers to handle a 2-1/2" hose (2-1/4 id on the hole) using a friction fit. That should maximize the air flow while being compatible with most any shop vac. To construct you need to cut two holes in the lid of your container. The L shaped inlet needs to be placed close to the edge of the lid, while the straight outlet goes near the center of the lid. Be sure to space everything out so you have some room to turn the nuts. I used a sharpie to trace the parts onto the lid, then drilled a pilot hole and used tin snips to cut the hole out, but you can use a hole saw or any other tool you can find. Once assembled you want to ensure the L shaped inlet is aimed so incoming air will swirl around the edge of the bucket. You can also add a bit of caulk to seal the nozzles to the lid of your container. I recommend using a lid that has a built in seal as well to minimize air leaks. The threads may be a bit stiff at first, just slowly work them back and forth till they free up. This depends on how well your 3D printer is setup. Vacuum release valve I added a vacuum release valve to the design to help prevent an implosion of your bucket if the vacuum hose is fully blocked. This seems to work really well. Picking the right spring is key, I got a few from ACE and tested them out till I found the right level of pressure. Note that you need to print the valve itself (plunger) with 2mm walls and 50% infill to make it strong enough to handle the load. You can read more on this on my Hackaday project page: https://hackaday.io/project/176110-multibot-cnc-v2/log/187263-rise-of-dusty-20 Improvements Chris Notap has an idea for cutting the lip off a bucket so you can stack two buckets together. That would increase the capacity of the setup for a minimal investment. And it would be easier to clean out than prying off the lid every time. https://www.youtube.com/watch?v=1WnitgYFnE0 You could also augment this with a Thien baffle to help further separate the dirt from the air. The rumor is that this will allow the bucket to fill up more before dust starts to be sucked out of the bucket and into your shop-vac. http://www.jpthien.com/cy.htm I made a solid lid for my setup using 2 pieces of 1/4" plywood cut at 33 cm and 28.5 cm diameters then glued together. This works great and you can easily cut it out with a jig saw or bandsaw if you have access to one. It is not needed, but it is easier to remove the lid. I also added a baffle to mine using a 22 cm diameter circle of 1/4" plywood and the 10 cm standoffs from above. This acts like a Thien baffle, but it is slightly simpler to cut out. It is mostly there to stop dust from sucking back out of the separator when the vacuum hose is restricted. Printer settings Print with PLA at 30% infill 0.4 mm line width, 0.2 mm layer height, 1.2 mm wall thickness and 1.0 mm top/bottom thickness. All parts are oriented for optimal printing already. And all are designed to print without a brim, raft, or support. --- 2020/12/21 - Added a new vacuum release valve to prevent the bucket from imploding when the inlet gets blocked. 2020/12/30 - Lengthened screws on ports to handle thicker lids. 2020/12/31 - Added an optional diffuser for the outlet. This acts like a Thien baffle and reduces the chance of the outlet sucking up dust when the bucket starts to fill up. 2020/01/03 - Increase tolerances a bit on nuts to help with assembly. Added optional standoffs that can be used when attaching a Thien baffle to the lid.
With this file you will be able to print Dusty the dust separator with your 3D printer. Click on the button and save the file on your computer to work, edit or customize your design. You can also find more 3D designs for printers on Dusty the dust separator.