E-Bot
thingiverse
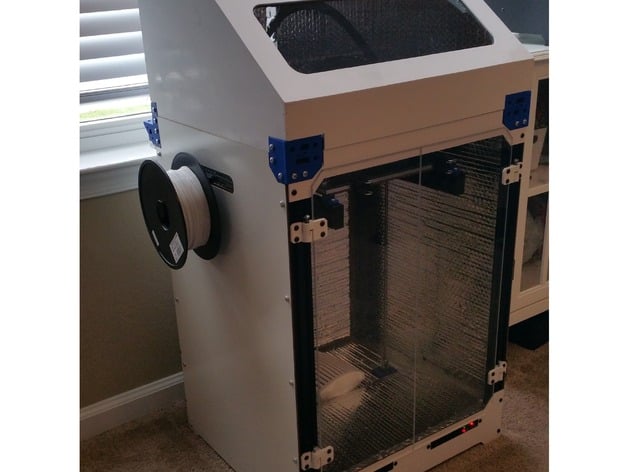
Remix of the Core-XY C-Bot and D-Bot with much thanks to all their and their communities work 305mm x 305mm x 457mm print $650 approximate cost (But who knows at this point given all of the experimentation I have done) Please note that this thing is a continuous work in progress and not all files have been uploaded yet. UPDATE FEB 2018 Now 362 x 322 x 457 mm print volume Step file of build attached. Includes several imported designs from various sources, listed in my remixes (Thank you to all!!!) Differences Larger than the original to allow for 1.5 cubic ft of print volume. Fully enclosed with all motors located outside of the heated chamber area Modified X axis end caps to allow for cantilevered V-Bearings, freeing the sides of the Y rails for case mounting Cantilever Y axis bearings with aluminium plate Build Plate Cantilever Z Axis Dual Extruder (E3D V6) Auto Capacitance Based Z Leveling UPDATES FEB 2018 I have been constantly evolving this design. Re made the aluminium end plates and shifted the 3d printed mount aft by about 1cm to allow for a larger print volume and for the titan extruder to fit in front of the carriage Whole new z axis setup. I still stand by the cantilever design posted earlier, but in the quest for a more reliable and predictable machine I have switched to a fully constrained approach. Bearings are now rolling on the front and aft vertical V-Rails. They are compressed against the rails via bolts. I believe this was inspired / printed from 1sPiRe's work. It took some care in insuring the vertical rails were very close to parallel. At the same time, I added a belt to link the two z axis motors. This was not necessary for operation but made maitenance easier as I didn't have to worry about one side getting out of sync. The belt tensioner was borrowed from JonnayLin's J bot design. Additionally, I fianlly put a cover over the bottom area (I used dollar store foam core) At first I perfectly centered my two Z screws front to back but found I was having a few issues while keeping a perfectly flat bed front to back. This led to two adjustments. I shifted the screws aft by 4 cm to allow gravity to preload the bed in one direction. Additionally, I replaced my springy z axis motor couplings with spider couplings. I can't tell you which was the solution but the combo did the trick and as you can see in the photo, I get a perfect first layer now. Again, with inspiration from 1sPiRe's build I re constructed my X carriage. I based the concept on 1sPiRe's work but rebuilt the CAD. I also made the addition of my own fan duct. In the image below you will see I used a cable chain and a laser cut acrylic plate to mount it for wire management. This is an area of active work for myself.
With this file you will be able to print E-Bot with your 3D printer. Click on the button and save the file on your computer to work, edit or customize your design. You can also find more 3D designs for printers on E-Bot.