E Step Calibration Ruler
thingiverse
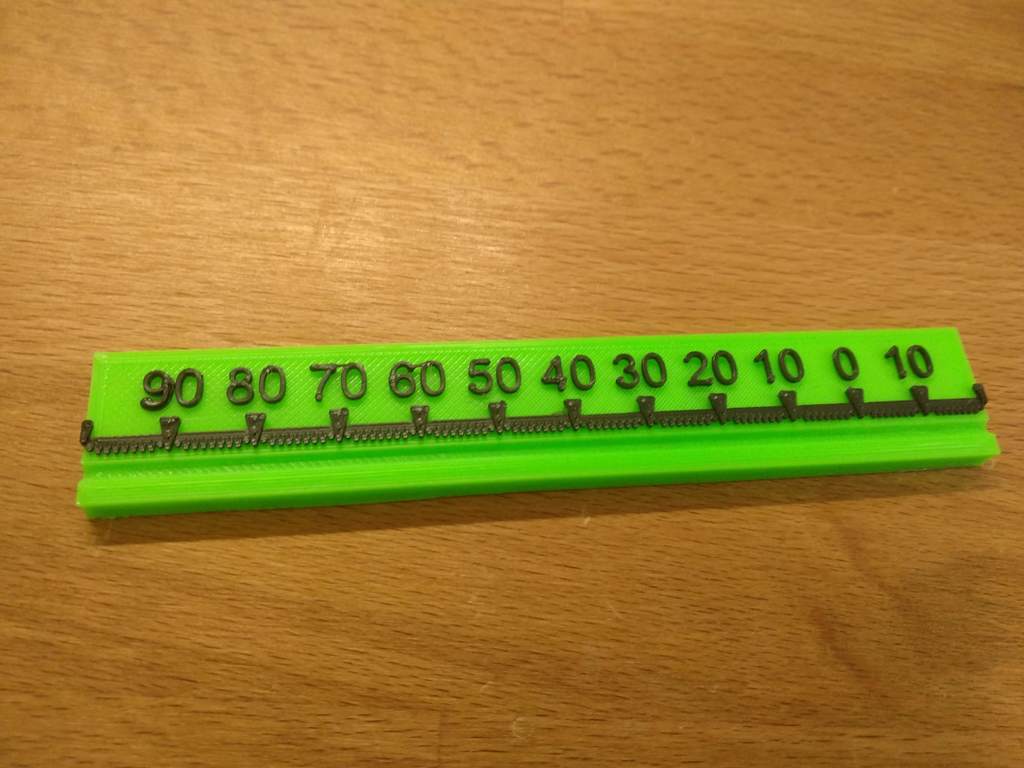
120mm ruler with filament grove. Put the side closest to zero flush against a reference point and mark the other end on the filament. Calibrate against a 100mm extrude length of filament and the mark should land on 0mm. Measurements on the ruler from where it should land. Never calibrate off a single result. Do it twice, better yet three times. Inconsistent results is a good indicator that your extruder has an issue (gummed up with filament dust, loose screw, gummed up filament contact teeth etc). If you do get an issue, start with visual inspection (make sure there are no cracks in the extruder body, is there a dust build up in the drive gears or filament teeth, is Bowden tube loose etc). Give it a good clean and SMALL amount of lube on drive gears for dual extruders - better yet disassemble, clean and re-assemble. If you do disassemble, check for wear on the bores of the drive (an idle if applicable) rollers. If everything fails - throw money at the problem and get a new extruder (about £12). If you do lube drive gears for a dual extruder, it should go without saying to make sure you avoid the filament contact area by quiet a margin - otherwise you might introduce issues! You can print in a light colour and go over raised features with marker - better yet, do a filament switch at layer 26 (0.2mm player height). You can do this in Cura using post-processing script and select layer height. Hope it helps with calibration. To avoid having to run the calcs each time as well, calibration tools is a good plugin for octoprint. Enjoy.
With this file you will be able to print E Step Calibration Ruler with your 3D printer. Click on the button and save the file on your computer to work, edit or customize your design. You can also find more 3D designs for printers on E Step Calibration Ruler.