E-Steps Calibration Stick
thingiverse
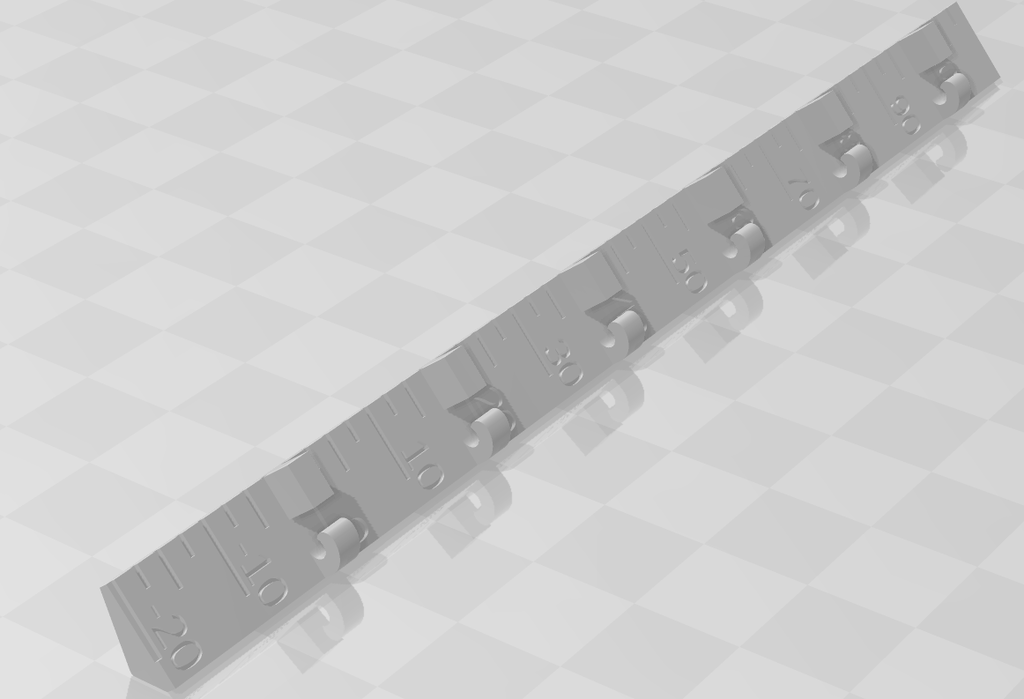
E-Step Configuration Stick ----------------------------------- This is a stick I designed to help me calibrate my e-steps for my various printers. It is designed to clip on to the filament going into the extruder and the filament slides through the clips. It has marks every 2.5mm and has labels every 10mm. It is a fast print, so I like to use a small layer (~.1) height for readability, although it comes out fine at .2. It is designed to be printed in the orientation it was uploaded so it doesn't need supports. How I use it: 1. Clip on to the filament. 2. Use a Sharpie to mark the filament at the 100mm mark. 3. Extrude 100mm of filament. 4. Check how far the filament is from the "0" mark. 5. Take the difference and subtract the percentage from the current e-steps. For example: if your current e-steps are 415 and the gauge says -5mm, you would take 100-5 or 95% of your e-steps value, so .95 * 415 = 394.25. 6. Save the e-steps to your printer. This varies depending on your firmware & printer, so you will have to look it up for your specific printer. 7. Run the test again until it comes out to exactly 0. Do not forget to save the settings to the firmware when you are done-- usually an M500 command.
With this file you will be able to print E-Steps Calibration Stick with your 3D printer. Click on the button and save the file on your computer to work, edit or customize your design. You can also find more 3D designs for printers on E-Steps Calibration Stick.