E14D Fast Electric Unicycle EUC
thingiverse
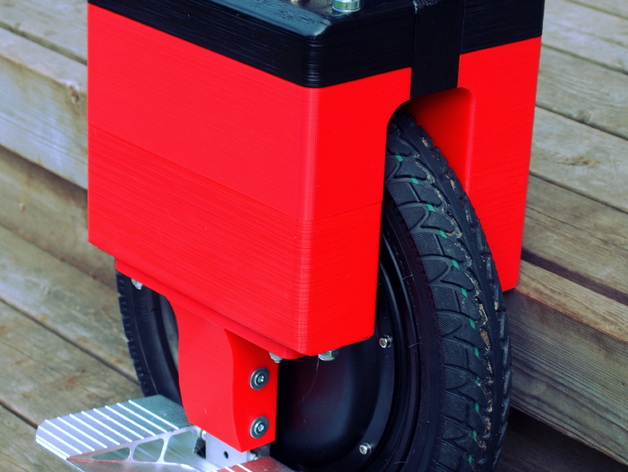
IMPORTANT NOTE: THIS DESIGN WAS AN EARLY PROTOTYPE WITH FAR FROM PERFECT ERGONOMICS. I STRONGLY RECOMMEND TO USE THE NEW IMPROVED VERSION INSTEAD, WHICH CAN BE FOUND HERE: http://www.thingiverse.com/thing:1723980 After an unsuccessful search for an enclosure with sufficient battery capacity for my high performance 14" 500W Unicycle motor from Microworks, I decided to make an attempt to design and 3D print my own. The housings on both sides are identical and, due to print size limitations, have to be printed in two sections, which are then stacked and secured with M8 threaded rods which go through the whole structure from top to bottom. The two sections can be glued together for added strength. Each housing can hold either two standard 2200/2900 mAh battery packs or one battery pack plus the mainboard. For that purpose, the housings can be divided into two separate sections. The housings on both sides are bolted to each other through the top handle part, also using two M8 threaded rods. Underneath the top handle, there is room for another battery pack. So all in all, it is possible to connect up to 4 battery packs in parallel to make sure you have enough juice left to get back home safely. With the motor I used, top speed is around 30 km/h and when using the maximum amount of battery capacity, your range should be around 40 km in average conditions. I´ve been trying to keep the design as simple, compact and smooth as possible. Assembly parts needed: 4 pcs M8 threaded rods, approximately 230 mm long (cut to right length) 2 pcs M8 threaded rods, approximately 80 mm long (cut to right length) 12 pcs M8 nuts and washers - you might want to use nylocks, I used 4 knurled nuts for quick access while testing, but you can also use regular ones 12 pcs M5 screws and washers for the pedal brackets, approximately 12mm long. I used countersunk machine screws with slightly oversized washers to keep the screw heads as flat as possible. 8 pcs M6 Screws & nuts (nylocks remommended) & washers to attach the lower battery housing to the pedal bracket. Use large washers on the inside of the housing. Check clearance (air valve!) and alignment (slide to fit) before final tightening. I recommend PLA for this project to avoid warping issues. Please be aware that these parts are large and will take a long time to print. UPDATE: I designed an alternative top section with hidden nuts and rounder shape. It is however more challenging to print than the original version:http://www.thingiverse.com/thing:1683314 Video: https://youtu.be/3sQ9o1g2cig Assembly order: Mount pedal brackets with 6 M5x12 screws and washers. Make sure they are correctly aligned before tightening. Mount lower sections of the battery housing with M6 screws washers and nuts. Use large washers inside the housing. Only tighten them slightly at first, leave them a bit loose so you can still slide the housing towards or away from the wheel without using too much force. Bolt the upper housing parts together with the handle part inbetween so they form a single unit, use M8x80mm threaded rods, washers and nuts. Put the 230mm threaded rods into the openings on the lower housings. Put a washer and a nut to the lower end and screw them on until the rod will just pass through the nut. Drop the upper housings with handle onto the 8mm rods sticking out of the lower housings. Slide the lower housings to align everything nicely. Make sure the wheel is able to turn freely. Then tighten the screws which attach the lower housing sections to the pedal brackets. Install your mainboard on the side with the leads from the motor. Make a mounting plate for the controller to slide into the slots in the housing. If you use the slot in the middle, there should be just enough room for a battery behind the mounting plate. Install batteries: there is space for two in the housing on the other side than the controller, for another one behind the controller mounting plate and one more on top. You don´t need to have four, you can start with just one. install battery LED indicators, power switch, charging socket and buzzer on the top cover part with openings, make sure everything is correctly connected and close the cover (same side as controller). Put on washers and nuts and tighten install the other top cover (without holes) on the batteries only -side. Put on washers&nuts and tighten.
With this file you will be able to print E14D Fast Electric Unicycle EUC with your 3D printer. Click on the button and save the file on your computer to work, edit or customize your design. You can also find more 3D designs for printers on E14D Fast Electric Unicycle EUC.