E3D/Titan direct drive for X5SA Pro
prusaprinters
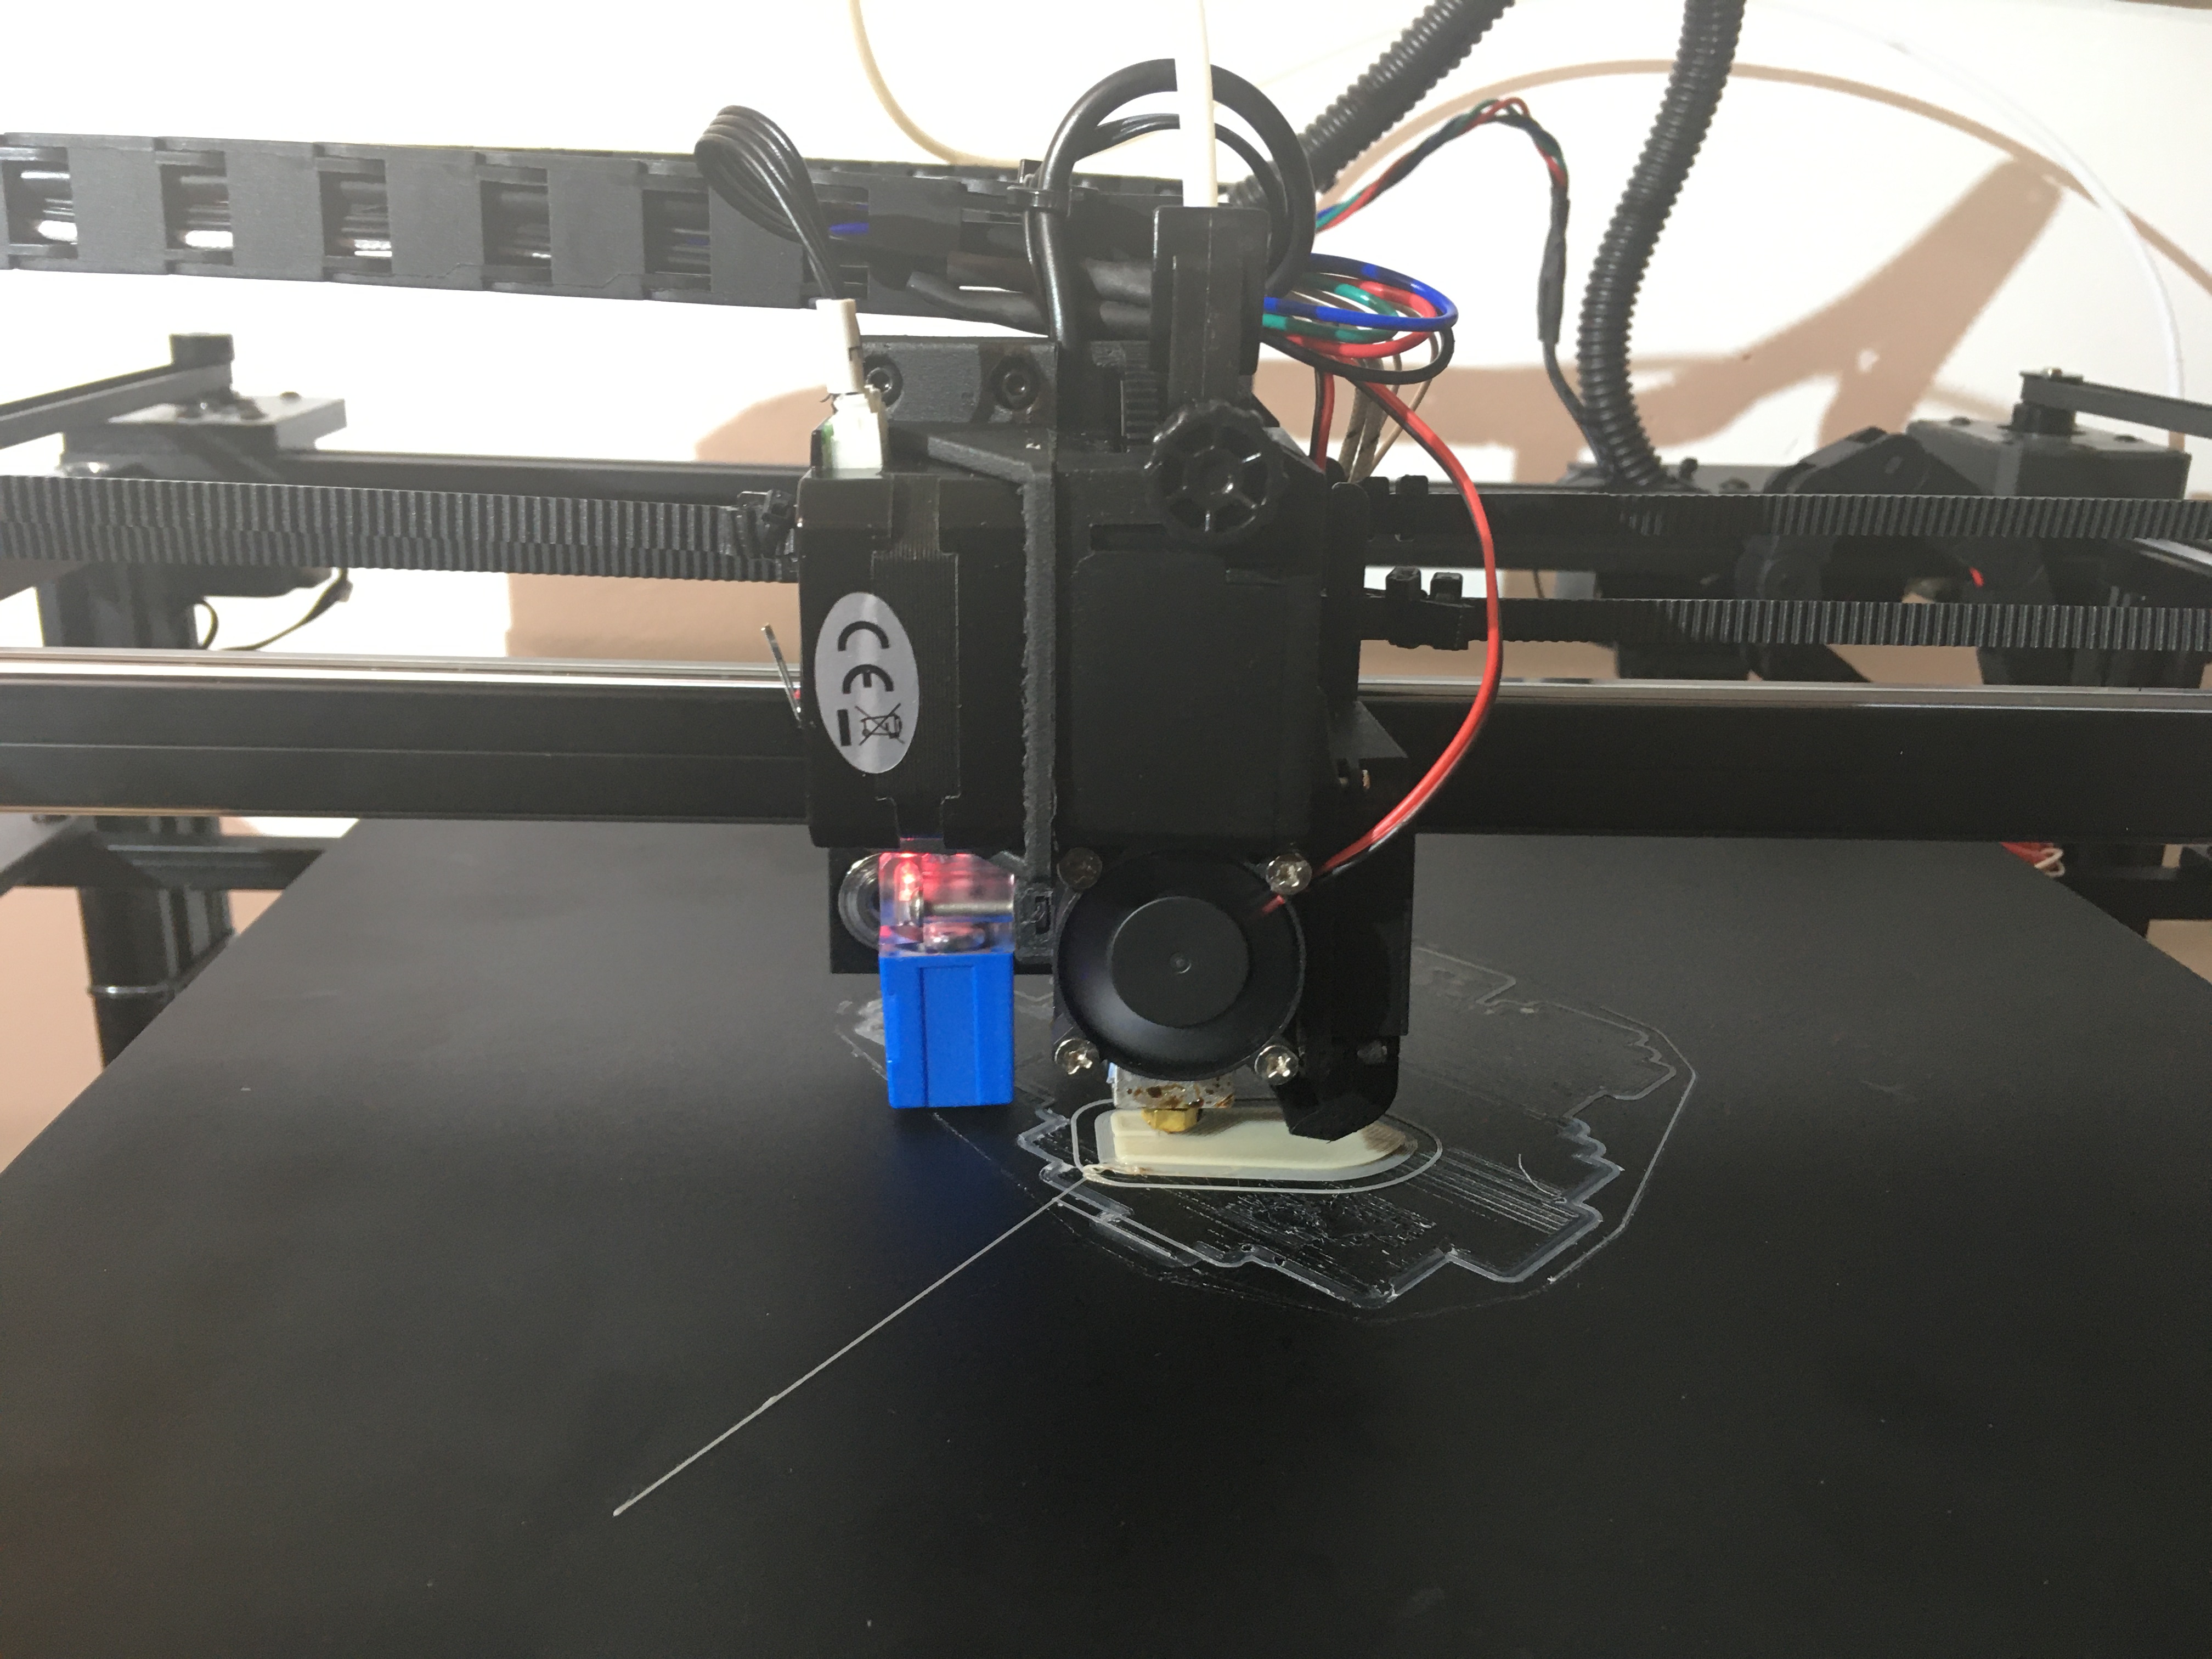
<p>Had to quickly adapt my X5SA to a direct drive. This uses an:<br/> • E3D hotend (1.75 direct drive or universal).<br/> • The Titan extruder<br/> • A pancake stepper motor (<a href="https://www.omc-stepperonline.com/nema-17-stepper-motor/nema-17-bipolar-1-8deg-13ncm-18-4oz-in-0-7a-2-9v-42x42x25mm-4-wires.html">https://www.omc-stepperonline.com/nema-17-stepper-motor/nema-17-bipolar-1-8deg-13ncm-18-4oz-in-0-7a-2-9v-42x42x25mm-4-wires.html</a>)<br/> • 3 x m3 square nuts (e.g., as per Prusa)<br/> • Some normal m3 nuts and bolts</p> <p>Bolt the carriage onto the existing metal plate using a pair of M3 botls with nyloc nuts, and a pair of shorter ones (8mm maybe) into the holes for the old hotend.</p> <p>Feed the wires for the x-axis limit and the level sensor through the cable channel and install the motor carriage and titan on top.</p> <p>X-axis shouldn't change, but the nozzle will be around 18mm further forward compared to the old Mk8. I've included a Y-axis limit arm that should recover that distance, but watch out for clearance at the back of the machine.</p> <p>There's a fan plate that will use the existing axial fan, but it should be easy to adapt for other fan types.</p> <p>In addition there is an adaptor to mount the filament sensor to the V-slot, and a modified motor mount for the Y-axis to raise that motor slightly.</p> <p>I used the heater cartridge and thermistor from the Mk8 nozzle as I had an older V6 variant. If you use an E3D thermistor you may have to tweak your firmware.</p> <h3>Print instructions</h3><p>Support from buildplate for the nut pockets.</p>
With this file you will be able to print E3D/Titan direct drive for X5SA Pro with your 3D printer. Click on the button and save the file on your computer to work, edit or customize your design. You can also find more 3D designs for printers on E3D/Titan direct drive for X5SA Pro.