E3Dv6 Snowflake
prusaprinters
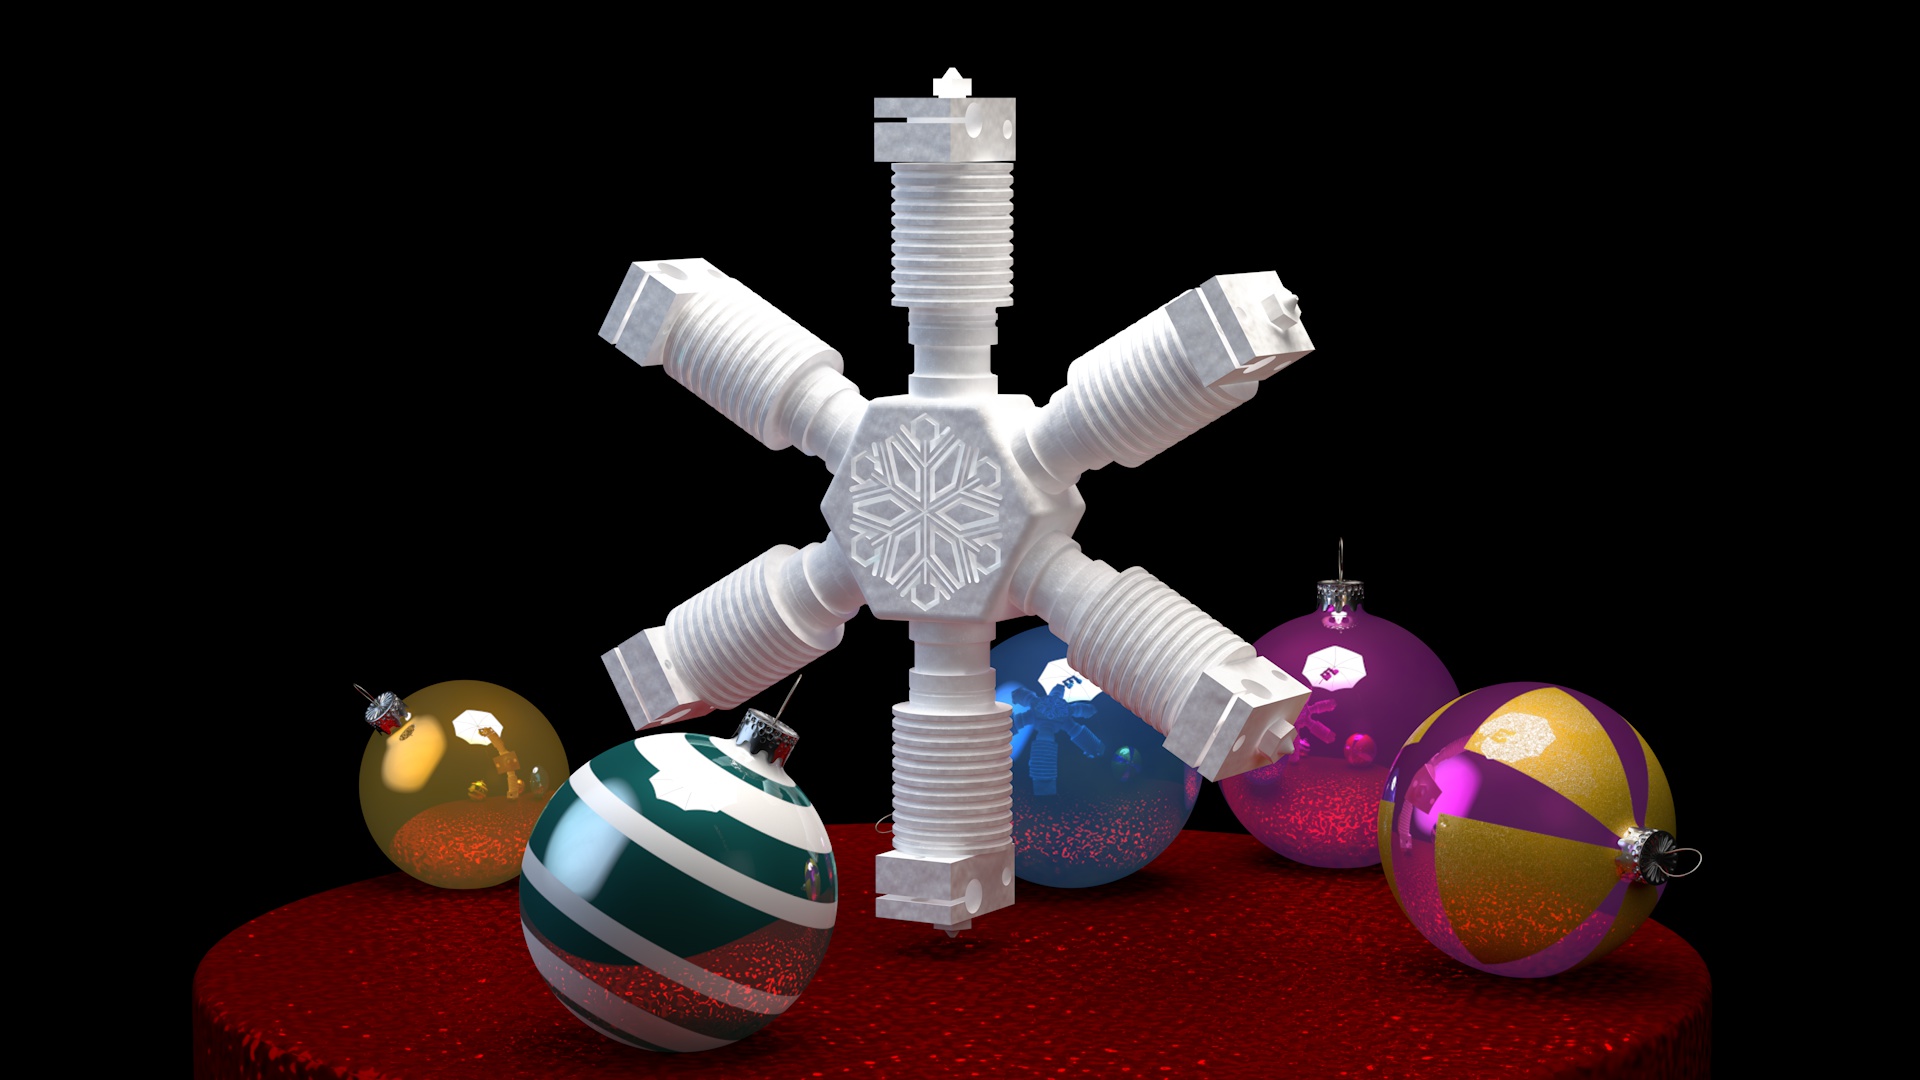
<p>Anyone who has built a Prusa printer, or any printer with an E3D hot end, will recognize this. It’s an E3Dv6 Snowflake. This was designed to be easy to print and printed without supports.</p> <p>I started by designing an exact copy of an E3Dv6 in Fusion 360, then began to modify it to make it easy to print. For example, the original radiator (E3D calls it a heatsink) is not possible to print without difficult to remove supports but I have changed it so it's printable and still looks great. The nozzle is printed in place for you on the heat block. The heat break has been made wider and shorter to give it more strength. Additionally, the gCode and the amf file I provided have been modified so the heat break prints with double the default extrusion width (0.9mm) to make the heat break even stronger.</p> <p>I printed MANY copies while designing this in several different materials and found that I liked the look of FilamentOne PLA PRO SELECT Glint Silver and any pearl white (or off white) the best. Proto-Pasta Stardust Translucent HTPLA with Silver Glitter and Polyalchemy Elixir Onyx PLA looked great too. Of course just about any filament will work.</p> <p>I have included each stl if you need to reprint any part. If you do choose to print the complete snowflake from the stl files, you will need one hub, and six of each part that make up the hot end.</p> <h3>Print instructions</h3><p><b>Using The gCode</b><br/> If you are using an Mk3/s, just use the gCode. It's all ready to print with PLA. Please keep in mind that you should increase the temperature for some Proto-Pasta filaments to avoid jamming or under extruded parts that are brittle. More about this below.</p> <p><b>Using The amf File</b><br/> You can of course use the included amf file and change it for your particular filament (you may want to use the amf file with Proto-Pasta HTPLA and increase the hot end temp on Prusa printers to around 240C.) The amf file includes the modification to the heatbreakv2 set to 0.9mm default extrusion width. However, if using the amf file make sure you say "No" when it asks you about "Multi-part objects detected" when importing it or you will loose the modified setting for the extrusion width.</p> <p><b>Printing With The Individual stl Files</b><br/> Finally, you can choose to use the stl files included, just remember you need one hubv2.stl, and six of each part that make up the hot end (heatblock.stl, radiatorv2.stl, and heatbreakv2.stl.) You don't have to set a higher default extrusion width on the heat break, but I snapped one once (the reason I changed this.) Additionally, it helps to group the radiators together on the print bed to save some time in printing since those are the tallest prints and you will avoid unnecessary print head moves near the end of the print.</p> <p><b>Putting It Together</b><br/> It only takes a couple of minutes to assemble your E3Dv6 Snowflake. First screw a radiator into the hub, screw the heat break all the way into the heat block, and then screw this assembly into the radiator (don't leave a gap as in a real E3D hot end or it will be loose.) The radiator is tight enough in the hub for you to slightly turn it to get it lined up the way that looks best for you. Repeat this for each E3D hot end. Then simply add a hook or ribbon through one of the heater cartridge openings and hang it up. It can be used as a star on a tree too, but this just simply seems wrong!</p>
With this file you will be able to print E3Dv6 Snowflake with your 3D printer. Click on the button and save the file on your computer to work, edit or customize your design. You can also find more 3D designs for printers on E3Dv6 Snowflake.