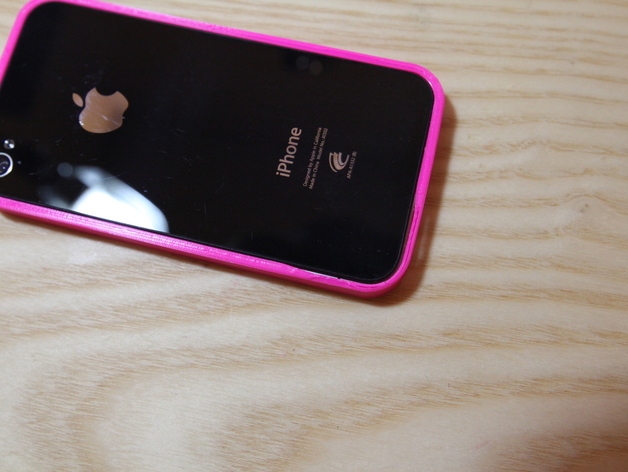
Easier to fit Rocksolid IPhone Bumper
thingiverse
**Updated stl to an improved model*** It's an improved version on previously made Rocksolid IPhone 4 Bumper. Instructions Instruction Videohttp://youtu.be/KZPcZmigoQw Print with PLA. You can use supplied G-code or make some adjust if you wish. READ INSTRUCTIONS BEFORE USING WARNING : There is almost no space between the phone and the bumper and requires some force to fit so be careful not to break anything such as power button, vibrate switch, your finger or IPhone. Print with fill greater than 80%, I've done with 100%. Otherwise horizontal layers won't stick well at thinner parts. Now the important part - Watch the instruction video Lay down the bumper and IPhone with the back panel up and volume/vibrate buttons facing away from you. Bottom left corner of the bumper (after step 1, bottom left corner is now on the right and facing towards you) has reduced overhang. Now lay the bumper down and fit your IPhone from up(as in from the air). Fit and align 3 other corners very tight. Slowly push in the bottom left corner until it's in place. You should hear a "click" sound. Make sure other 3 corners are still in place. Check the screen side(front) as well. If it doesn't make its way easy then tap it with your hand gently but firmly. It may require some force to push in. Once it's in, it should feel rock solid. To take it off, hold your IPhone and push the bottom left corner from the back to the front, with both thumb until it pops out. Once it's been in and out, it should be easier to fit.
With this file you will be able to print Easier to fit Rocksolid IPhone Bumper with your 3D printer. Click on the button and save the file on your computer to work, edit or customize your design. You can also find more 3D designs for printers on Easier to fit Rocksolid IPhone Bumper.
