Easter Bunny Springo
prusaprinters
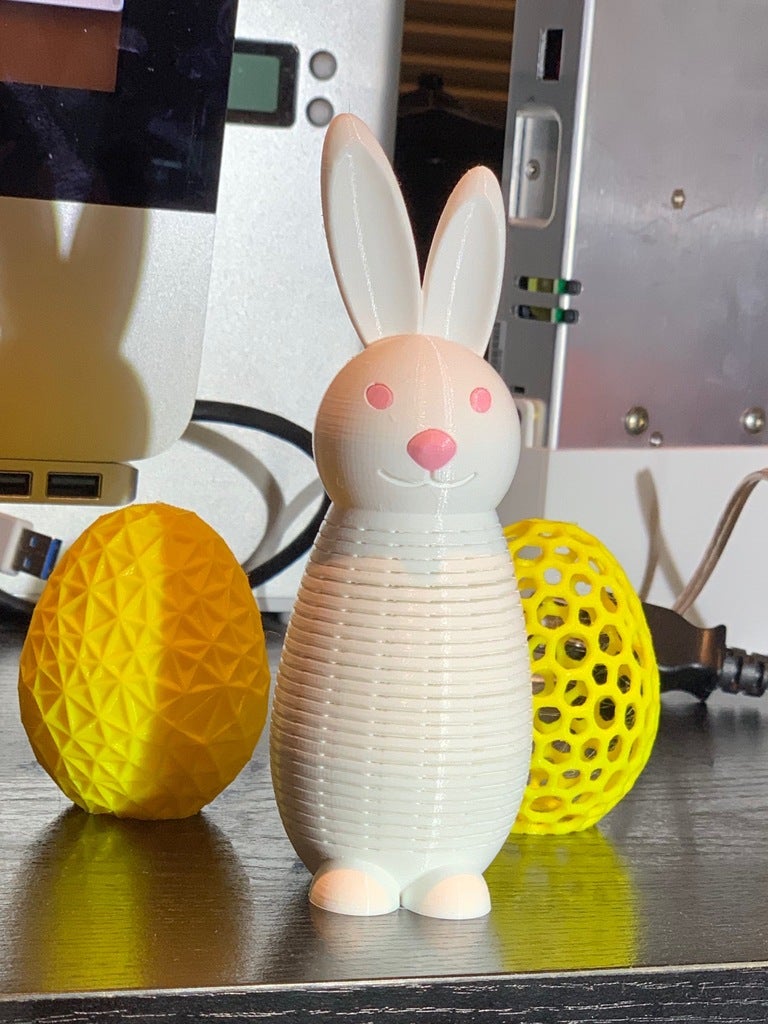
<p>I was inspired by <a href="https://www.youtube.com/channel/UCVc6AHfGw9b2zOE_ZGfmsnw">Devin Montes</a> <a href="https://twitter.com/makeanything3d?lang=en">(@MakeAnything3D)</a> to create a springo (or is it slingo?) of my own - an Easter Bunny. This was a fun design process, and it is a bit of a challenge to print. It took me a few goes to get it right.</p><p>It's my first attempt and I've included the Fusion 360 file. You'll notice that the head and body are in two separate parts. I did this mostly for my own convenience during the development process. I've included STLs for the head and body separately, and a combined STL that includes them both. If you print them separately you can print the head at a low infill. The body should be 100%. If you print the single model, you can use your slicer to change the infill settings of the two areas if you'd like. I did this in PrusaSlicer.</p><p>There are also STLs for the left and right eye and the nose. I printed these in a different color and they snap into place. You could use a dot of glue, but I didn't find it necessary - especially for the eyes.</p><p>Here are a couple of short videos showing the bunny:<br><a href="https://youtu.be/T-5i651o8sk">Cracking apart the layers</a><br><a href="https://youtu.be/pBH1jFlEmYo">The finished product</a></p><p>I've printed this design on a Prusa MK3 and an Ender 3. A friend printed it on a CR-10.</p><h3>Print instructions</h3><h3>Category: Sculptures Summary</h3><p>I was inspired by <a href="https://www.youtube.com/channel/UCVc6AHfGw9b2zOE_ZGfmsnw">Devin Montes</a> <a href="https://twitter.com/makeanything3d?lang=en">(@MakeAnything3D)</a> to create a slingo of my own - an Easter Bunny.</p><p>It's my first attempt and I've included the Fusion 360 file. You'll notice that the head and body are in two separate parts. I did this mostly for my own convenience during the development process. I've included STLs for the head and body separately, and 1 big STL that includes them both. If you print them separately you can print the head at a low infill. The body should be 100%. If you print the single model, you can use your slicer to change the infill settings of the two areas if you'd like. I did this in PrusaSlicer.</p><p>There are also STLs for the left and right eye and the nose. I printed these in a different color and they snap into place. You could use a dot of glue, but I didn't find it necessary - especially for the eyes.</p><p>Here are a couple of short videos showing the bunny. First, cracking apart the body:</p><figure class="media"><oembed url="https://www.youtube.com/watch?v=T-5i651o8sk"></oembed></figure><p> </p><p>The finished product:</p><figure class="media"><oembed url="https://youtu.be/pBH1jFlEmYo"></oembed></figure><p> </p><h3>Print Settings</h3><ul><li><strong>Resolution</strong>: 0.15mm</li><li><strong>Infill</strong>: 100% (this is important, but can be lowered for the head - see notes below)</li><li><strong>Filament</strong>: Hatchbox PLA. For most of my prints I used white for the body and pink for the nose and eyes.</li></ul><p><strong>Notes: </strong></p><p>Print the nose and eyes in an accent color, then print either:</p><ul><li>The Body and Head separately ("Bunny Body.stl" & “Bunny Head.stl”), <i>or</i></li><li>The whole bunny ("Slingo Bunny.stl")</li></ul><p><i><strong>The body should be printed at 100% infill to make the spring work and separate properly</strong></i>. The head can be a low infill if desired. If you print the single body you can use your slicer to set different infill for different regions (i.e. the head and body). I did this in PrusaSicer. If you print the head and body separately, use CA glue to connect them permanently.</p><p>When I printed the eyes and nose, I used a brim to keep them from being knocked over. They're pretty small and have a hard time standing on their own. Print the eyes upright with the slanted parts facing up.</p><p>Printing on an Ender 3:<br>I've done most of my prints on a Prusa i3 MK3, but I've printed a couple on an Ender 3 and CR-10S Pro. On those machines I find that I need to reduce the bridge flow rate to about 20mm/s. I also decrease the extrusion multiplier a little (to about 97%), but honestly I don't know if that is needed. I didn't do independent tests.</p><h3>Post-Printing</h3><p>Once the body is printed, you need to "crack" it apart. You can do this by hand as I did in the attached video, or you can carefully insert the edge of a scraper and pry the layers loose. Once you have an opening, I find it easiest to use the scraper to pry open the rest of the layers. I stopped prying about 1 coil up on the bottom and 4 coils away from the top. You can go further, but it gets harder around there.</p><p>Once you've broken apart the coils, double check to ensure there are no stray remains of filament that will keep the spring from closing all the way.</p><p>Remove the eyes and nose from the brim and clean up the bottom edges if need be. Insert them into the slots. You can use a drop of glue, but I just snapped them into place.</p><h3>How I Designed This</h3><p>I used Fusion 360 to design this. I based the ears on another model. Once I had the basic design in place, I followed @makeanything3d's tutorials on making Springo's (sometimes he calls them Springo's and sometimes Slingo's. I go back and forth too).</p><p>After a few failures with fused layers, I reached out to @makeanything3d for advice on MyMiniFactory. He suggested using the coil tool in Fusion 360 which is what I did. That's when it started working.</p><p> </p><p> </p>
With this file you will be able to print Easter Bunny Springo with your 3D printer. Click on the button and save the file on your computer to work, edit or customize your design. You can also find more 3D designs for printers on Easter Bunny Springo.