Easter Egg Decorating Lathe
thingiverse
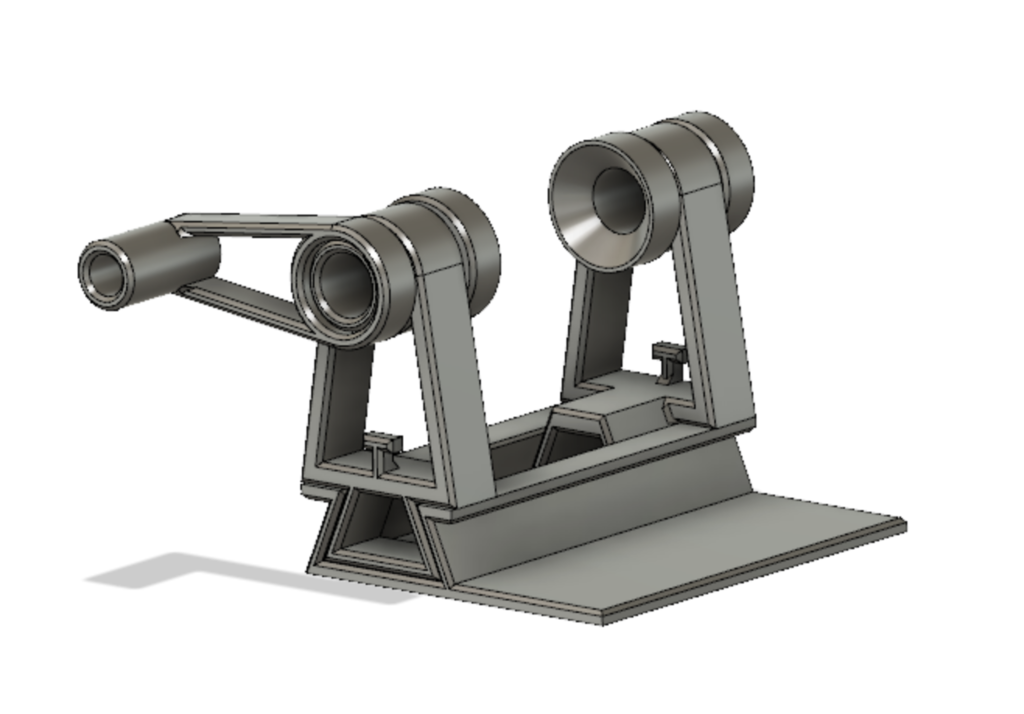
I wanted a lathe for Easter egg decorating. I was not satisfied with what was available. Whipped this up really quick. Everything prints easily without complication. The crank side is fixed and the other slides, with tension provided by a rubber band. A flat base for holding by hand or use a clamp to fix it to your table. Photographs are of my first print. I have since modified the files to be smaller, use less material, and take less time to print. -U se Cyanoacrylate to glue the FixedRiser in place. (locate the rubber band post INSIDE and away from the crank) - Light sanding as necessary to assure the shafts rotate smoothly before assembly - Carefully glue the crank and the shaft lock to the shafts to fix the rotating parts in place. - Install a rubber band - if you need more friction, you can glue rubber band pieces or use Plastic-dip on the EggShaft cups. Yes, it's stupid simple on purpose. Not a lot of time before the holiday!
With this file you will be able to print Easter Egg Decorating Lathe with your 3D printer. Click on the button and save the file on your computer to work, edit or customize your design. You can also find more 3D designs for printers on Easter Egg Decorating Lathe.