Easy-E(Step), The Estep calibration gauge.
thingiverse
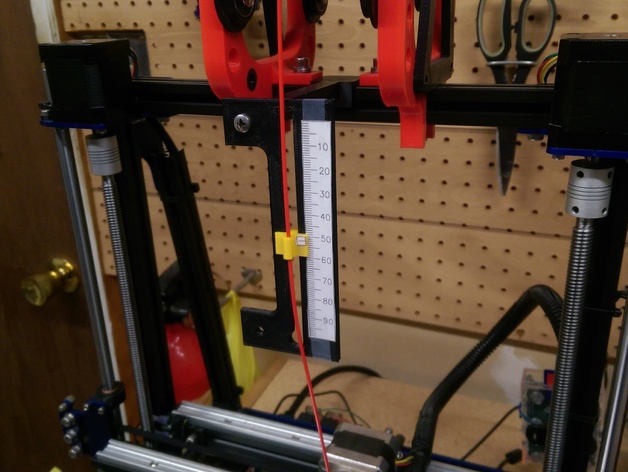
Easy-E is still kicking and making waves. \nThis straightforward slide rule makes it easy to calibrate Esteps. The gauge fits snugly in several different orientations and comes equipped with a center groove for 20mm Extrusions. \nhttp://youtu.be/-BgdgcUAUXAhttp://youtu.be/UBapl4dKNjY\n\n \n \n Instructions First, print out the three components. The mount attaches to the gauge with an M4x10 screw. Next, slot the slider/pointer in sideways and slide it to the bottom of the gauge plate, where there's a cutout to rotate it to the correct position (see photo.) If the slider doesn't move freely, trim & sand the slider slot until it glides smoothly. Print out the included 100mm gauge and pointer (remember to print at 100%, no scaling or printing larger than life!) and secure them with a little clear tape. Avoid wrapping the tape around the parts to prevent binding. Snap the mount in place, then push the filament into the slide so that the pointer rests on 0mm. Call for 75mm to be extruded and read the gauge once the command is completed. Next, adjust the Esteps based on your printer's calibration instructions. Because different filaments, printer calibrations, and mount requirements may vary, I've included the Autocad files so you can make adjustments as needed.
With this file you will be able to print Easy-E(Step), The Estep calibration gauge. with your 3D printer. Click on the button and save the file on your computer to work, edit or customize your design. You can also find more 3D designs for printers on Easy-E(Step), The Estep calibration gauge..