Easy Replicator1 Motherboard Fan Mod
thingiverse
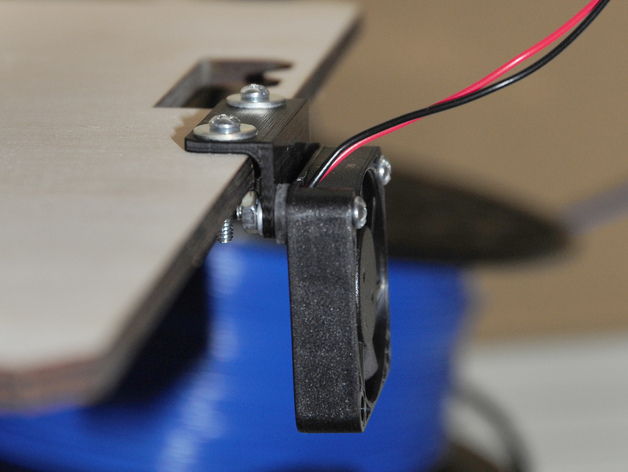
Improve motherboard cooling on Rep1 printers without invasive mods by relocating the fan to the edge of the cover board, pulling air from the cooler area beneath the printer and directing it towards the motherboard. This method requires minimal drilling and no interference with the motherboard. For better performance, upgrade to an Orion fan (Digi-Key #1053-1208-ND) for quiet operation at 7cfm or use the stock fan if preferred. To implement this mod, print a bracket designed for your printer, safely unplug and turn the printer on its left side, unbolt the motherboard cover plate and fan, mark and drill two mounting holes on the cover plate, attach the fan to the bracket with optional rubber washers, reinstall the fan/bracket assembly onto the cover plate, and secure the plate. The provided instructions come with a 123D file and DXF format for easy access. Note that the photos show a prototype version of the bracket, which has since been refined for better fit and function.
With this file you will be able to print Easy Replicator1 Motherboard Fan Mod with your 3D printer. Click on the button and save the file on your computer to work, edit or customize your design. You can also find more 3D designs for printers on Easy Replicator1 Motherboard Fan Mod.