Eclips3D A16 and A17 rod brackets
thingiverse
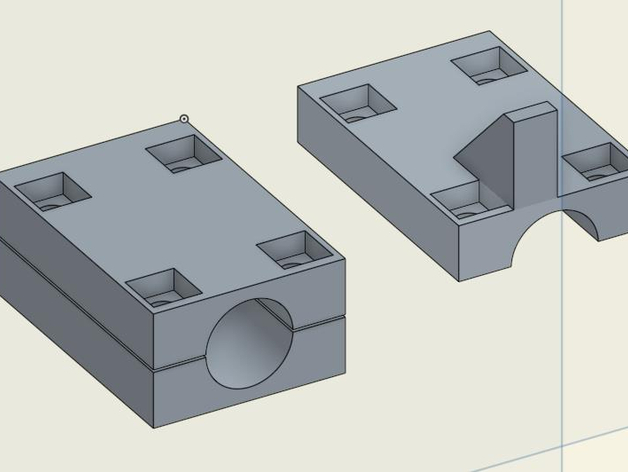
Original parts were designed to be printed vertically. This makes them susceptible to cracking along the layer lines. I remade them so they can be printed laying flat with the layer lines parallel to the rods, which should make them a bit stronger and alleviate cracking. Added files with a little looser tolerances. The rod hole is increased to 10.2mm, M3 nut cutouts are enlarged to 5.8mm. Print Settings Printer: Eclips3D Resolution: 0.16 Infill: 30 ~ 40% Notes: Print with the flat side down rod cutout up, except on the A17 Top part. Use supports on the A17 top if your printer can't handle the overhang. At least two shells on the sides and three to four on the top and bottom should make these parts plenty strong. PETg/nylon is also recommended, but PLA should work. Print four of the Bottoms, three of the A16 Tops, and one of the A17 Top. Use some sandpaper around a dowel or a wrench socket and smooth out the inside of A17 so it fits better around the rod.
With this file you will be able to print Eclips3D A16 and A17 rod brackets with your 3D printer. Click on the button and save the file on your computer to work, edit or customize your design. You can also find more 3D designs for printers on Eclips3D A16 and A17 rod brackets.