Edge lit Star Wars displays
thingiverse
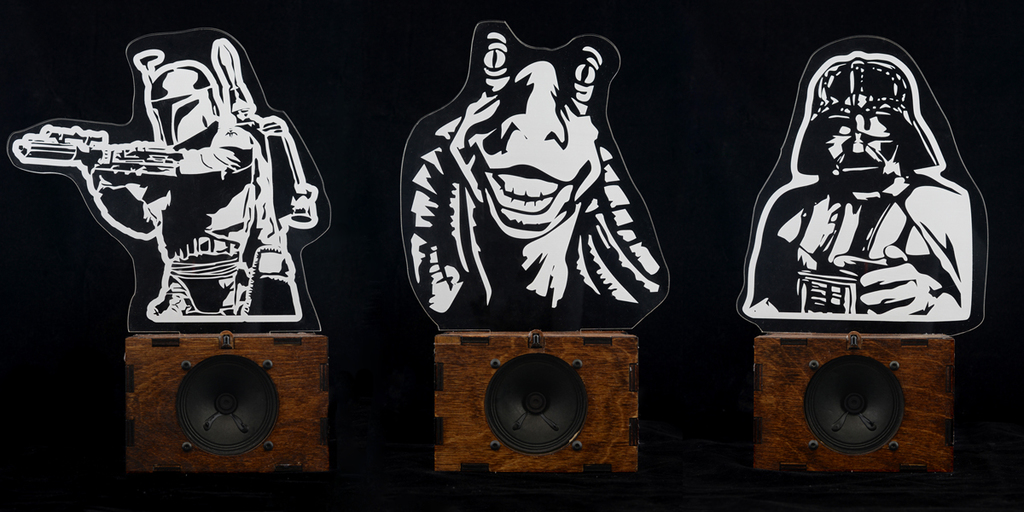
These are edge-lit displays/signs of Darth Vader, Boba Fett, and Jar Jar Binks that I made as part of a [bigger electronics project](https://www.pololu.com/blog/746/modified-han-solo-toy-blaster-controls-led-displays-of-star-wars-characters). To control color and brightness of those displays, I modified a toy Han Solo DL-44 blaster to emit IR TV remote codes and designed these displays to respond to the codes. (To see more about the design files for the display stand for that blaster, [follow this link](https://www.thingiverse.com/thing:3006122).) As the blaster shoots, the [Star Wars characters react](https://www.youtube.com/watch?list=PL_AvXBNfDUkcPNAVRrPmtHbrt-LV7FRaT&v=KIYRGa7y3pQ) by blinking and playing audio recordings. Also, certain button presses from a non-blaster TV remote [unlock bonus Easter egg content](https://www.youtube.com/watch?v=HqItv1lkCUc&index=8&t=0s&list=PL_AvXBNfDUkcPNAVRrPmtHbrt-LV7FRaT) from the displays! The displays were designed to be laser-cut from plywood and acrylic. So, the .STEP and .STL files that I generated and included here have not been printed and tested, though they should probably work together okay since they were generated from the same SolidWorks files that I used to make my 2D files for. Everything was held together with hot glue, except for the clear acrylic pieces, which, IIRC, were fastened with 1/4-20 screws and nuts (the hole has a diameter of 1/4", which could be okay for 1/4" screws since the laser kerf will make the cutout bigger than that). Before adding the acrylic pieces, I stained the wood and gave it a couple coats of polyurethane. Here is a list of how many parts you will need to cut and from what material <b>*for a single display box*</b>: <table> <tr> <th>Part Name</th> <th>Quantity</th> <th>Material</th> </tr> <tr> <td>all_3_star_wars_profiles</td> <td>1*</td> <td>1/4" clear acrylic</td> </tr> <tr> <td>led_array_holder</td> <td>1</td> <td>3mm or 1/8" plywood</td> </tr> <tr> <td>ir_detector_mount</td> <td>1</td> <td>3mm or 1/8" plywood</td> </tr> <tr> <td>top</td> <td>1</td> <td>1/4" plywood</td> </tr> <tr> <td>side</td> <td>2</td> <td>1/4" plywood</td> </tr> <tr> <td>profile_holder</td> <td>2</td> <td>1/4" plywood</td> </tr> <tr> <td>front</td> <td>1</td> <td>1/4" plywood</td> </tr> <tr> <td>electronics_platform</td> <td>1</td> <td>1/4" plywood</td> </tr> <tr> <td>bottom</td> <td>1</td> <td>1/4" plywood</td> </tr> <tr> <td>back</td> <td>1</td> <td>1/4" plywood</td> </tr> </table> *This .CDR has profiles of Darth Vader, Boba Fett, and Jar Jar Binks in it. Only a single profile is needed per display box. To show how the parts fit together, I have included a picture of a 3D model of the display box with a few components made transparent. You can also check out my [Imgur build log](https://imgur.com/gallery/0CFw4), which shows a few steps of the assembly.
With this file you will be able to print Edge lit Star Wars displays with your 3D printer. Click on the button and save the file on your computer to work, edit or customize your design. You can also find more 3D designs for printers on Edge lit Star Wars displays.