electronic-Component-tester-enclosure
thingiverse
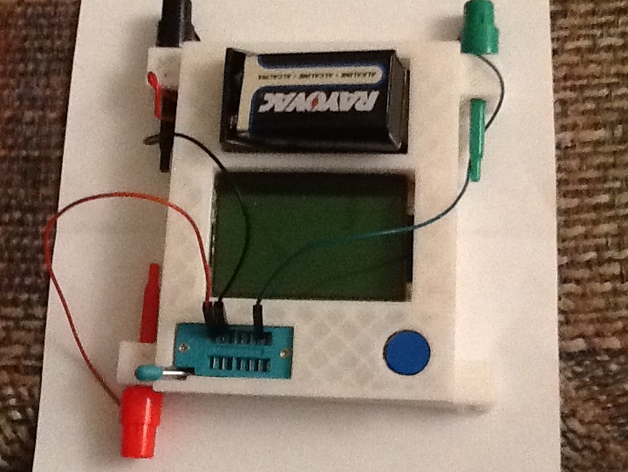
I'm returning this smoke detector battery because it wasn't inserted properly in its slot yet. I haven't cut the power wire and it's my own smoke detector battery, so it's going back where it came from. The battery fits extra tight and doesn't want to be forced out. The iPad had trouble with the unit on, so the picture is taken with it off. It works great. I really like that little device. I bought this electronic tester on eBay for 14 bucks and it's truly amazing. I wish they had such an item at a similar price when I was learning electronics. It checks about all but integrated components. Works great as far as I've seen. I don't have any other testers to cross-check with, but normally what you need is just a good bad test and this thing does that and a lot more. It will find transistor pin out check for npn or pnp beta and frequency check etc. All components connect any way you want to connect them - that's the best part. I made these top and bottom to fit which includes a few nice features. The top is a near snap-on to the bottom without much need for screws. There are holes for screws if your printer prints them well, otherwise it makes a boss area for drilling and setting screws. There is a slot for the battery wire to pull out so you can cut one or other to install a switch. I just cut the red wire so I can twist-tie it when in use. The battery will drain in storage so a disconnect or battery removal is needed. I made kinda silly but neat holders on both sides with holes to slide mini wire clips in to keep from losing them. Some things just can't be found when needed with me and I think those wire clips would be in that type shape. The battery connector can be screwed in or just glued in. Be extra careful with the screen ribbon that raps around the board and connects the display. It will be fragile and may break and disable the whole tester. Take care and no problems will happen. There is one problem though - all works great but I forgot to include a tiny recess for the bump on the back of the board where the two power wires loop around the board. You will just have to maybe drill, chip-out or use some form of tool to chip out so the board fits nice and flat. That's what I did and it works great. Don't try to bend - the screen will break or a solder joint come loose. A pocket knife will do, just don't lose a finger in the process. I hope you enjoy, have fun and happy printing. Rick. Search eBay for mega328 to get one of these testers - they're real nice. "Mega328 Transistor Tester Diode Triode Capacitance ESR Meter MOS/PNP/NPN L/C/R" Update: I forgot to mention that I plan to cut a small piece of plastic acrylic to drop in the screen display slot to protect it from bumps and knocks. 2-5/16 x 1-9/16 inches will fit perfectly. May have to file a small amount but will make much more durable. After all, that's why I made the enclosure to start with - to protect the board.
With this file you will be able to print electronic-Component-tester-enclosure with your 3D printer. Click on the button and save the file on your computer to work, edit or customize your design. You can also find more 3D designs for printers on electronic-Component-tester-enclosure.