Electronics frame for plastruder MK5
thingiverse
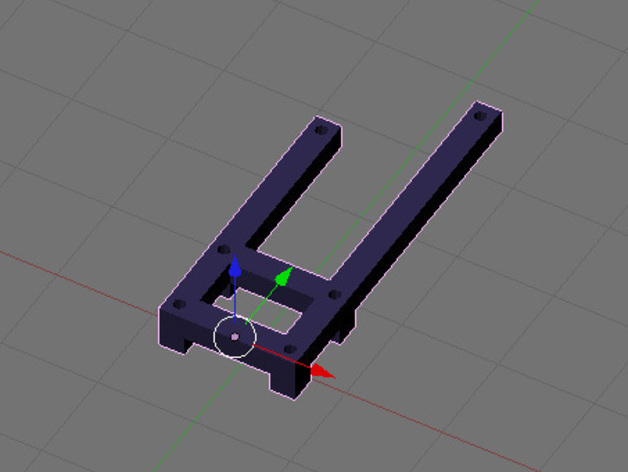
Frame to hold the extruder controller board and the relay board that attaches the the plastruder MK5 frame. Instructions You'll need 4, 22mm bolts and 2 of the shorter bolts. Print the frame, shave off a bit of the left bottom and left top feet to make sure they don't rub against the motor bearing. You'll need to clean out the 6 bolt holes in the frame (use the small allen wrench from the plastruder MK5 kit). I'd recommend screwing a bolt into each of the 6 holes and then backing them back out (this taps the holes and they will be much easier to screw back in). Place the frame on the plastruder MK5 (see image). Screw on the bottom two bolts using 22mm bolts. Put the extruder controller board and the relay board in place. Screw in the middle two bolts (22mm) and the top two bolts (the shorter ones).
With this file you will be able to print Electronics frame for plastruder MK5 with your 3D printer. Click on the button and save the file on your computer to work, edit or customize your design. You can also find more 3D designs for printers on Electronics frame for plastruder MK5.