Elegoo Mars Z-Axis Adjustment
thingiverse
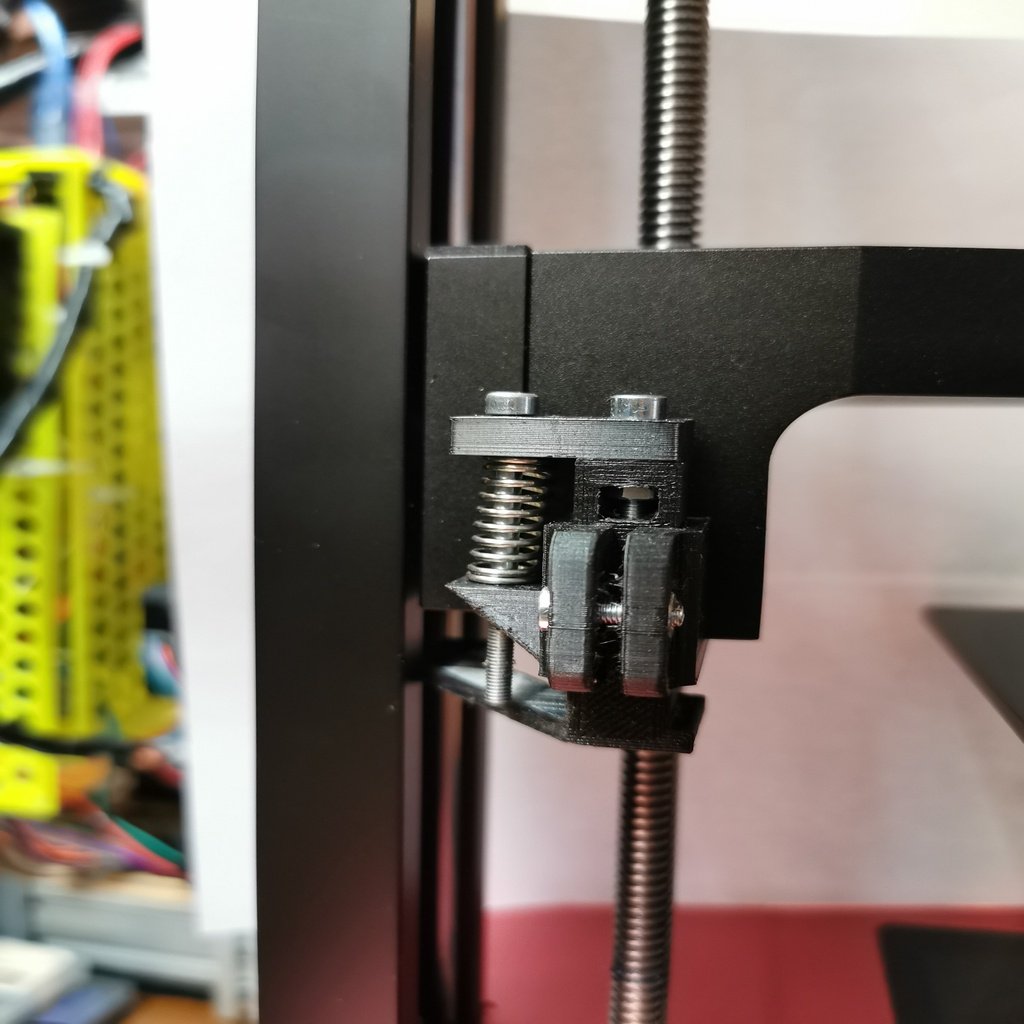
My inaugural release. Upon publishing my first print with the Elegoo Mars, I discovered a 1.6mm deviation in the Z-axis calibration cube. Realizing that the Elegoo Mars features only a fixed holder for the light barrier on the Z-axis prompted me to design an adjustable construction of my own. Following production and assembly of the unit displayed here, I successfully adjusted the Z-axis with precision. Note: To achieve exact adjustment, I removed the resin container and placed two sheets over the LCD. Next, I positioned the holder so it slid freely along the Z-axis without any resistance. Then, I moved the Z-axis upward by 0.1mm and set Z=0 via the menu option "Set." The subsequent calibration cube measured 20.01mm, with identical results repeated multiple times. I hope this construction will aid others in calibrating their perfect Z-axis setting. Your feedback is welcome.
With this file you will be able to print Elegoo Mars Z-Axis Adjustment with your 3D printer. Click on the button and save the file on your computer to work, edit or customize your design. You can also find more 3D designs for printers on Elegoo Mars Z-Axis Adjustment.