Elegoo v2 Arduino car chassis
thingiverse
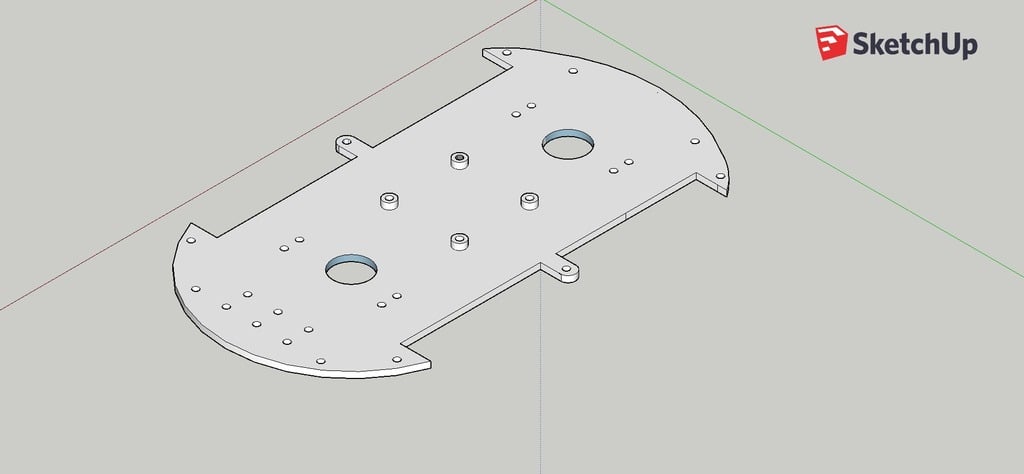
Since the Elegoo V2 chassis is made of acrylic, it shattered into pieces as soon as my son dropped it. I am now sharing with you for your potential benefit, a brand new chassis! ***ADDED*** (4/14/19): IR sensor repositioning: This positions the sensor facing upwards instead of sideways. You have a much better chance of hitting the sensor when the car is moving now. The IR sensor bracket features built-in spacers (1mm). Use the factory M2 p00 screws and nuts to attach it to the bracket. I used M3 x 12 screws and nuts to mount the servo bracket to the chassis. (4/7/19): The top and bottom chassis segments are now complete! The top segment features built-in standoffs for the Arduino mount! The upper frame has been fixed. Servo mount holes are correct, and Arduino standoffs are on the correct side of the board. *****Notes***** Built-in motor controller standoffs *Added holes in front and back for future bumper supports ***Added holes for future IR receiver mount (stock holes still available) Known issues: *Drill holes to preferred size (I prefer clean, drilled holes) Motor controller mount holes are slightly off (.6mm), but I just drilled a bit larger and it worked for me ****Be nice, this is my first submission...... =D**** Update 4/7/2019: Made thicker to accommodate stock screws Various little bugfixes Upcoming: Bumpers/brackets (possibly) I will try to improve at a later date.
With this file you will be able to print Elegoo v2 Arduino car chassis with your 3D printer. Click on the button and save the file on your computer to work, edit or customize your design. You can also find more 3D designs for printers on Elegoo v2 Arduino car chassis.