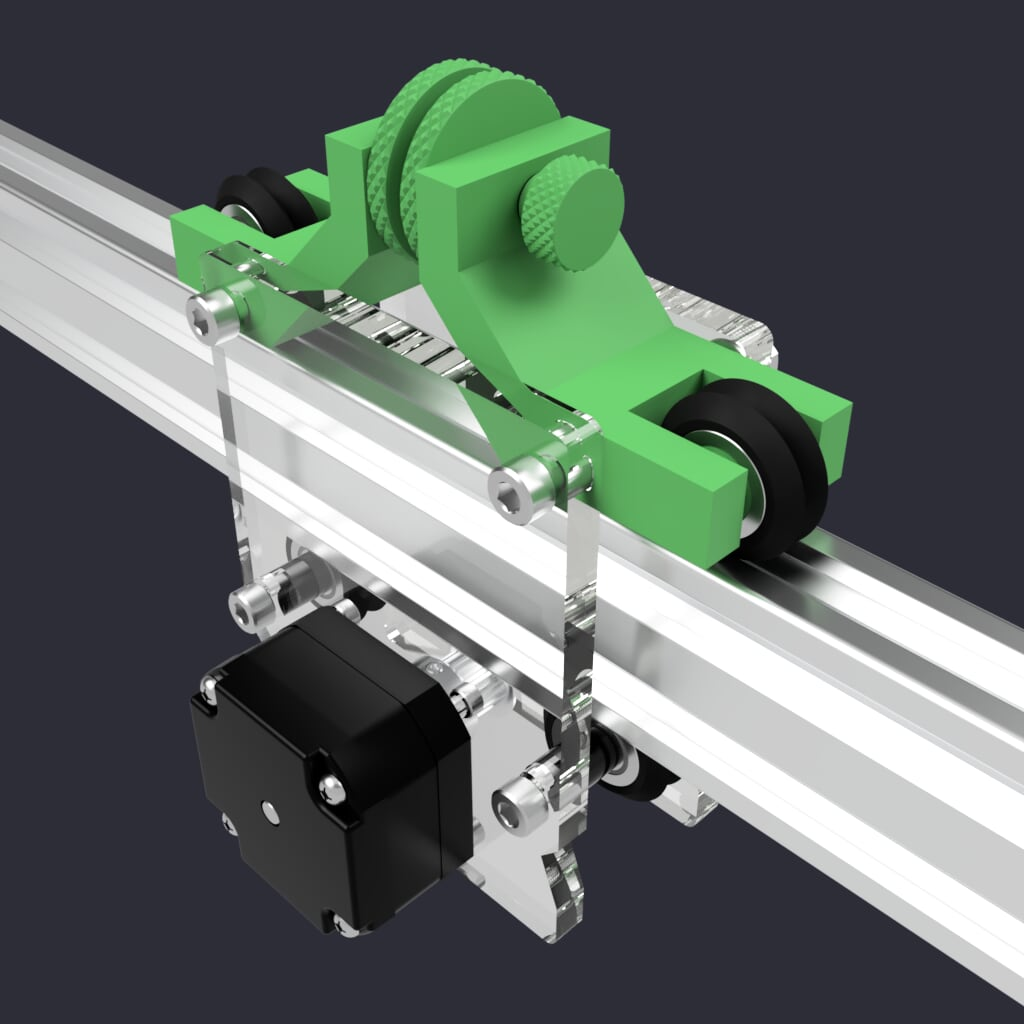
EleksMaker A3 Pro X-Axis Tension Adjuster
thingiverse
X-Axis Tensioner for the EleksMaker A3 Pro ================================= This X-Axis tension adjuster is a remix of the version created by ukflyer with Dual-V guide wheels. I had a couple of small issues to eliminate, and I wanted to remove the need for additional hardware. The M3 bolts used in the previous version were not a standard length and somewhat difficult to source. After building a few test prototypes, I determined the M3 bolts did not provide any benefit over some simple alignment pins when joining the two halves of the tensioner arm together. Modifications ------------------ 1. Removed the need for M3 bolts and replaced them with pins to hold the two halves of the tensioner arms together. 2. Extended the wheel hubs outward just a bit, my A3 Pro wheels were rubbing on the housing. 3. Increased the length of the hubs for the Dual-V wheels and eliminated the M3 bolt holes. The extended wheel hubs increase the stability of the wheels. 4. Resized the M5 bolt holes to a standard clearance. 5. Resized the upper tensioning bolt hole to accept an M6 bolt. 6. Added a printed M6 Bolt and two Adjustment wheels for adjusting the tension of the wheels against the rail. Preparation ---------------- You will need to print two X-Axis Tensioner arm assemblies, one M6x1.0x30mm bolt, and two M6x1.0 adjustment wheels. If you print them as positioned in the STL file, no supports are required. I printed the parts with PETG and a 50% infill to provide strength and rigidity. PLA will probably work fine, but it may strip the threads on the M6 bolt easier if they are over tightened. If you prefer not to use the printed M6 bolt and adjustment wheels, you may use a standard 30mm M6 bolt and 3-4 M6 nuts instead. Installation --------------- To install, remove the Dual-V wheels and bushings from the assembly and replace them with two tensioner arms. When installing the tensioner arms, reuse the bolts from the original assembly. No new or additional hardware is required. Push the M6 bolt through the upper tensioner bolt hole and screw on the two adjustment wheels before allowing the M6 bolt to exit the other side (See images). After installing, use the two adjustment wheels to increase or decrease the tension on the two Dual-V wheels until you achieve a smooth motion while moving the carriage. Check that all four wheels touch the guide rail and rotate when moving the carriage along the rail.
With this file you will be able to print EleksMaker A3 Pro X-Axis Tension Adjuster with your 3D printer. Click on the button and save the file on your computer to work, edit or customize your design. You can also find more 3D designs for printers on EleksMaker A3 Pro X-Axis Tension Adjuster.
