Elevator of Terror
thingiverse
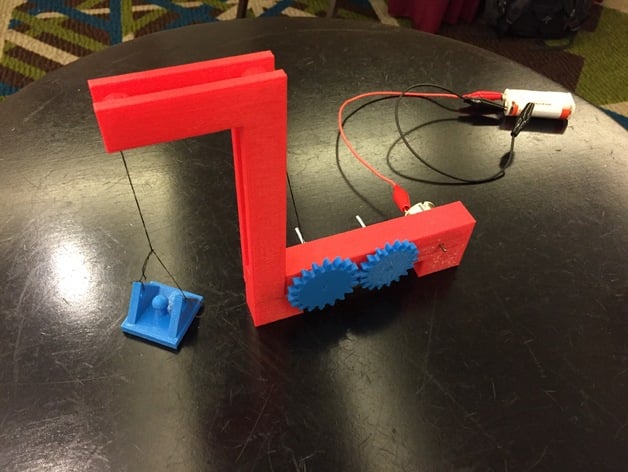
MBMAKEATHONDC Engineering Project Science Project This is a basic and pulley system that will be used to transport a small lift or elevator. The students must design the appropriate gearing ratio. The drive power is constant, and they want to find the balance in speed while considering safety and efficiency of the elevator. Print Settings Printer Brand: MakerBot Printer: MakerBot Replicator (5th Generation) Rafts: Yes Supports: Yes Resolution: standard Infill: 10% Notes: You will need supports on the following parts: base, roller 1, and roller 2. How I Designed This I would give the students the frame and pulley system with the lift. The students would then just be responsible for designing a compound gear train to adjust the input speed to the desired speed of the lift. They will design single gears that will slide onto the axles. Overview and Background The goal of this activity is to have the students practice their measurement skills, their modeling skills, and to discover the correlation between gear size and gear ratio. It is also possible to incorporate the physics of acceleration and movement. Lesson Plan and Activity Objective: At the end of this lesson, the students will be able to design a gear train to achieve the appropriate gearing ratio to power the lift at a safe speed. Audience: The grade levels would be 10, 11, and 12. The students will need some basic skills in 3D modeling. Skills Learned (standards): The students will be able to model gears. The students will be able to use gears to create a gearing system. The students will be able to calculate the gearing ratio of a compound gear train. The student will be able to determine the appropriate gearing ratio for a system with a desired output. CC.2.4: Measurement, Data and Probability 3.4.10.C1 Apply the components of the technological design process. 3.4.10.C2 Analyze a prototype and/or create a working model to test a design concept by making actual observations and necessary adjustments. 3.4.12.C3 Apply the concept that many technological problems require a multi-disciplinary approach. 3.4.10.D1 Refine a design by using prototypes and modeling to ensure quality, efficiency, and productivity of a final product. 3.4.10.D2 Diagnose a malfunctioning system and use tools, materials, and knowledge to repair it. Handouts I have included a handout for the students that gives them the design brief and goals. The major variable that can be changed is the input speed to the system and the goal for the output speed. Duration of Lesson Depending on the preexisting skill level of the students, the activity will take between 3-5 days. Preparation The students should have a basic knowledge of 3D modeling software. I would suggest having the frame, lift, and pulley system already printed. Following is a list of materials needed for the activity: Wire coat hanger for axles String to lift the elevator Drive system, you can use a 3-volt DC motor or also included is a roller system for using a Sphero as the input for the system. Included are the item numbers from Radio Shack for the electrical parts if you choose that route. Rubric and Assessment At the end of this activity, the students should have a completed compound gear train that can lift the elevator. I have included a sample rubric that you can modify and add the point values you want to use. If this was being used for a physics classroom, you could incorporate more detailed calculations such as acceleration, forces applied through the system, and conservation of energy in a system. References I have included a picture of an example of a reducing gear train that can be distributed to the class. I also included a link to a YouTube video that does an excellent job of explaining gear systems even though it is on the old side. These two resources will help give the students some background information on gear trains and systems. https://www.youtube.com/watch?v=D_i3PJIYtuY Modification If the students want to put larger gears in the system that would hit the floor, there are 25mm square holes on the bottom so they could also create legs to raise the base higher.
With this file you will be able to print Elevator of Terror with your 3D printer. Click on the button and save the file on your computer to work, edit or customize your design. You can also find more 3D designs for printers on Elevator of Terror.