"Ellie" m-ITX Computer Case v1.1
thingiverse
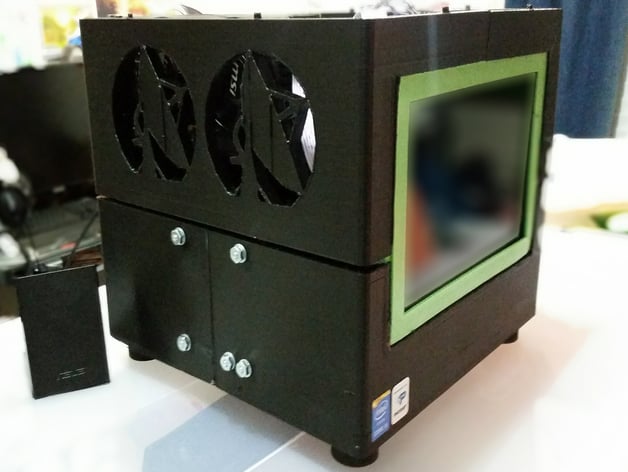
Welcome to Ellie! Ellie is a small form factor computer with a fully 3D-printed case and integrated 7-inch screen. It can accommodate a full-size ATX power supply, two 2.5" drives (SSDs or HDDs), and even a low-profile graphics card. For months and months I have been receiving requests from Redditors, YouTubers, and interested strangers to upload this project to Thingiverse. It's a bit late, but here she finally is! If you would like to know more about my process of creating this project, the above video links to a playlist of my entire series documenting the build (here's a shortcut: http://bit.ly/2ampKme). On top of that, Ellie was recently featured on the front page of DallasInnovates.com. You can find the article here: http://www.dallasinnovates.com/building-ellie-gives-teachers-students-tech-insight/ Version 1.1 Version 1.1 brings with it a few minor updates to the version in the above photos and video. The updates are a wider gap for the screen caddy's insertion and a small height extension to the basement. I hit several small road bumps creating my personal v1.0 Ellie (as seen by the use of a Dremel in the above video) and these changes should make the build a bit less of a headache for you. The changes are minor but are as yet untested. For now, there is no included screen caddy. The IT person at my previous workplace accidentally deleted my original caddy design, but on top of that the screen that was originally used in this build has not been available on Amazon in a year. It should be fairly simple and straightforward to model your own caddy to fit your own screen, though. As with the original version, the models have been cut to ensure they will fit on the build plate of a Makerbot Replicator (any version). Components used in my personal build: CPU: Intel Core i5-4690 MB: ASUS Z97I-PLUS RAM: 16GB DDR3 1600 Patriot Viper SSD: 256GB Samsung 850 PRO SSD HDD: Will add one soon. GPU: MSI GTX 750Ti 2GB (Low Profile) (http://amzn.to/2aqHnV3) PSU: ThermalTake 550Watt Screen: Tontec 7-inch screen GPU Selection Make sure that the GPU you decide to use will not only fit this case, but that it will have a feasible way to route its video signal internally to the screen. The GPU I used has its VGA output on a small ribbon cable that comes off of the GPU's main board. Find my GPU here: http://amzn.to/2aqHnV3. This is extremely helpful as, with the help of the male-to-male adapter listed above, it is able to plug directly into the screen's control board. Of course, other solutions can be used, but I found this to be the easiest way to go about it. Obvious Precautions As you can tell from a couple of the photos, my computer is a little more droopy and sagged than it started out. That is entirely my fault, as I allowed it to be exposed to Texas heat. I designed and built this slowly over the course of 11 months, involving my students in the process. The constant trekking back-and-forth really had a toll on the case, but it's honestly held up admirably. Heat from the computer itself has had no effect on the case (in fact, with the cooling the way it is, the system stays VERY cool overall). If you have to print this in PLA like I did, please be careful and don't let your computer melt in the sun like mine. Remix Information Portions of this were remixed from Teslaboy's mini-ITX modular case. This is because, just like the screen caddy, my original designs for the motherboard mount, backplate, and partial frame were accidentally deleted by our IT guy. (You can see a large part of my original layout mATX layout in the first video of my video series on this project.) UNLIKE the caddy, though, I hadn't yet printed my design. In order to speed up the project and to avoid making all of the same measurements again, I decided to download and remix Teslaboy's work-in-progress. I kept the overall shape (although it has been widened significantly to accommodate the low-profile GPU) as well as the mounting holes and standoffs. Everything else has been modified or replaced in some way along the way.
With this file you will be able to print "Ellie" m-ITX Computer Case v1.1 with your 3D printer. Click on the button and save the file on your computer to work, edit or customize your design. You can also find more 3D designs for printers on "Ellie" m-ITX Computer Case v1.1.