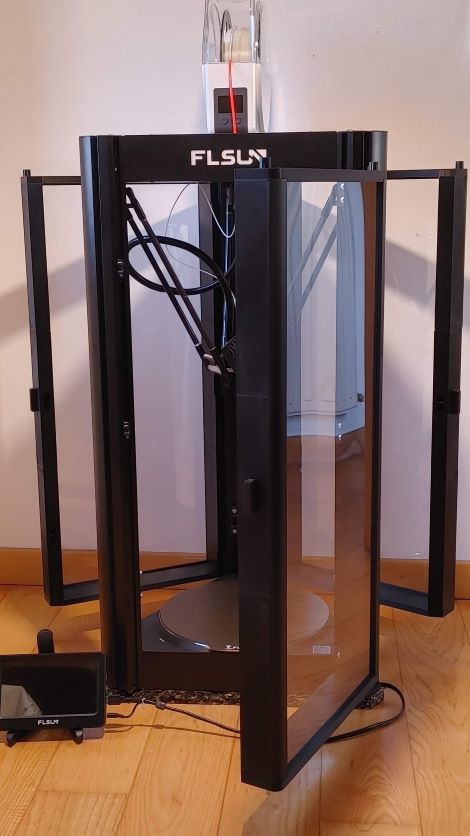
Enclosure FLSUN V400
thingiverse
The doors are symmetrical so they can be assembled with a right or left leaf as needed, by removing the cover of the printer columns to be able to insert the piece to connect the internal hinge on one side and the piece to block the door on the other. The transparency is in plexigalss 793 x 350 mm and 2.5 mm thick with anti-UV protection so that it does not turn yellow if kept outdoors; but if you keep it in a room you don't need UV protection so you save money on plexiglass. To connect the bases, as they have been designed to fit perfectly together, carefully use a rubber mallet, or if not available, do not hit the piece directly with the hammer but place a wooden guard on the piece. To connect and keep the door columns firmly in place, use a threaded rod with a diameter of 5 mm and a length of 830 mm (6 are needed: 2 for each leaf) The screws for the hinges have a flat head; you need 18 with a diameter of 4 mm and a length of 20 mm for the external hinge and 18 with a length of 15 mm for the internal hinges (if you don't already find them to size, cut the 20 mm ones). Use 3mm thick nuts (36 in all). To connect the door closures, use a screw with a diameter of 3 mm and a length of approx. 9 mm because it must go to reach and push on the column of the printer to block that piece. The nut is the one generally sold in the blister with those screws. It takes 9 of them. The inner and outer hinges connect with a 4mm diameter and 40mm long screw. It takes 9 of them. To assemble the doors, first connect the hinges to each other, then the external hinge to the door, then the internal hinge to the piece to be inserted in the printer column, then remove the top cover of the column and insert the piece that goes inside the column from above. column until the door is completely down. At this point take the distance from the ground that is needed to get the base flush with the triangle which is based on the printer plate and tighten the screws of the internal hinges. If by chance, while tightening the screws well, the door goes down, then print the 'Gomma_cerniere' piece with TPU shim and place it between the piece that goes inside the column and the internal hinge. In this way the TPU creates the right friction and prevents the door from falling. Then put the piece that blocks the door (you can mount three for each door so you are sure that the door adheres best to the printer column) and bring it to the right height so that it can enter symmetrically in the joint obtained inside the 'door element; then screw so that the latch is locked by the screw that pushes onto the printer column. The material for printing all the pieces is about 3.5 kg There are necessary about 20 hours for printing every door. If with this enclosure you have reached the result you wanted for your V400, you could donate a coffee (or as much as you like) to my account; thank you.
With this file you will be able to print Enclosure FLSUN V400 with your 3D printer. Click on the button and save the file on your computer to work, edit or customize your design. You can also find more 3D designs for printers on Enclosure FLSUN V400.
