Enclosure for Up 3D Printer
thingiverse
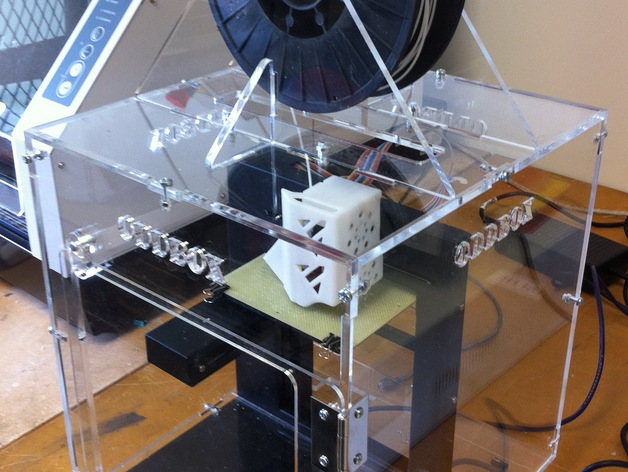
Introducing a laser-cut enclosure for the popular Up 3D Printer, designed to optimize print quality by eliminating drafts and maintaining an ideal printing environment. The enclosure also features a top-mounted reel holder. Two versions are available - one made from 4.5mm acrylic with M3 screws, and the other from 6mm acrylic (except for 3mm door and spacer) using M4 x 16 screws, star washers, and m4 nuts. Assembly requires 50mm Broad Butt hinges, M3 x 6 screws and nylock nuts for hinge installation, and M3 x 10 screws for enclosure attachment. A 120mm long 25mm dowel rod with acrylic spacers completes the reel holder setup. Olaf's detailed instructions ensure a hassle-free assembly process.
With this file you will be able to print Enclosure for Up 3D Printer with your 3D printer. Click on the button and save the file on your computer to work, edit or customize your design. You can also find more 3D designs for printers on Enclosure for Up 3D Printer.