Ender 2 Pro BLTouch
thingiverse
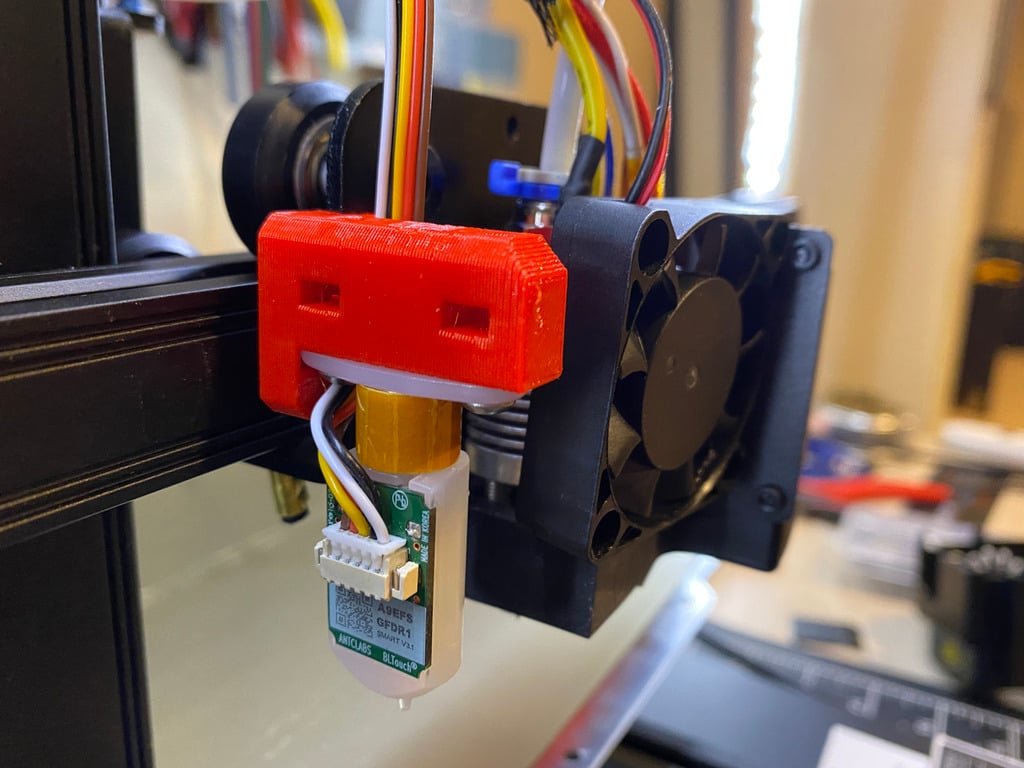
# Ender2Pro-BlTouch BLTouch bracket for the Ender2 Pro ## Installation This should work with the M2.5 nuts/screws provided with the BLTouch _or_ you can use M3 screws (with no nuts). Note: When using M3 screws, you will be tapping directly into the plastic. It works well and that is how I installed mine 1. Remove the Z-Sense plug from the board 1. Wire up the BLTouch to the 5 port header on main board The Brown and Black wires are both ground, you can join them to make wiring simpler I used a proper [JST from Amazon](https://www.amazon.com/dp/B06ZZ45G7G/ref=cm_sw_em_r_mt_dp_CYFAK1BVFZH8YKFFS9SW?_encoding=UTF8&psc=1) Marlin firmware should automatically detect the BLTouch. You will then need to calibrate the Z offset. On my machine the Z offset is -2.1mm Installing a BLTouch with this bracket will shift your X axis by 10mm. Creality [has not yet released](https://github.com/Creality3DPrinting/Ender-3/issues/76) official configuration files so you can compile a new config. Until they do you can modify the [reverse engineered configs from github](https://github.com/MarlinFirmware/Configurations/pull/633/files) Klipper configs can be found [in this repo](https://github.com/spuder/klipper-ender2pro/blob/main/printer.cfg) CAD Files available on github - **Github**: [https://github.com/spuder/ender2pro-bltouch](https://github.com/spuder/ender2pro-bltouch)
With this file you will be able to print Ender 2 Pro BLTouch with your 3D printer. Click on the button and save the file on your computer to work, edit or customize your design. You can also find more 3D designs for printers on Ender 2 Pro BLTouch.