Ender 3/3 Pro/3 V2 Dual Z-Axis Linear Rail
thingiverse
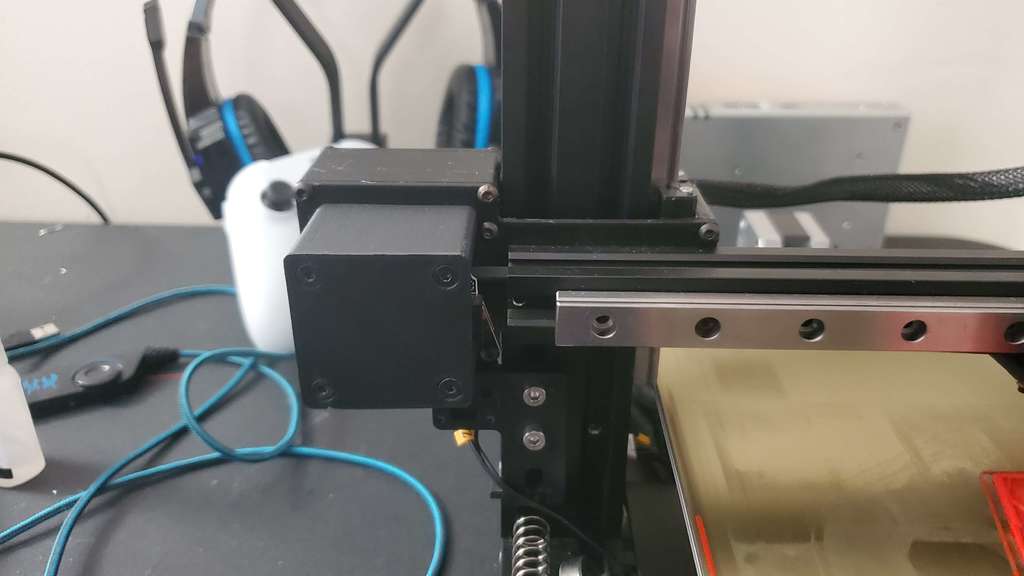
Edit to add mechanical gantry calibration blocks. 2 needed. Use them to space the linear rails from the top 2020 extrusion. This is designed to be used with direct drive. I am using a Biqu H2 extruder but it will work with others obviously. You must print at 100% infill. I used 0.2 layer height. This set up eliminates the need to recenter the build volume after installation. You can use it with a single z-axis stepper but I don't recommend it. It is vitally important you make sure the frame of your printer is as square and true as is possible to ensure bind free travel of the gantry. The spacing between the upright extrusions needs to be 250-251mm. The X axis stepper motor needs to be mounted with the wires facing out as pictured. Hardware needed: x32 m3x8mm x4 m3x10mm (lead screw nuts) Once you have everything installed the gantry needs to be squared to the bottom legs of the printer before you attempt to tram the bed. I remove the screen and bring the gantry down on a pair of 100mm uprights I printed but you can use any method you want as long as both sides are equal. After levelling the gantry, use the move menu to travel the Z axis all the way up and back down then measure it again. Keep adjusting until it stays level. The Z end-stop will need to be relocated as pictured.
With this file you will be able to print Ender 3/3 Pro/3 V2 Dual Z-Axis Linear Rail with your 3D printer. Click on the button and save the file on your computer to work, edit or customize your design. You can also find more 3D designs for printers on Ender 3/3 Pro/3 V2 Dual Z-Axis Linear Rail .