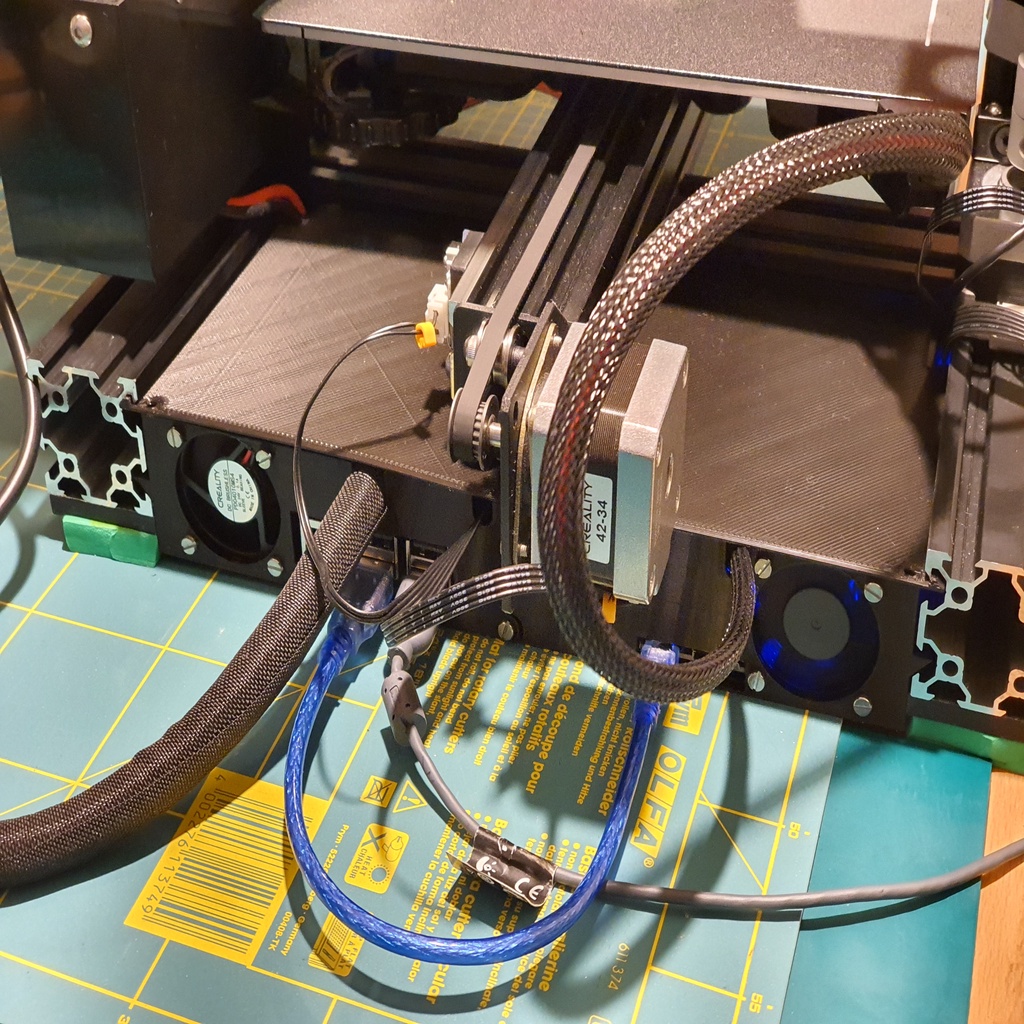
Ender 3 all in one rear electronics case with 2 40mm fans in the back
prusaprinters
<p>Edit: Added electrical schematics</p> <p>This is a remix of original TeachingTech's <a href="denied:%E2%80%9Dhttps://www.thingiverse.com/thing:3688967%E2%80%9D">All-in-one rear case</a> and surenz'es <a href="denied:%E2%80%9Dhttps://www.thingiverse.com/thing:3725682%E2%80%9D">OrangePI box</a>.</p> <p>I liked how surenz placed the two 40mm fans in the back. This way the airflow is really good and the fans are not facing upwards so no problem with falling something into it.</p> <p>Also, the extra 10mm height of the box adds more room for cables inside and better airflow. As in surenzes case, that extra box height requires some stand-offs under the machine. I use a piece of vibration isolation foam.</p> <p>I modified his design to fit regular Ender 3 (Pro) electronics (in my case BTT SKR mini E3) and regular RasberryPI (in my case 3B+).</p> <p>As an addition, there are 2 mounting places for LM2596 DC/DC converters and 1 mounting place for<strong>proper 30A</strong> relay YYG-2 (5V version).</p> <p>I redrew the whole design in OpenSCAD because I had problems with converting surenzes STEP files. If you are comfortable with SCAD, feel free to modify the design to your needs.</p> <p>You can find here 2 versions of the left box. I use the one with extra cutout above RPi for a cable bundle going to my DDE.</p> <p>Also the right lid has smaller cutout because I did not need bigger. You can also use the original one from TeachingTech.</p> <p>You can use two 40x40x10 fans at 12V or 24V. 12V version you can just wire in series. For now I use original Ender's 3 24V fans with extra resistors to reduce the speed and noise. Most likely will replace them with Noctua or something similar in the future.</p> <p>The right fan is blowing in, the left one out. The airflow is just great. The motor drivers are not heating much and RPi is 40degC under load (with no cooling it went up to 60degC).</p> <p>Regarding wiring, as I already mentioned, I use 30A relay to switch the controller board, because the current during heatup goes easily beyond 15A.</p> <p>To improve safety, I also have an in-line fuse (1A) at the input of the DC/DC converters, because that cabling and electronics could easily burn with 300W power supply if a short would happened.</p> <h3>Print Settings</h3> <p><strong>Printer Brand:</strong></p> <p>Creality</p> <p class="detail-setting printer"><strong>Printer: </strong> <div><p>Ender 3 Pro</p></div> <p><strong>Rafts:</strong></p> <p>No</p> <p class="detail-setting supports"><strong>Supports: </strong> <div><p>No</p></div> <p><strong>Resolution:</strong></p> <p>0.2</p> <p class="detail-setting infill"><strong>Infill: </strong> <div><p>20%</p></div> </p></p></p> Category: 3D Printer Parts
With this file you will be able to print Ender 3 all in one rear electronics case with 2 40mm fans in the back with your 3D printer. Click on the button and save the file on your computer to work, edit or customize your design. You can also find more 3D designs for printers on Ender 3 all in one rear electronics case with 2 40mm fans in the back.
