Ender 3 (all versions) Z braces
thingiverse
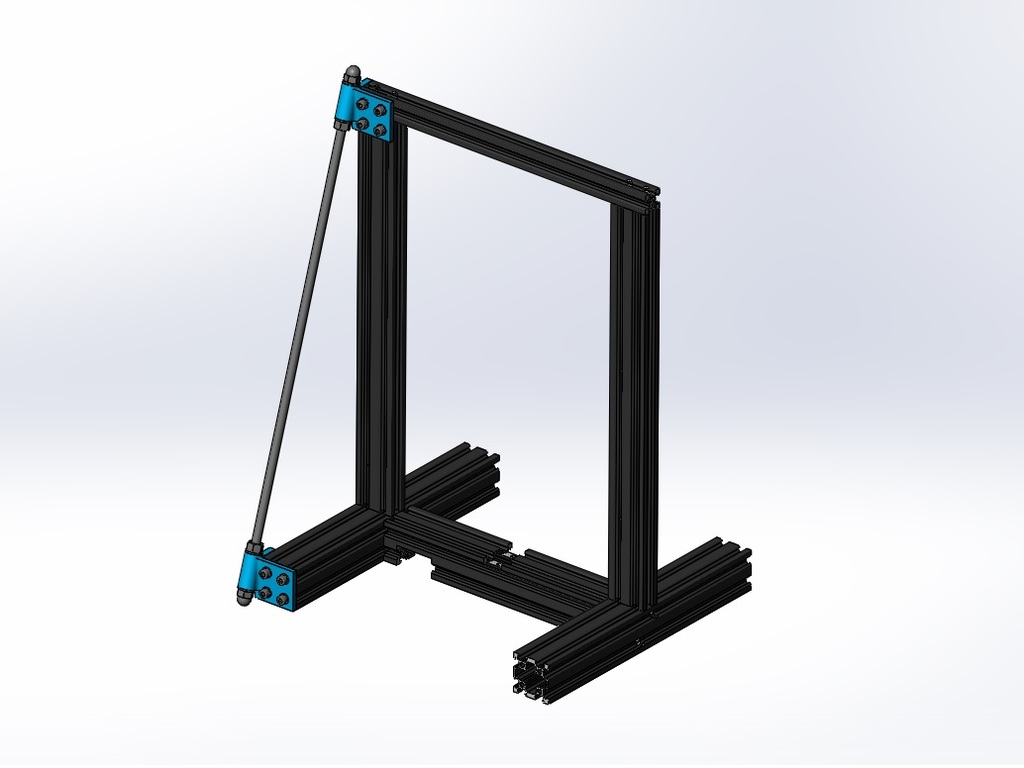
! Be aware: Ender 3 z-height is reduced with this mod ! This helped me to get my Ender 3 Pro noticeably more rigid. Also, moving the filament spool down onto the base frame helped to reduce vibration. See "Makes" for a picture of the complete setup. You need the following parts: - 2x Bracket - 2x Bracket (mirrored in Slicer) - 24x M5x10 screws (e.g. ISO 7380) - might be a bit overkill ;-) - 24x M5 washers (e.g. DIN 125) - 14x M5 T-nut - 2x M8 x 495mm threaded rod - 4x M8 cap nut (e.g. DIN 1587) - 4x M8 nut (e.g. DIN 934) - 8x M8 washer (e.g. DIN 125) The brackets print best standing upright. Enable support material "touching the build plane". If your Ender 3 is built square, the M8 threaded rod will line up perfectly with the upper and lower bracket. If not, then you can put some aluminium foil under the vertical beams to adjust for any misalignment... When everything is aligned, install the M8 nuts and wahser as shown in the pictures (see make and CAD screenshot). Only lightly tighten the cap nuts; you don't want to introduce tension in the system and mess with the 90° angle between the vertical and horizontal frame elements. Instead hold the caped nuts static and counter torque them with the nut on the other side of the 3D printed bracket. Repeat this for all four brackets.
With this file you will be able to print Ender 3 (all versions) Z braces with your 3D printer. Click on the button and save the file on your computer to work, edit or customize your design. You can also find more 3D designs for printers on Ender 3 (all versions) Z braces.