Ender 3 BMG V6 clone with creality fans
thingiverse
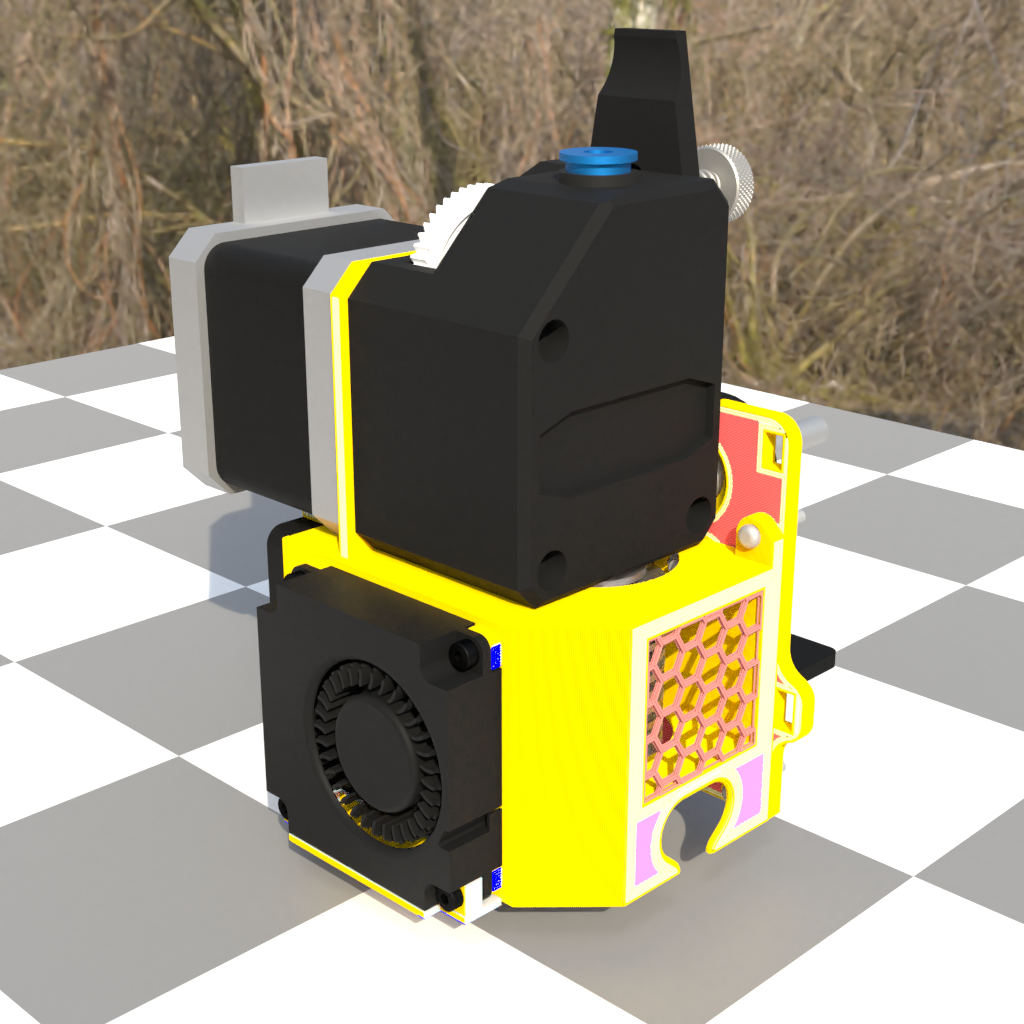
I no longer have my Ender3, but I've been using it for a week or more, and here's what I think: The cover is too big; I could remove that part easily and move the mounting points for the part cooling fan to the main part. The hot end would be more accessible, and there's no need to cover it so much. On the other hand, the cover could be mounted with neodymium magnets. The hotend cooling fan needs a cover; I accidentally damaged mine with a screwdriver too easily. If you're as clumsy as me and damage your fan, you can exchange it for the motherboard cooling fan. Here's an assembling animation: https://youtu.be/WVlCcw_Ls6A - It's an older version but still works. This is my attempt at a direct drive Ender 3 with a clone BMG (Fysetc) and a clone V6. I accidentally bought the V6 without a fan, so I decided to make this with original fans. This is my second iteration of this project, and changes are based on flaws that I found in the first printed version that I've been using for several days. The nozzle is about 8-10mm before the printer bed, making printing Y axis "shorter" by that value. This problem can be "fixed" by moving the printing surface, changing the home offset in firmware, or just some slicer tweaks. With a standard motor, you'll need a new X endstop housing part. *Updated with a new fan duct, lid part, and some minor tweaks.* The "GrillPart.stl" is supposed to be a modifier part of LidPart in your slicer. With this, you can make the cover with an infill pattern. If you add a part to the lid in PrusaSlicer, then GrillPart should be placed automatically in the right place. In other slicers, you'll need to move that modifier to the right place manually. Then, you can rotate the whole thing to the right orientation. After that, set per-model settings of GrillPart to 0 or 1 perimeter without top and bottom, and adjust the infill. For this mod, you'll need additional screws. * For cooling fan: * - 2 x M3x12 + 2 x M3x19 OR 4 x M3x12 * M3x19 will better hold the "lid" part from the side. * For "lid" front side: * - M2x(+9) with nuts * OR * - M3x(+9) with nuts * Holes are 3mm because I thought that would be better, but my M2 screws work fine and they're smaller, so I used them. Check the head size of your M2 screws or change hole size. * For main part: * - threads of original heatsink: M3x12 with nut * optionally two screws with nuts, more info below * - thread of original hotend housing (looking frontside left one): M3x9 * for second thread, you can use the original screw * For new X endstop housing: * - M3x19 * it's possible to use a longer screw but that requires modification in model Isolation cotton from the upper side of heatblock may be required! The original blowing fan duct works. The fan is mounted with original Ender 3 screws. This cable chain https://www.thingiverse.com/thing:2920060 will work with this design.
With this file you will be able to print Ender 3 BMG V6 clone with creality fans with your 3D printer. Click on the button and save the file on your computer to work, edit or customize your design. You can also find more 3D designs for printers on Ender 3 BMG V6 clone with creality fans.