Ender-3 Control Box - MKS GEN-L - MOSFET - Buck Converter -Pi Zero W
thingiverse
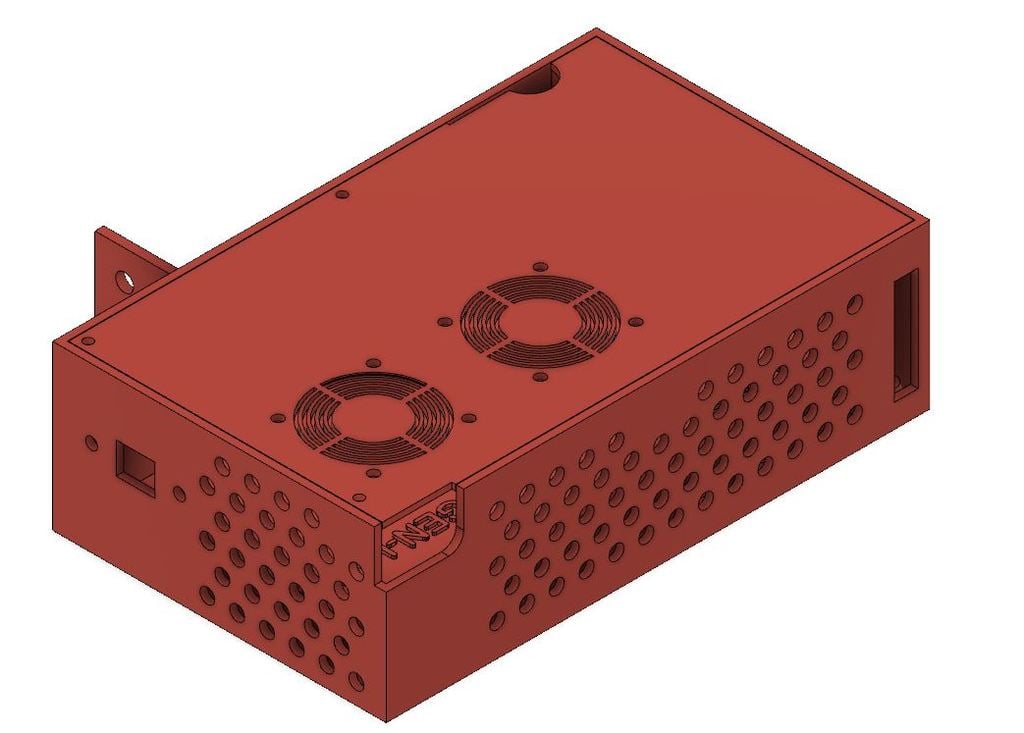
*UPDATE* 11/6/2018 - Due to a lot of feedback on the factory wires not being long enough, I went ahead and modified a version of the box that has the MOSFET and GEN-L board flipped. Because of the this, the Pi Zero W mount is in the front of the box now. When using the MOSFET, you will more than likely need to extend power supply wires. The swapped version STLs are: Control_Box_Flipped_Buck_Wall_Left_Lid.stl and Control_Box_Flipped_Buck_Wall_Left_Tab.stl *UPDATE* 10/17/2018 - Well it's been a long time coming but I can finally say that this box is ready for production. I have spent countless hours making sure that everything is correct and to make sure this is the most useful Control Box available on Thingiverse for the Creality Ender-3. With the help of an outstanding Thingiverse member (ReefBum), I was able to transform this box into a BEAST. I did a complete overhaul of the box and as you can see, the interior has changed a lot! This box, which is slightly larger than stock, has the ability to house: • MKS GEN L • MOSFET • Buck Converter (x2) • Raspberry Pi Zero W The base of the box will house your MKS & MOSFET boards, the side wall will house your buck converters and finally the Raspberry Pi Zero W will be mounted on the lid. And before anyone comments or complains, I did try and fit the Model B+ but it did not fit. If the Pi Zero doesn't fit your needs, there are a lot of Pi 3 boxes that can be used. *NOTES: A few have commented that they had to extend some of the wires because the GEN L board sits further forward, others have said they didn't. Your millage may vary with this.* *UPDATE* 10-10-2018: I have uploaded new control box & lid files after some needed adjustments based on user feedback. I moved the mounting point on the box so there is no longer a need for the frame extender piece. I adjusted a few hole sizes to allow for a little more wiggle room and lowered the box height by 2mm. This should allow for better clearance. I also added a notch out of the top right corner so that the box does not interfere with the cap head screws on the Y axis. There are also two (2) different versions of the box. If you want to install it in the factory location, please use the files marked "LEFT" and if you want to install the box on the right portion of the frame, please use the files marked "RIGHT" The boxes ARE different and not meant to be interchangeable! *UPDATE* 10-03-2018: I added another StL file for a control box that features two (2) MOSFET areas. The buck converter area was removed from this box. Now you'll have the choice of whichever you want to use. The new STL file is named: Control_Box_MOSFET2X I have been working on this control box for the Ender-3 for a couple weeks now. It went through multiple design changes during that design period. I am now happy will the final design of this box! Besides printed parts, hardware need to complete: Lid: (Button Head Screws ONLY) Six (6) - M3 6mm or 8mm Button Head Screws Eight (8) - M4 8mm Button Head Screws Inside Box: All Boards: M3 4mm Button or Cap Head Screws Fans: https://tinyurl.com/NTE-40mm USB Type-B extension Cable: https://tinyurl.com/CB-extension Boards I am using: Control Board: https://tinyurl.com/MKS-GEN-L-AE https://tinyurl.com/MKS-GEN-L-AM MOSFET: https://tinyurl.com/MOSFET-AE https://tinyurl.com/MOSFET-AM Buck Converter https://tinyurl.com/Buck-AE https://tinyurl.com/Buck-AM
With this file you will be able to print Ender-3 Control Box - MKS GEN-L - MOSFET - Buck Converter -Pi Zero W with your 3D printer. Click on the button and save the file on your computer to work, edit or customize your design. You can also find more 3D designs for printers on Ender-3 Control Box - MKS GEN-L - MOSFET - Buck Converter -Pi Zero W.