Ender 3 Enclosure
thingiverse
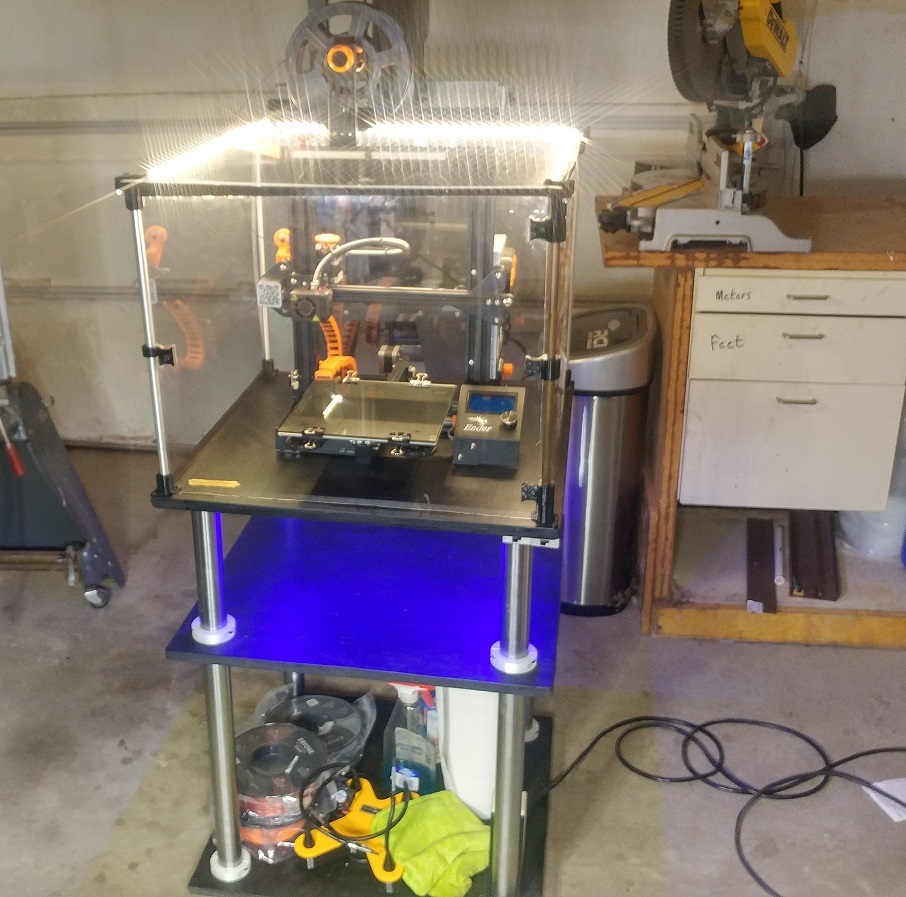
I'm going to need some ABS 3D printed parts in an upcoming DIY go-kart series, so I decided to make an enclosure for my Creality Ender 3. Being unsatisfied with both the cost and quality of available options on the market, I set out to DIY my own enclosure as cheaply and as skookum as possible. You'll need something for a base. I used a 2'x2'x3/4" piece of plywood. You want something stiff so the enclosure doesn't wobble from the movement of the printer. Use some of your favorite 1/2" OD tubing for the corners of this enclosure. Aluminum tubing is pretty good as far as $/effectiveness goes. It's rigid enough that things don't wobble and pretty light so the enclosure doesn't end up top heavy. Print four corner brackets and four hinge brackets. You'll also need two corner caps and two hinge caps. These will hold the 1/2" tubing upright and hold your favorite cladding (that you'll use as the roof) down. The brackets themselves hold the cladding for the three not-door and not-top sides. I used lexan, cut into 18x22 rectangles but you could use whatever...like even cardboard. Those dimension were plenty big enough to hold my CE3, any future upgrades I may do, and have room to work in the enclosure. I used 10-24 screws and nuts because that's what I had on hand, but any ~4-7mm screws and matching nuts will work. Heck, you probably don't even need the nuts. Next you'll need to print at least two hinges, but I chose three to stiffen the door. Also a door knob and latch, but I think you could get away without those if you had to. If you want an airtight enclosure you'll need to cut away little notches where the hinges are, otherwise you'll have a ~2mm gap but that isn't too bad...just enough to provide an inlet for negative pressure if you want to print ABS... If you go with the door knob and latch you will need to cut two additional notches, one in the door for the knob, and one in the adjacent panel for the latch. These aren't optional unfortunately (if you want a door...you want a door right?); without them the latch interferes with fitment of the cladding. Finally if you want to add LEDs, you'll need to print 2 corner height extenders, 2 hinge height extenders, and how many ever LED spacers for your size of enclosure. I needed 12 to do all four sides of ~2ft cubed enclosure. These just clip/slide on to the top of the lexan and are the same height as the extenders. I used a bit of superglue to ensure their permanence but that's optional. I modelled and printed a mount for some simple switches I had laying around as well as an enclosure for the guts of some wall-wart power supplies to keep everything tidy. You can find those linked around here somewhere. Most of the materials I had were from previous projects or were scrounged from around the shop. I ended up out about $100 after the lexan, spray paint, and tubing, so about $150 less than an equivalent enclosure which didn't even come with a stand! I designed all the 3D printed components with exception of the collars which were obtained using everyone's favorite McMaster-trick then modified to fit my screws. Cheers, pals.
With this file you will be able to print Ender 3 Enclosure with your 3D printer. Click on the button and save the file on your computer to work, edit or customize your design. You can also find more 3D designs for printers on Ender 3 Enclosure.