Ender 3 Extending Camera Arm
thingiverse
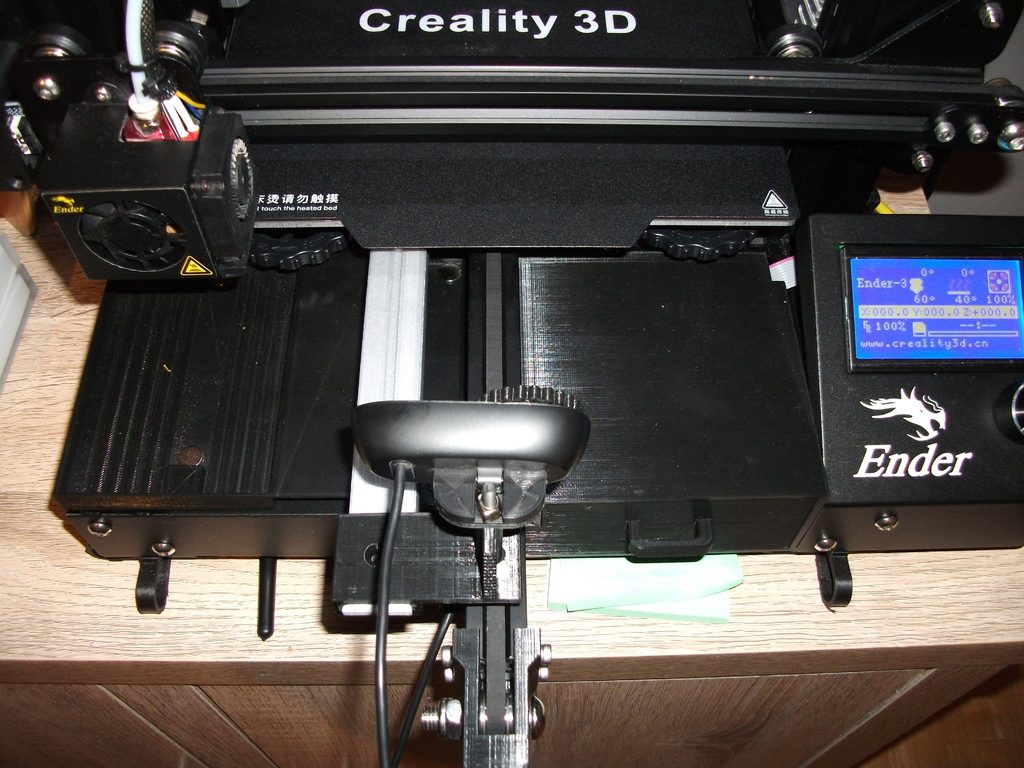
See update below. I've been using a camera mount on the bed handle (Thing 3077545) for a few weeks now and, whilst I love the design, I noticed that the handle started to sag - presumably under the weight of the camera. A second niggle was that the camera was very close to the bed, which is fine for small items, but anything large would go out of frame during the printing. I had previously looked at the mount devised by one_2_three, because I liked the way it bolted to the frame and didn't rely on the stability of other stuff. My original plan was to simply adapt my existing camera mount to fit that. But then I thought it would be quite nice to be able to extend the distance from the bed to accommodate those extra tall prints. I still can't get stl files to import into my ancient Sketchup 8. So remixing stuff is a bit of a pain for me: I had to print a copy of one_2_three's original clamp, along with an extremely flattened version of the mounting arm, just so I had something to draw from. Because of the C270's offset lens, I wanted the arm to the left of the Y-axis. But I couldn't get the reversed arm to fit on the frame without fouling. So I completely redesigned the clamp and the arm's mounting area to allow more flexibility in its location on the carriage. The next issue was fouling of the bed adjuster wheel. I had already reduced the clamp thickness as part of my redesign, and I didn't want to take any more off. So I printed a small spacer washer that slips on above the adjuster wheel, and provides enough clearance (see pics). I eventually plan to have a much more adjustable camera holder on the end. But I'm just using a simple adaption of my earlier design for now, whilst I refine the idea I have in mind. The stl files will need rotating for optimum print position. The only part that I had to print supports on was the main bracket - simply because I couldn't find a support-free orientation for it. This left me with a slightly ragged mating surface but, as it's concealed in the slider tube, it's not really important - and it does help provide a little useful friction when adjusting the arm. The cutout at the end of the bracket is to take a T-nut, as is the one on the camera mount (which I haven't yet got around to putting a bolt through!) The carriage nuts and bolts came out of my junk bin, and I think they are old imperial BA sizes. But I'm sure you'll find a metric nut and bolt in your own spare hardware that'll do just as well. Happy printing! ________________________________________________ UPDATE 11/10/2018 I noticed that the heat from the bed started to cause sagging issues on this arm too. To combat this, I've added a version of the design that accommodates a small metal rod in the load carrying member, and continues a short way into the clamp. Depending on your print settings, the hole in the clamp may break into the surface of the print. This will not affect its performance in any way. I used a short length of threaded rod I had 'kicking about' in my workshop. I've had it in place for quite a while now, with no sagging issues (apart from my waistline!). So I think I can pronounce it a "success".
With this file you will be able to print Ender 3 Extending Camera Arm with your 3D printer. Click on the button and save the file on your computer to work, edit or customize your design. You can also find more 3D designs for printers on Ender 3 Extending Camera Arm.