Ender 3 Extruder Tensioner
thingiverse
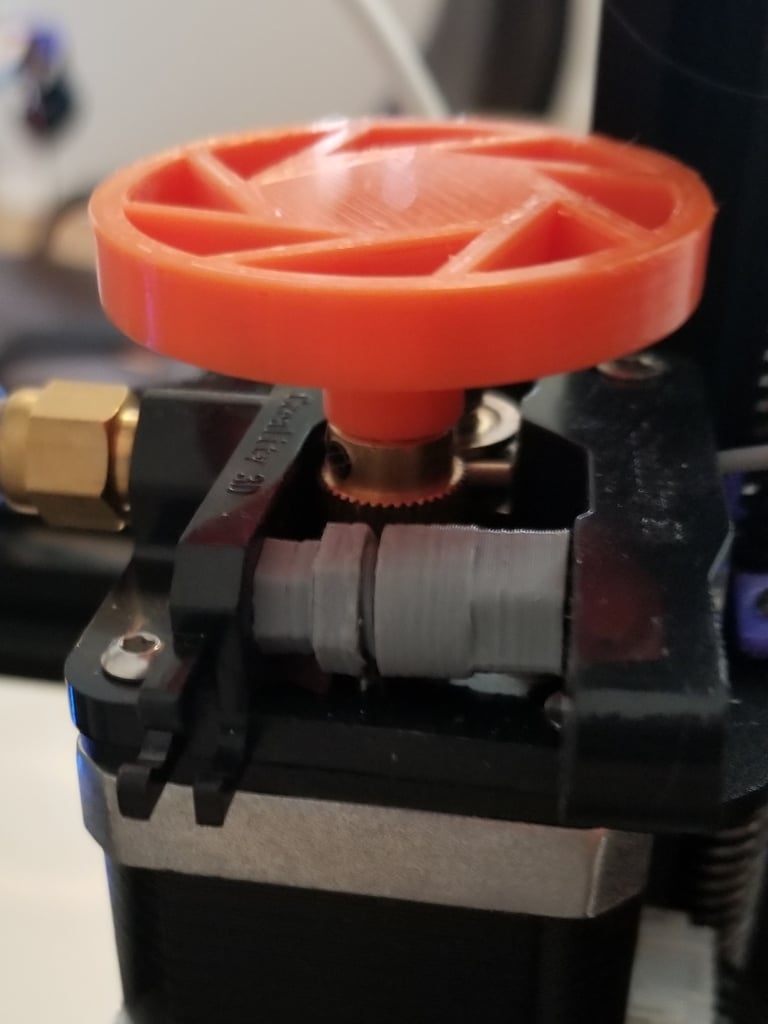
Update I recommend using my newer design which allows the use of a spring, helping the tensioner to work better: https://www.thingiverse.com/thing:3529205 -- This is an threaded extruder tensioner to help with more consistent extrusion on your Ender 3. It's made to replace the spring on the extruder. You slip it in place of the spring and now can directly control the tension via the threaded mechanism! You will need 7 & 9mm wrenches to adjust it. I included a lock nut here, but I haven't used it or found it necessary in 2 months of printing. Recommended print settings: Layer height: 0.2mm Infill: 60-80% Orientation: threads facing up (the elephant foot / bed expansion can make them hard to fit, so print them with end of threads facing away from the bed) Sizing: I found that 101% in x and y for the sleeve and nut really helped with fitting. As in, don't make the threads longer, but make all the internal threads a slightly larger circle. Support: I printed with a raft and no direct support otherwise. The raft helps with expansion where the parts meet the bed. Installation: Clear up burrs and loose plastic on end surfaces. Heat up the nozzle and remove filament from extruder, cool extruder (or leave it on if you can be safe and plan on calibrating after). Loosen the tensioner arm until it can move upward a good deal. Remove the spring. Tighten the tensioner all the way to make it as compact as possible (should be about ~19mm) before fitting. Careful not to overtighten or the bolt can snap. Fit the tensioner on both indents. Push the arm back down and ensure there's enough space to refit filament. If you can refit filament then tighten the arm back down. Fit filament. Expand the extruder in steps, after try feeding / unfeeding filament to examine how well it's grabbing. Lock the lock nut at desired fit. Ensure you calibrate the extruder after as you will probably extrude more filament now that you're not having slippage. --- This blog has a picture of what good tension looks like on filament that's been fed: http://thrinter.com/tiko-part-2-first-prints-and-adjusting-the-extruder-tension/ My ender barely would make visible marks on the filament. If you're having extrusion issues make sure your tension arm isn't overtightened. This can cause the issue. Unfortunately for me my original spring appeared to be very soft steel. The tension would degrade over time until I could barely print.
With this file you will be able to print Ender 3 Extruder Tensioner with your 3D printer. Click on the button and save the file on your computer to work, edit or customize your design. You can also find more 3D designs for printers on Ender 3 Extruder Tensioner.