Ender 3 EZ Vent Upgrade (Uses Stock Fan)
thingiverse
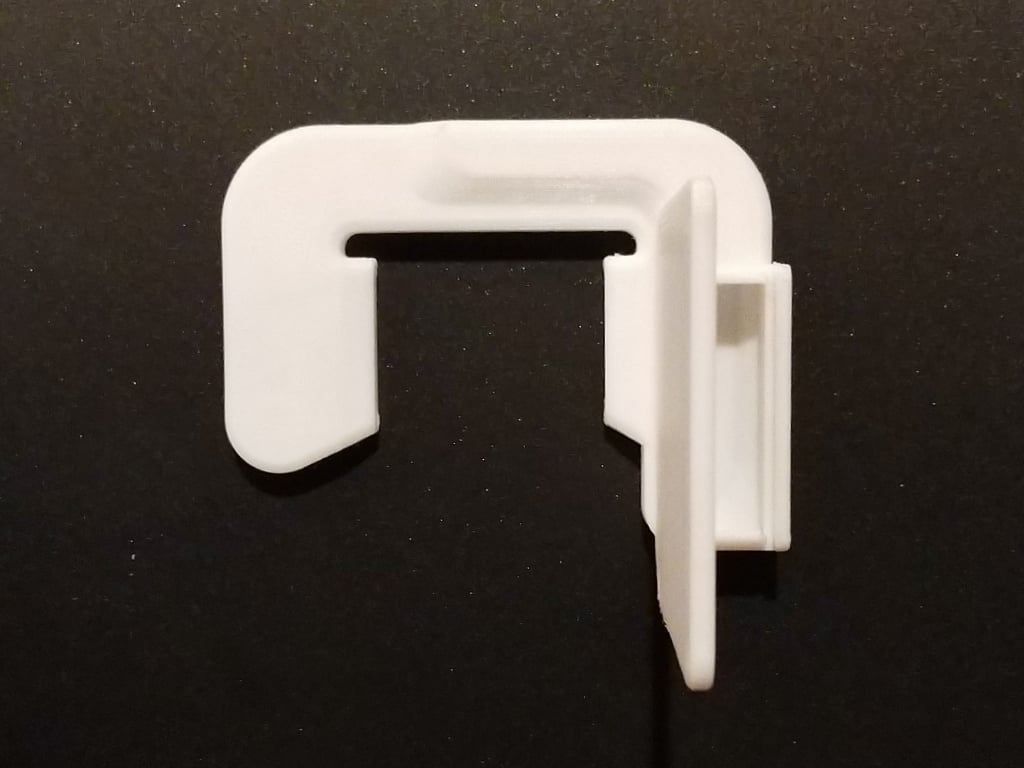
This upgraded vent nozzle for the Ender 3 features high volume, dual opposed crossing flow. This flow type creates maximum turbulence, targeted at the nozzle to cool the filament quickly and is a huge upgrade to the stock air diverter. I designed this to be able to print easily with no supports. There is some challenging bridging on the top of the duct, so you might want to print one, and then print a second after you install the first one. Some small features will print best at 0.1mm, but I have printed it successfully at 0.2mm in about an hour. This vent keeps the plastic far enough away from the hot end to not have to worry about melting or warpage like some of the other upgraded fan vents suffer from. It directs the air below the hot end at the filament itself for maximum cooling. The dual nozzle design means your parts will cool evenly from all sides. To install the vent, remove the 4 fan screws and slide the vent behind the fan. Reuse the same hardware to finish the install. There are 2 different length screws so make sure to use the longer 2 screws in the bottom hole locations. You may need to loosen the 2 screws holding the metal fan frame to make sure the bottom of the vent is parallel with the build plate. It is possible that the vent may rattle against the metal frame. To prevent this either adjust the vent slightly downward by loosening the fan screws or place a small piece of electrical tape or similar on the far side of the vent where it contacts the metal frame.
With this file you will be able to print Ender 3 EZ Vent Upgrade (Uses Stock Fan) with your 3D printer. Click on the button and save the file on your computer to work, edit or customize your design. You can also find more 3D designs for printers on Ender 3 EZ Vent Upgrade (Uses Stock Fan).