Ender 3 Lightweight DD Overhaul & Linear Rail
prusaprinters
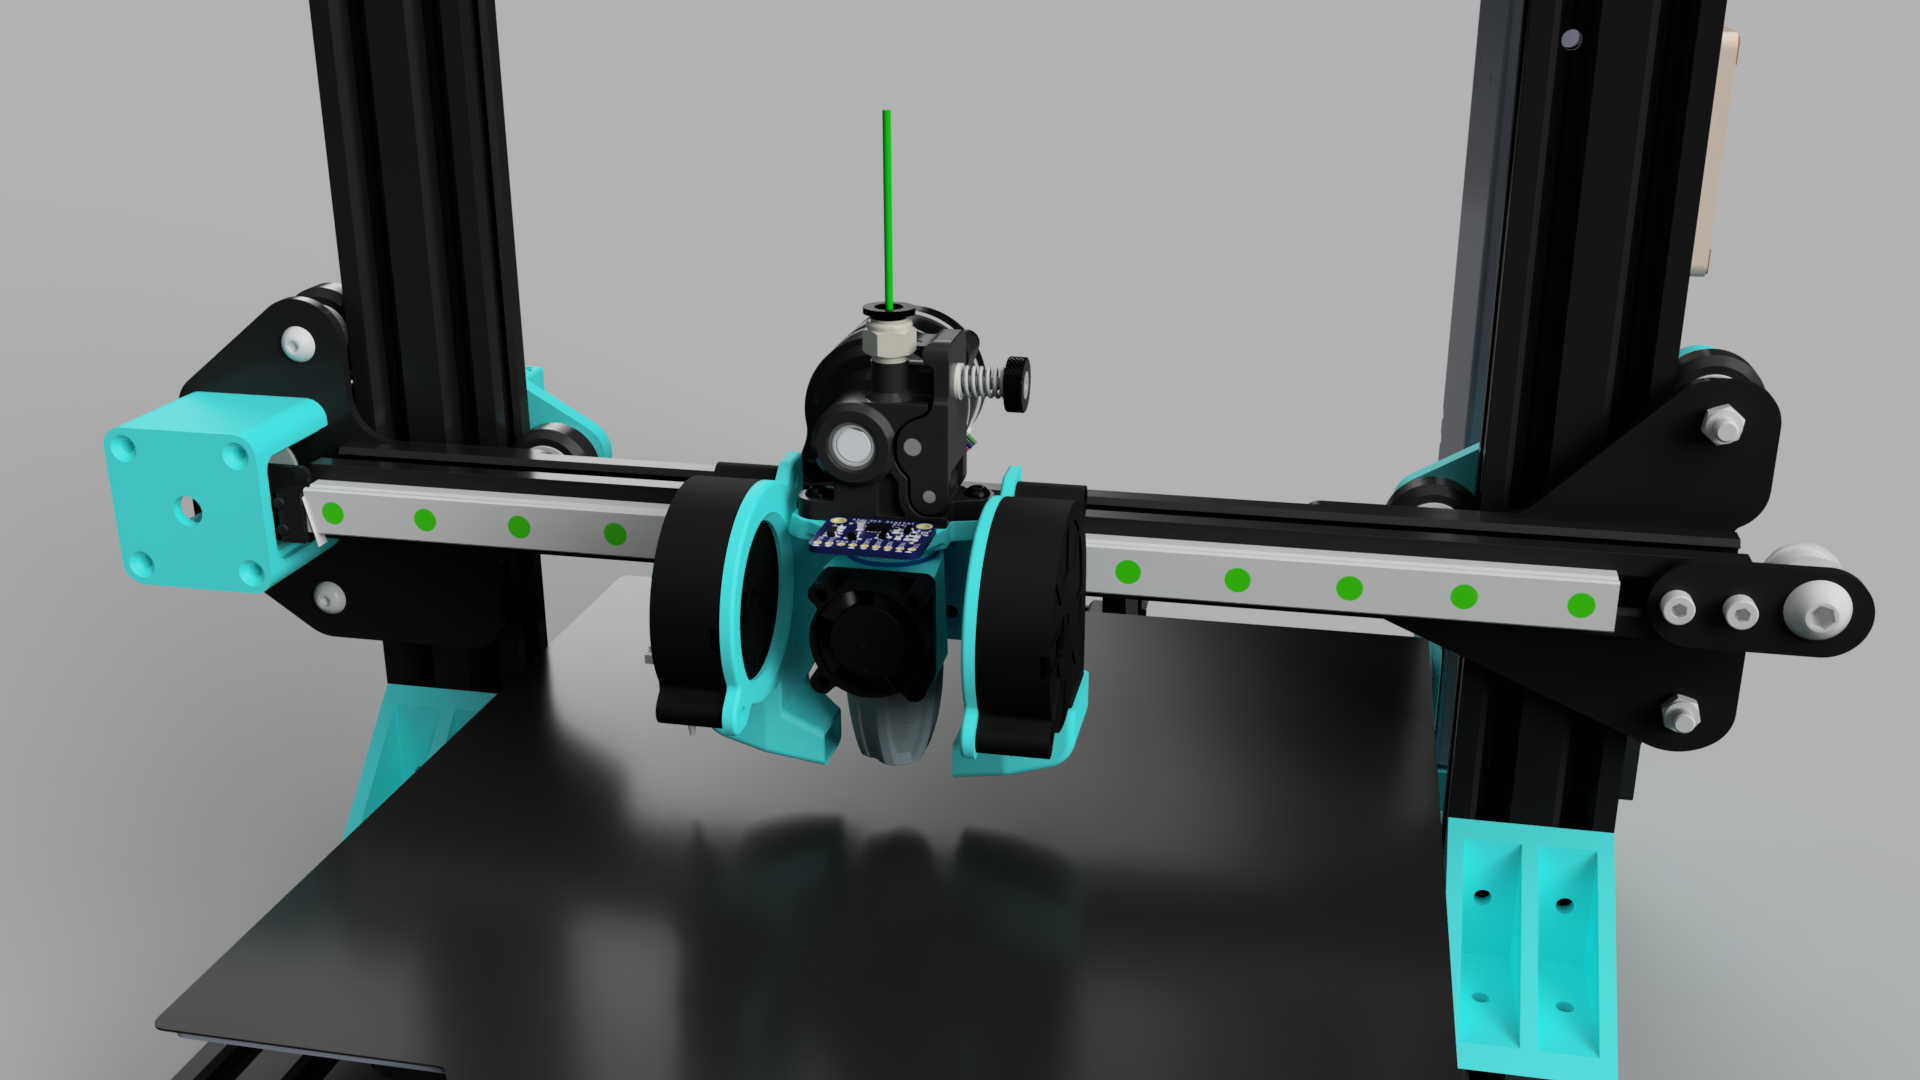
<p>This is my complete overhaul for the Ender 3's X axis. I used this to get my (currently) world record bedslinger #speedboatrace benchy at only 4m 48s.</p><p>After trying other people's designs and having issues or bad performance as they always lacked something or another, I finally decided to design my own X axis system.</p><p>I managed to push my printer up to 40kmm/s^2 accelerations at 360mm/s, with the bottleneck being my E3D High Torque steppers (I don't recommend, buy LDO 2504AC instead).</p><p>I'll be sharing the STEP file along with the STLs, and I would love to see the community's upgrades for my design!</p><p>This project requires:</p><p>Tools:</p><ul><li>Soldering Iron / Insert Tool</li><li>Hex keys</li><li>Pliers</li><li>Tubing cutter / exacto knife</li></ul><p>Hardware & Parts:</p><ul><li> MGN12H 300mm rail</li><li>Phaetus Rapido HF Hotend</li><li>28mm PTFE tube</li><li>Orbiter v1.5 (might upload other versions for other extruders in the near future)</li><li>2x 5015 blower fans (I use 12v GDSTime fans, they run great at 24v and move a lot of air)</li><li>25x10mm fan or 40x10mm fan (25mm is lighter and more than enough cooling for the Rapido)</li><li>BLTouch (Not required)</li><li>ADXL345 Accelerometer (Not required)</li><li>2x M3*6mm screws (for the accelerometer, not required if not using one)</li><li>15x M3*8mm screws</li><li>4x M3*10mm screws (2 of which for the BLTouch, not required if not using one)</li><li>2x M3*14mm screws</li><li>4x M4*18mm screws</li><li>4x M2.5*8mm screws (Included with the Rapido Hotend)</li><li>2x M3 Nuts</li><li>6x M3 inserts (Designed for these: <a href="https://www.aliexpress.com/item/1005002615923810.html">https://www.aliexpress.com/item/1005002615923810.html</a> OD 4.2mm H3mm)</li></ul><p>Printed Parts:</p><ul><li>Mount</li><li>Duct L</li><li>Duct R</li><li>25mm Fan Duct / 40mm Fan Duct, according to your hotend cooling fan size</li></ul><p>Print settings and orientation:</p><p>I recommend 25% Gyroid infill, 4 walls (+ alternate extra wall for mount), no supports, 0.2mm layer height, 0.5mm line width.</p><ul><li>Mount: Align to this specific face:<img src="https://media.prusaprinters.org/media/prints/128229/rich_content/6d4d9674-5ec5-4c22-8646-5631eff6b105/screenshot-2022-02-02-101153.jpg#%7B%22uuid%22%3A%2236aaa23a-a163-4429-96d5-6dc044be8e5e%22%2C%22w%22%3A1295%2C%22h%22%3A897%7D"></li></ul><figure class="image"><img src="https://media.prusaprinters.org/media/prints/128229/rich_content/8c8195fc-a7ce-4c8b-ba42-d4eef8ff4c69/image.png#%7B%22uuid%22%3A%224134277c-6dbd-4b73-aafd-b14b4f0c9cb1%22%2C%22w%22%3A710%2C%22h%22%3A727%7D"></figure><ul><li>Ducts L and R: <img src="https://media.prusaprinters.org/media/prints/128229/rich_content/43bc318e-353e-4390-b932-4b5b5f2d0c9d/image.png#%7B%22uuid%22%3A%227ab60694-8db6-4c11-8a72-18aab5a78ea1%22%2C%22w%22%3A999%2C%22h%22%3A850%7D"></li><li>25mm / 40mm duct: <img src="https://media.prusaprinters.org/media/prints/128229/rich_content/d1fd9894-d2bc-423a-8f96-730bd0eafaf2/image.png#%7B%22uuid%22%3A%226eaad28b-58ae-41f0-bec7-b6f795679657%22%2C%22w%22%3A1009%2C%22h%22%3A866%7D"></li></ul><p> </p><p>Build instructions: </p><ul><li>Insert 6 M3 inserts to the Mount at these points: <img src="https://media.prusaprinters.org/media/prints/128229/rich_content/4baf56df-6387-4927-b57e-e78b9f592c14/image.png#%7B%22uuid%22%3A%223a24e84f-57cf-43c5-84a0-32d783e3669a%22%2C%22w%22%3A1347%2C%22h%22%3A957%7D"></li><li>Cut out the built-in supports for the belt slots: <img src="https://media.prusaprinters.org/media/prints/128229/rich_content/c7cfd164-b4fd-4396-bf73-dcca07fd53b2/image.png#%7B%22uuid%22%3A%2232336911-e22d-4729-bf9d-3f2fb025ea10%22%2C%22w%22%3A1166%2C%22h%22%3A1026%7D"></li><li>Mount the linear rail to the front of the 2020 extrusion. You can use every second screw hole:</li></ul><figure class="image"><img src="https://media.prusaprinters.org/media/prints/128229/rich_content/d0f077a3-7579-419c-ad28-a721fffe6dfd/screenshot-2022-02-02-100723.jpg#%7B%22uuid%22%3A%22f336725b-dd33-4895-9de1-464473918b9f%22%2C%22w%22%3A1773%2C%22h%22%3A622%7D"></figure><ul><li>Mount the Mount printed part to the linear rail using M3*8mm screws and connect the belt (red): <img src="https://media.prusaprinters.org/media/prints/128229/rich_content/03d3f5a5-bccd-4161-bce1-dab51987c401/image.png#%7B%22uuid%22%3A%22d934e2b9-a886-4a3c-94a6-4b3468ccec58%22%2C%22w%22%3A970%2C%22h%22%3A675%7D"></li><li>Mount the hotend fan to your desired duct (25/40mm with 2x M3*14mm screws) and put in on the Rapido: <img src="https://media.prusaprinters.org/media/prints/128229/rich_content/b5c93adc-7d41-49b3-9591-2ab40d86f485/image.png#%7B%22uuid%22%3A%22cf47b2f6-9662-4b53-8a46-d0445ae99186%22%2C%22w%22%3A1126%2C%22h%22%3A857%7D"></li><li>Mount the Rapido hotend and cooling fan using 4x M2.5*8mm screws. make sure the cable is going in the direction as shown in blue:<img src="https://media.prusaprinters.org/media/prints/128229/rich_content/f7691954-7ada-44ce-be7d-1ae5eba01dc2/image.png#%7B%22uuid%22%3A%22f12aed97-13ce-419b-b7fc-7b4f036343aa%22%2C%22w%22%3A888%2C%22h%22%3A918%7D"></li><li>Insert a 28mm piece of PTFE tube into the Rapido (red), and screw in the Orbiter (2x M3*10mm, blue): <img src="https://media.prusaprinters.org/media/prints/128229/rich_content/63d5f184-7230-42f4-b84c-53514be9536b/image.png#%7B%22uuid%22%3A%2234d1da1f-4a54-4013-9885-bb230ab2a129%22%2C%22w%22%3A707%2C%22h%22%3A978%7D"></li><li>Mount the 5015 fans (4x M4*18) and BLTouch (2x M3*10 + 2x M3 nuts) with the screws as shown. The M4 screws thread directly into the plastic: <img src="https://media.prusaprinters.org/media/prints/128229/rich_content/1796f4eb-5d9c-4957-bc5a-992d98902185/image.png#%7B%22uuid%22%3A%22e6b3e278-bea8-43e7-b404-85ac4a93a1ad%22%2C%22w%22%3A1148%2C%22h%22%3A917%7D"></li><li>Mount the Accelerometer (2x M3*6mm, red) and the 5015 fan ducts (4x M3*8mm, blue): <img src="https://media.prusaprinters.org/media/prints/128229/rich_content/189f4569-4e7e-472f-9685-6feb8900756b/image.png#%7B%22uuid%22%3A%225fecde8d-7333-4e27-b1c9-007a5b9de229%22%2C%22w%22%3A862%2C%22h%22%3A948%7D"></li></ul><p>Tighten your belt and all done!</p><p>General Settings:</p><p>BLTouch offset: ~3mm Z (calibrate exactly manually), -49mm X, 0mm Y</p><p>Pressure advance: 0.032, smooth time 0.04s (also need to calibrate exactly yourself)</p><p>Fan speed: 30% or so for most stuff, 50% if extra cooling is needed. 100% basically exclusively for speed benchies :)</p><p>Klipper things:</p><p>[bltouch]<br>samples: 2<br>speed: 8<br>lift_speed: 20<br>samples_tolerance: 0.015<br>sample_retract_dist: 1.6<br>samples_tolerance_retries: 4<br>pin_move_time: 0.65<br>stow_on_each_sample: False</p><p>[safe_z_home]<br>home_xy_position: 166,117.5<br>speed: 240.0<br>z_hop: 5<br>z_hop_speed: 20.0</p><p>[bed_mesh]<br>speed: 200<br>horizontal_move_z: 6.5<br>mesh_min: 10,15<br>mesh_max: 200,225<br>probe_count: 5,5</p><p>[input_shaper]<br>shaper_freq_x: 58.2<br>shaper_type_x: mzv</p><p> </p><p>*input shaper should also be calibrated manually, i'm giving my settings as a general guideline.</p><p>Final setup:<img src="https://media.prusaprinters.org/media/prints/128229/rich_content/31304209-7ecd-48f3-8deb-8feec3d242c6/whatsapp-image-2022-02-01-at-212332.jpeg#%7B%22uuid%22%3A%22816649cc-8443-4d95-a825-75b1d71cb745%22%2C%22w%22%3A1600%2C%22h%22%3A900%7D"></p><p>Happy printing!</p>
With this file you will be able to print Ender 3 Lightweight DD Overhaul & Linear Rail with your 3D printer. Click on the button and save the file on your computer to work, edit or customize your design. You can also find more 3D designs for printers on Ender 3 Lightweight DD Overhaul & Linear Rail.