Ender 3 Max V6 Upgrade
thingiverse
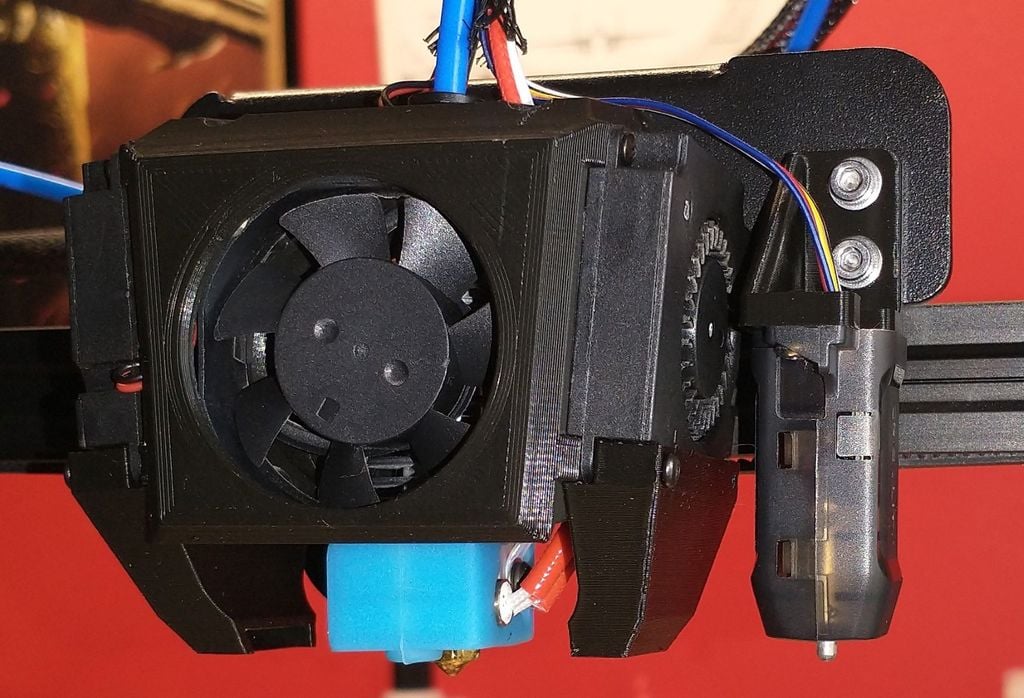
My goal for this project was "better than stock". I didn't make it direct drive because most cases lead to loss of build area and I didn't really want that or felt that it was necessary. I wanted to upgrade to a V6 because heat creep sucks to run into on a longer print. I didn't upgrade to a Klemco mount because it just barely places the nozzle too far forward to keep the full build area without running into potential binding issues on the Max. I also liked how the stock shroud looked so I wanted to keep clean aesthetics. The ducts weren't modeled with any CFD, I just put a small bowl of water underneath and went "yep, that's definitely better than it was". Some build notes: Nozzle to probe offset: (50,0,0) Home offset: (_,-6,0) (I left X blank because it will change between machines; my mount puts the V6 nozzle exactly 6mm in front of the stock location) For hardware you'll need an assortment of button heads but cap heads can be used in some places. Some specific lengths you'll need are: 2xM3x25 (holds the 4010 shroud to the main mount) 2xM2x14 & 6XM2x8 (holds the ducts and blower motors) I recommend printing the main mount first, the thickness where the two screws hold it at the stock location is designed to be a perfect fit on my machine but it may not work for others depending on quality control. You'll need washers behind the two screws that hold it there. You'll have to be careful about the exact placement of the belt tensioner because if you try to print edge-to-edge the bed can get just barely close enough to run into minor binding issues. I found you can just loosen two of the forward bolts and gently push/pull it down to the right spot.
With this file you will be able to print Ender 3 Max V6 Upgrade with your 3D printer. Click on the button and save the file on your computer to work, edit or customize your design. You can also find more 3D designs for printers on Ender 3 Max V6 Upgrade.