ENDER 3 Power Supply Relocation Bracket
thingiverse
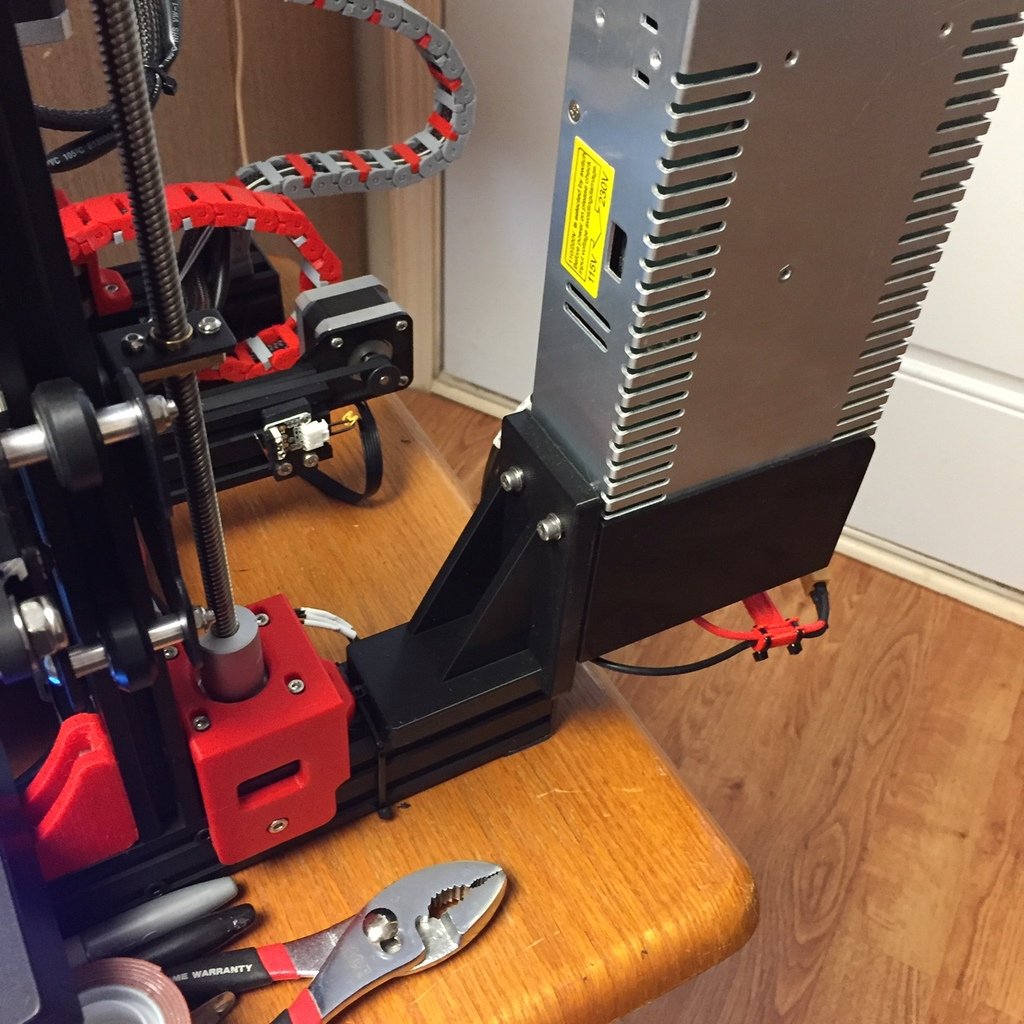
I am installing a second Z-Axis Lead Screw and motor, so I had to move the power suppy and did not want it flopping around on the bench. This bracket allows the power supply to be removed from the right vertical column of the machine and moved back far enough to mount the second Z-Stepper motor and leadscrew. The bracket slips into the bottom extrusion channels. The bracket slides all the way to the back of the channel. Remove the two screws that retain the power supply switch/plug cover, align those two holes with the holes on the bracket. Install 2 - 4mm flat washers on each of the original long 4mm socket head screws that held the PS to the vertical column. Screw these bolts through the bracket, through the plug cover and into the original holes. Tighten the screws and you are done. Make sure that your bed clears the power cord, mine was close, but OK. Bracket needs to slide all the way to the rear of the channel. The bracket that is illustrated in red is the final design, which is shorter than the black prototype in the first picture. I have included a STL file as well as a g-Code file. This was designed using TINKERCAD and sliced with CURA 3.6.0. Printed on my modified ENDER 3. Use the G-Code file with Caution and at your own risk.
With this file you will be able to print ENDER 3 Power Supply Relocation Bracket with your 3D printer. Click on the button and save the file on your computer to work, edit or customize your design. You can also find more 3D designs for printers on ENDER 3 Power Supply Relocation Bracket.