Ender 3 Pro Damper Spacers
thingiverse
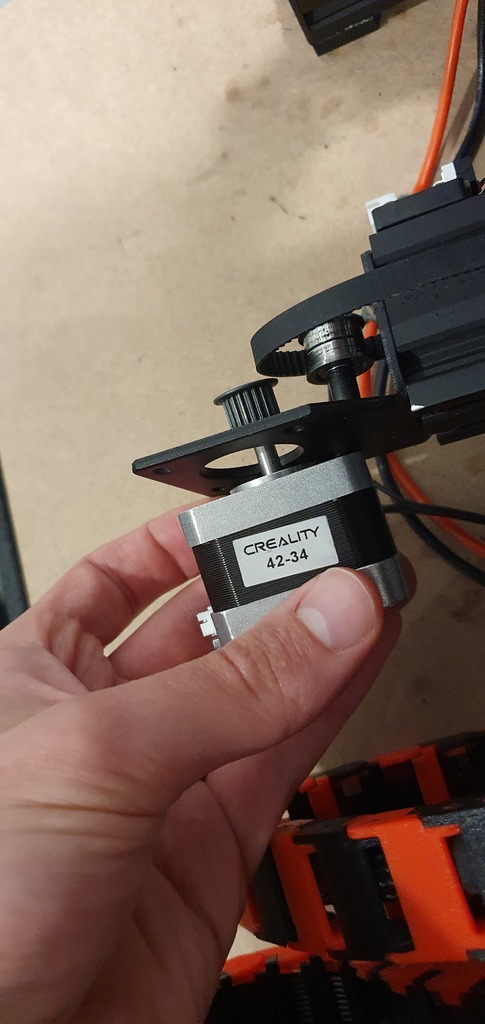
This is a remix of the damper spacer by matthijsp (https://www.thingiverse.com/thing:3245255), designed for the Ender 3 Pro. You only need to print the one file provided in this remix for the printer and you can re-use most of the original Ender 3 Pro hardware. __You will need the following additional hardware:__ 2x M3x25mm screws* 2x M3 nuts 2x M3 washers (optional) **Longer screws are possible, but you will need to space them using M3 nuts and/or washers (see my pictures)* 1. Switch off and electrically disconnect Ender 3 Pro 2. Disconnect X and Y axis stepper motors and limit switches 3. Remove screws holding X and Y axis stepper motors (take care not to drop them) __NOTE: Set aside all screws for reassembly__ 4. Attach stepper dampers as per image with the original M3x6mm screws __NOTE: Swap stepper dampers so that the X axis motor goes on the Y axis and vice versa__ 5. Attach X and Y axis dampers as shown, using the M3x25mm screws and nuts to secure the Y axis and the original fasteners to secure the X axis 6. Flash a new firmware with the Y axis inverted (Refer to this video: https://www.youtube.com/watch?v=IjzrNoFnbcI) 7. Remove the bed and Y axis carriage, flip it upside-down (so the wheels are on the other side) and then reattach the carriage __NOTE: The Y axis carriage is asymmetric. There is a cutout on one side so that it doesn't contact the stepper motor. Refer to the picture if you are unsure__ 8. Perform an eccentric nut adjustment on the Y axis and reattach the bed 8. Reconnect all stepper motors and limit switches 9. Reconnect the Ender 3 Pro and test that the steppers move in the correct direction
With this file you will be able to print Ender 3 Pro Damper Spacers with your 3D printer. Click on the button and save the file on your computer to work, edit or customize your design. You can also find more 3D designs for printers on Ender 3 Pro Damper Spacers.