Ender 3 Pro - IKEA Lack table enclosure - refined hinges, refined side panel system
thingiverse
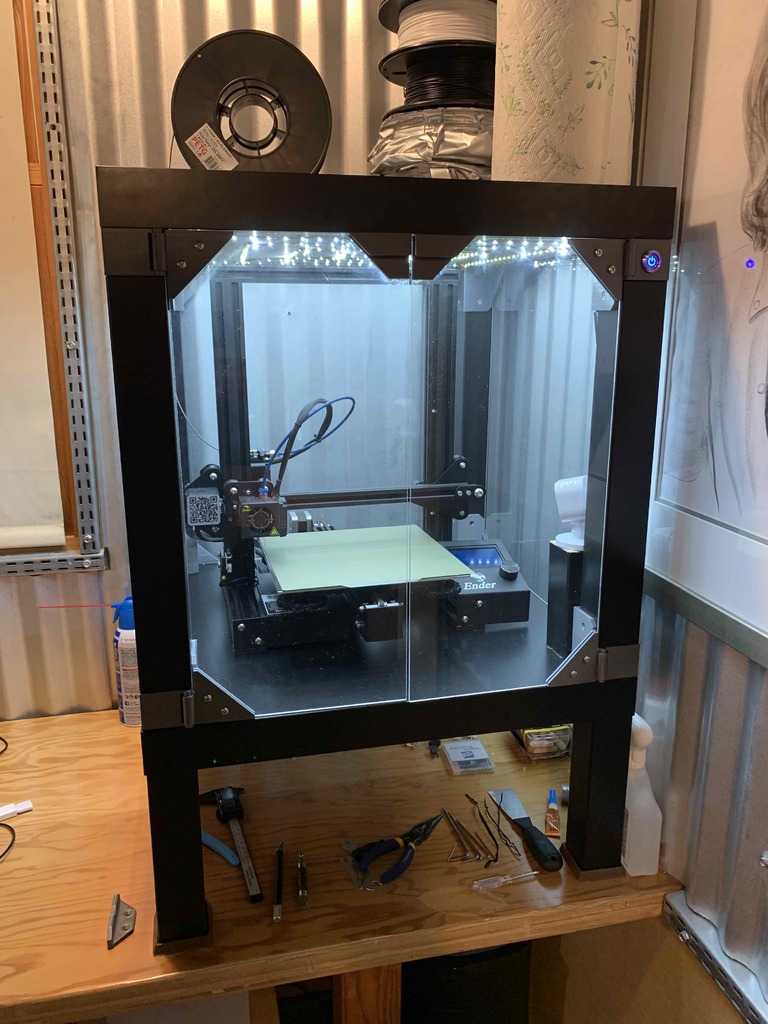
Lack enclosure. Below are the parts I modified and what I did: * Hinges - to enable fully-open doors, I offset the hinge and the piece it snaps onto. The doors open all the way. I added a thin bottom to the hinge, to line up the plexiglass better, and made them bigger and put screw holes in them - I prefer mechanical connections to glue. Because they're offset, you'll need to print 2 of each - the top right one is the same as the lower left one. Oh, and I inset the hinges so the plexiglass doors are simple rectangles. * Top corners with fixed plexiglass - I replaced the slot with a peg and because of it I had to make the triangle bigger. Then I drilled 1/2 inch holes in the plexiglass, so they can slide in and out easily, but I can still lift the whole upper assembly. They work well. * All corners - I modified the geometry slightly to simplify. I think this looks cleaner. I also made the area for the leg slightly bigger - I think the legs look cleaner fitting into the base. * All upper corners - I added a hole to accept standard dowel pegs to make a better connection to the leg. This is the weak point some people have brought up in comments. I then drilled a hole in the top of the leg to accommodate the peg. But I actually think the table is strong enough without it. * Top right corner - I added a button from Amazon(https://www.amazon.com/gp/product/B07JH9DKLQ) for $10. It works great. * Door Handles - I merged the 2 handle/magnet pieces for the door. This makes it easier to line up looks cleaner. I DID glue this part, though I'm not loving the glue... Note: I bought the magnets posted someplace here, but the manufacturer sent the wrong size and then said they can't control the size exactly. So I returned them and got these: https://www.ebay.com/itm/182793392856 * cable guide - I made this bigger so I could fit the power cable through it. I cut second lack table down for the legs. I was able to use one of the leftover leg parts for a camera stand inside the enclosure. Works well, actually. I colored the bottom edge of the legs with a sharpie - otherwise you see an edge of cork. Power extender cable: https://www.amazon.com/gp/product/B082X73J2J LED Lights: https://www.amazon.com/gp/product/B00MHLIFO8 The plexiglass pieces: 3x - 17.5" x 18.75" - sides and back 2x - 8.675" x 18.75" - doors I'm not sure how consistent the Lack tables are in different regions, though. You might want to print the corners, then double check that the openings are correct. I held the plex up to the printed corners and marked where to drill the holes with a sharpie. The hole are 1/2" and I used a plexiglass drill bit to cut them. You need to hold the plex to the top of the opening when you mark the holes - it slots in, then lowers to lock in place. This does leave a 1/8" gap at the top. It holds the heat in well, though. Printed on Ender 3 pro with PETG.
With this file you will be able to print Ender 3 Pro - IKEA Lack table enclosure - refined hinges, refined side panel system with your 3D printer. Click on the button and save the file on your computer to work, edit or customize your design. You can also find more 3D designs for printers on Ender 3 Pro - IKEA Lack table enclosure - refined hinges, refined side panel system.