Ender 3 Pro PSU Mount for Dual Z-axis
thingiverse
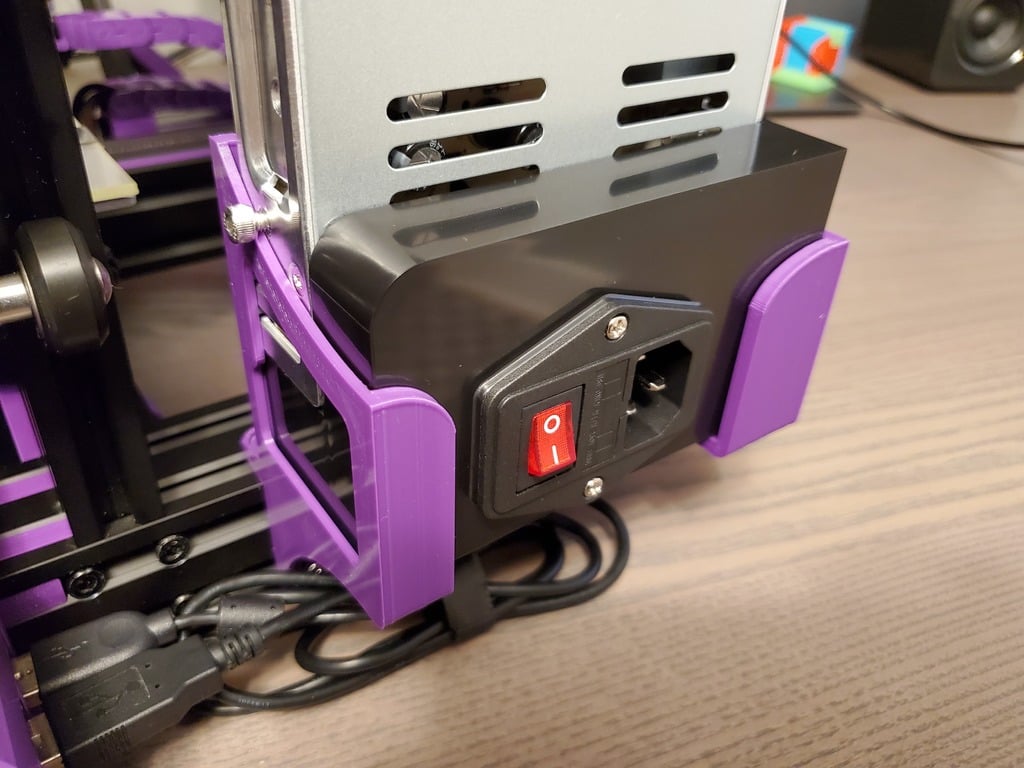
The Ender 3 is a great 3D printer, but the flex and sag in the X-axis gantry is a real weak point. A dual Z-axis kit really makes the printer much more reliable and convenient. I started with the TH3D dual Z-axis kit (1), and later adapted this kit to add a second Z-stepper motor. Both options require moving the PSU. I wanted to keep the PSU mounted to the frame to allow for a bigger case and larger cooling fan (2), which you can't do with most of the designs that put the PSU under/behind the printer. But I could not find any existing brackets that did exactly what I want. The CR83D bracket (3) is beautifully done, but it sits the PSU low enough that it interferes with the ethernet cable running to my Raspberry Pi LCD enclosure (4). The bracket Scuddy included with their dual Z-axis design (5) places the PSU in a nice raised position, but the bracket does not perfectly fit the Ender 3 Pro PSU. To get the best of both worlds, I simply smooshed the two designs together, added some screwholes to better secure the PSU, and it works really well for the TH3D kit. There is plenty of clearance for the second Z-screw, and the bracket is very, very stiff. To mount the brackets to the frame you will need 5 * M4 8-10 mm screws and t-nuts. You will also need to remove one of the M4 screws that attaches the PSU to the stock PSU mount. When later adding the second Z-stepper motor, my 'smooshed' designs don't give enough clearance. So, I switched back to just the CR83D version, but with the added screwholes. Switching back to wireless on the Pi made cabling acceptable. It works wonderfully with the Z-motor mount from AndiArbeit90 (6). Because of the way I threw this together really quickly in TinkerCAD, you might get a printing artifact on the surface near the screwholes; the X/Y/Z resolution of TinkerCAD is 0.01 mm, while the original files have features that measure to 0.005 mm. This is way less tolerance than you can achieve with an FDM printer, so it really isn't worth fixing. The only time you will notice is if your slicer rounds up and adds a whole layer on parts of the design that I added. So if you get weird surfaces on the screwhole variant, just change your initial layer height by ±0.01 mm, forcing your slicer to give every part of the design the same number of layers. Use an M4 8 mm screw to secure the PSU to the front bracket, and an M4 12 mm screw for the rear bracket. 1. <a href="https://www.th3dstudio.com/product/ender-3-dual-z-upgrade-kit/">Ender 3 and CR-20 Dual Z Upgrade Kit</a> 2. <a href="https://www.thingiverse.com/thing:3232346">Ender 3 - psu box for 80mm fan</a> 3. <a href="https://www.thingiverse.com/thing:3742126">PSU Bracket Ender 3 Pro</a> 4. <a href="https://www.thingiverse.com/thing:4096147">Ender 3 PRO LCD and Raspberry Pi Enclosure</a> 5. <a href="https://www.thingiverse.com/thing:3451260">Scuddy Dual Z Upgrade Kit for the Ender 3</a> 6. <a href="https://www.thingiverse.com/thing:3434253">Ender 3 Z-Axis Damper Mount</a> <b>NOTE: I am putting print instructions here, because Thingiverse does not properly parse paragraphs in the print settings section below.</b> This is a very easy print, but the geometry is prone to warping and lifting. When using Magigoo as an adherence aid on glass I did not need a brim or raft, but YMMV. These are structural parts, so print thick and heavy; I used 4 * 0.4 mm walls and 1.2 mm top and bottom layers with heavy infill. The rear bracket from Scuddy is designed to slide into the extrusion. This is a very tight fit, particularly if you print with thick walls. I used -0.1 mm horizontal expansion in my slicer to help it fit, and even then I still had to use some percussive maintenance to fully seat the rear bracket into the extrusion.
With this file you will be able to print Ender 3 Pro PSU Mount for Dual Z-axis with your 3D printer. Click on the button and save the file on your computer to work, edit or customize your design. You can also find more 3D designs for printers on Ender 3 Pro PSU Mount for Dual Z-axis.