Ender 3 Pro Pulley Press for Dampers
thingiverse
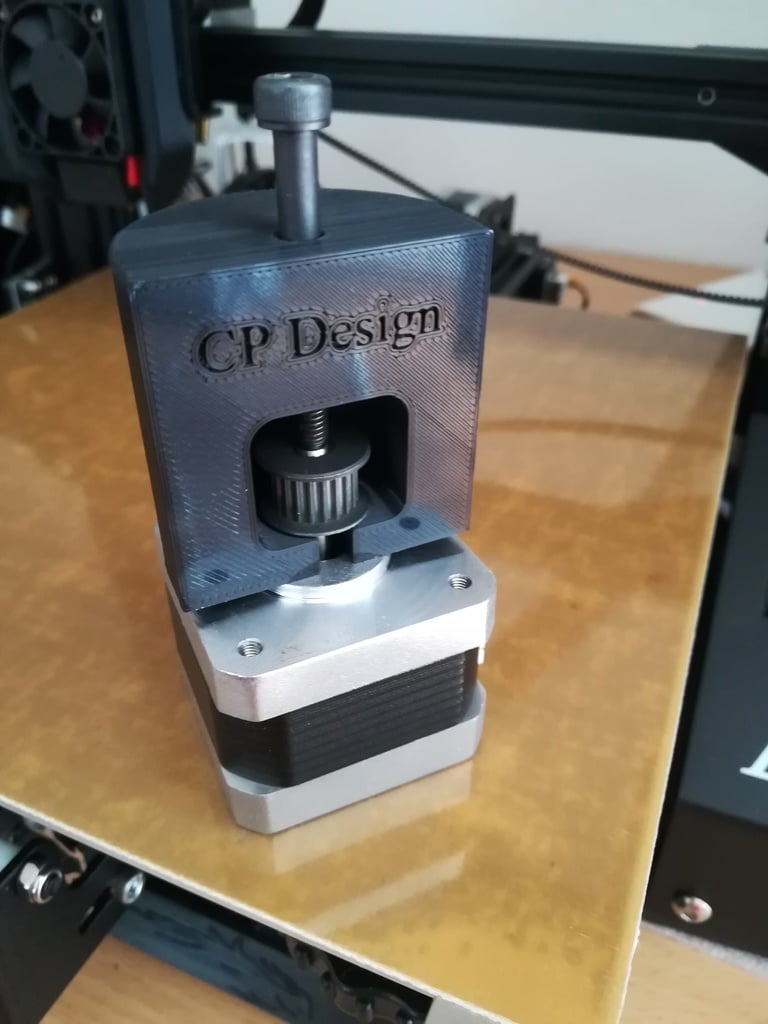
Hey guys, (18.07.2019) important information: after installing the dampers you must check the movement of the y-axis, because of risk of collision of the height adjustment of the plate with the stepper motor. In my case, I had a collision and therefore, I unscrewed the screws that connect the stepper motor with the printer, and pushed it further away from the knob for the height adjustment of the bed. Afterwards, I had no collision anymore. Have fun printing. - - - - - - - - - - - - - - - - - - - - - - - Hey guys, for the ender 3 pro the pulleys are nowadays unfortunately pressed onto the shafts of the steppers. Therefore, I designed a Pulley press, that can be used for x- and the y-Stepper. You put the stepper into the press and with a M5x40 and a M5 nut you can press it out. The pulley is only one-sided pressed onto the shaft. After 5 mm the pulley will drop down. Than you turn the pulley around and press it (using a press, or as I did, using a hammer) too the desired lenght. The best though would be to order GT2 pulleys with screw connections, and use these instead. The distance between Pulley and Press was in my case 6 mm for the x- Stepper and 10 mm for the y-Stepper. Therefore, the design is now made with 6 mm, so that you can use it for both and do not need two prints. If you have a smaller distance, you are welcome to contact me. In case of the press fitting of the pulley I recommend at least 80 % infill. I am new hear and would be very happy to see your makes and get your likes.
With this file you will be able to print Ender 3 Pro Pulley Press for Dampers with your 3D printer. Click on the button and save the file on your computer to work, edit or customize your design. You can also find more 3D designs for printers on Ender 3 Pro Pulley Press for Dampers.