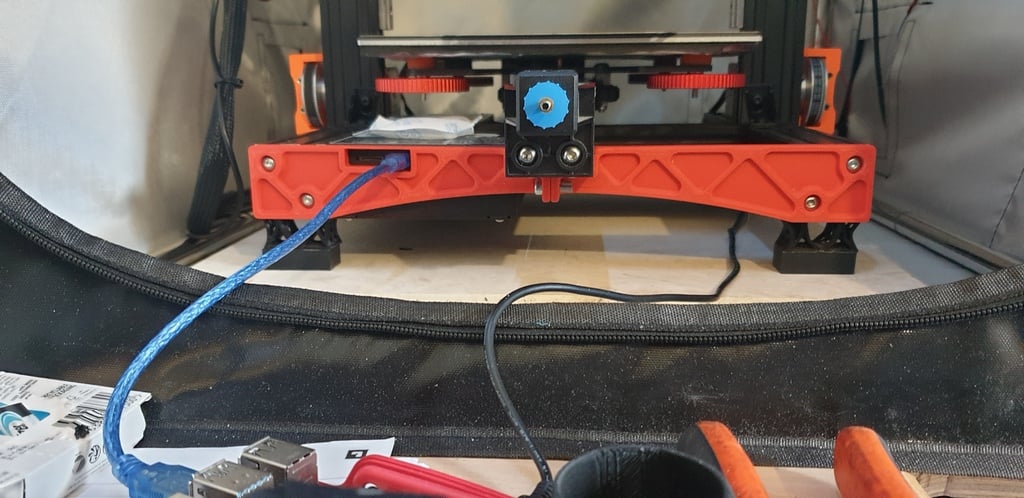
Ender 3 (pro / V2) Y brace (UPDATED)
thingiverse
UPDATED! After having my Ender 3 V2 for over 2 years now i ended up getting into Klipper as my firmware of choice. this led to me being able to print at forever faster speeds and far more than i thought would be possible. But it did highlight some area's to be improved upon. This is my own take on the basic Y axis bracing. it uses the original mounting points on the front legs and requites minimal fixings to install. the design is broken down into two files to make it printable on the bed on an ender 3. EDIT I have updated the design after some great feedback and added a V2 veriant for people who use the SD slot. The new opening should give much better access to it and the USB point. i have also moved the fixing points as proposed to make it easier to construct. fixings needed for the original are... 4 x M5 x 12mm button head bolts (for the base/leg frame) 2 x M4 x 8mm socket head bolts (to join the 2 halves together) 2 x M4 x 5mm heat set nuts (inserts into the right part) 2 x M5 x 10mm button head bolts (for the Y axis frame) 4 x M5 slide nuts (for the Y axis frame) use the original 2 x M5 x 10mm button head bolts from the left base / leg for the Y axis fixings. fixings needed for V2 are... 4 x M5 x 12mm button head bolts (for the base/leg frame) 1 x M4 x 8mm socket head bolts (to join the 2 halves together) 1 x M4 x 5mm heat set nuts (inserts into the right part) 2 x M5 x 10mm button head bolts (for the bottom of the Y axis frame) 4 x M5 x 8mm button head bolts (for the side of the Y axis frame) 6 x M5 slide nuts (for the Y axis frame) you will need to tap (M5) the right leg / base extrusion to accept the M5 x 12mm button head as this is not done from factory. if you wish, you may not need all of the fixing points for the Y axis but i will leave that to your discretion. print settings are what ever you deem necessary but i use the Voron print settings as i print in an enclosure and a lot of ABS. so it gets quite warm in there. (50 deg C) my recommendations.... 4 perimeter 5 top / bottom 40% infill. thank you for looking at my mod and Happy printing!
With this file you will be able to print Ender 3 (pro / V2) Y brace (UPDATED) with your 3D printer. Click on the button and save the file on your computer to work, edit or customize your design. You can also find more 3D designs for printers on Ender 3 (pro / V2) Y brace (UPDATED).
