Ender 3/Pro/V2 Z axis anti wobble nut - Direct Drive
thingiverse
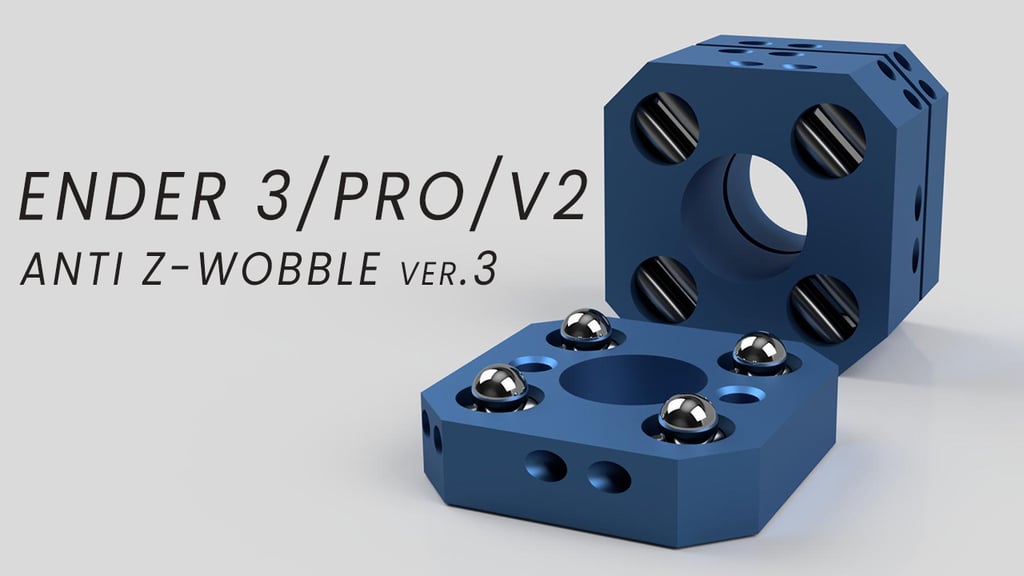
# Anti z-wobble squares ## 04.01.2022 Update I have made minor changes in the design and updated the files :) ### Metal Pins Here you can find updated version of anti z-wobble. (probably last version :) and only for direct drive) This design uses 32 additional metal pins (fi 2mm, length 8mm) on which steel balls are placed. Number of steel ball per layer was also doubled (4 per layer) to create full working plane. Additional parts: - M3 8mm screws - 4x - 6x3mm magnets - 12x - 4mm steel balls (I took mine from 628 bearing) - 8x - Metal pins - Length: 8mm, fi: 2mm - 32x, I have used cylindrical studs from BOSSARD: 1255622 BOSSARD Ø: 2mm; L: 8mm Assembly: 1. For Bottom and Top part insert all metal pins, and align them correctly. You can use thin allan key to pushed them all the way into small holes on the other side. 2. For middle Part place all metal pins on one side. 3. In the middle part, place all magnets in the same direction. 4. Close the magnets from the other side with metal pins. 5. Insert all left magnets in Top and Bottom part in the way that they will be attracted correctly with middle part. All magents needs to attract each other 6. Mount device on Ender and enjoy :) Assembly video can be found here: https://www.youtube.com/watch?v=_5dofevaiAw&ab_channel=Tekti3D
With this file you will be able to print Ender 3/Pro/V2 Z axis anti wobble nut - Direct Drive with your 3D printer. Click on the button and save the file on your computer to work, edit or customize your design. You can also find more 3D designs for printers on Ender 3/Pro/V2 Z axis anti wobble nut - Direct Drive.