Ender 3 S1 & Ender 3 S1 Pro high performance 5015 fan part cooling duct (based on Hero Me Gen7)
thingiverse
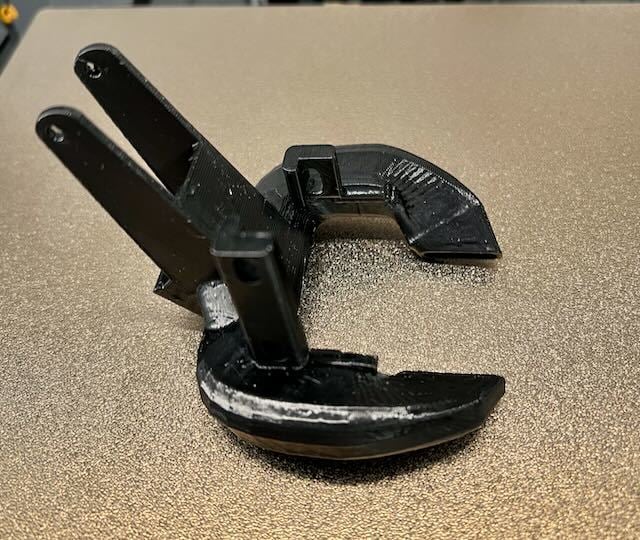
An optimised part cooling duct for a Creality S1/Pro/Plus using the Creality Sprite extruder to maximise airflow and reduce back pressure on the 5015 fan. It is a remix of the hero me gen 7 single 5015 fan duct to make it fit for a Creality Ender S1 & S1 Pro. Most other Ender 3 S1 & Pro ducts are routing them to the right side of the CR touch module; however that results in a narrow air channel reducing air velocity and increasing back pressure to the fan. That means a reduced print speed is achievable due to the material not being cooled down quickly enough. By relocating the CR touch to the rear of the extruder much larger fan ducts can be used to maximise airflow to the nozzle, reduce backpressure to the fan and reduce noise. To use this duct you will also need to print a CR touch zero offset kit and follow the instructions to set your new probing location and mesh. For example: https://cults3d.com/en/3d-model/tool/creality-ender-3-s1-pro-cr-touch-no-y-offset https://www.printables.com/model/257460-ender-3-s1-zero-offset-cr-touch-mount This fan duct is a must if you are planning on using klipper with the S1/Pro/Plus to enable improved part cooling and achieve higher print speeds without the part deforming due to excessive heat. Also if you are looking for a quieter setup with the stock speeds & configuration. Print Settings: Orient it with the Hero-Me logo facing down Print with supports on built plate only. Use 4-5 perimeter lines to increase object strength Print with 30% infill and 0.2 layer height Material Needed: One 5015 fan (i use Delta 5015 BFB0524HH for its high performance) 3x M3x8 bolts and 3 washers (to evenly distribute the screw pressure on the mounting slots) 1x M3x20 bolt for the fan. No washer or nut is required as the bolt threads into the fan mounting bracket but if you want to secure the fan more tightly use a slightly longer screw and a nut. 1x 1.25 mm JST 2 Pin Micro Electrical Female Connector Plug and Wire to connect the fan to the board. The Creality extruder board has the fan polarity inverted so make sure you solder the red fan wire to the black cable on your JST connector and the black fan wire to the red cable on the JST connector. Some heatshrink φ2.0 in diameter to insulate the fan cables. Suggested print material: As the fan outlets are close to the nozzle it is highly recommended to print using PETG or ASA/ABS or similar high temperature filaments. PLA would work for a trial fit but not for a long term setup due to the risk of deforming the duct due to the nozzle heat.
With this file you will be able to print Ender 3 S1 & Ender 3 S1 Pro high performance 5015 fan part cooling duct (based on Hero Me Gen7) with your 3D printer. Click on the button and save the file on your computer to work, edit or customize your design. You can also find more 3D designs for printers on Ender 3 S1 & Ender 3 S1 Pro high performance 5015 fan part cooling duct (based on Hero Me Gen7).